
A small digital icon becomes a usable cross stitch pattern when its pixels have clear jobs: one filled square is one full cross, one palette entry is one thread color, and an empty square remains fabric. This worked tutorial uses two original 25 by 25 designs, a kite and a sailboat. You can stitch the supplied charts or open their editable projects to practise changes. Exact previews and free symbol PDFs are below the article. The four square photographs are illustrative; count from the charts, not the photographs. These designs have been checked digitally, without physical stitch testing.
Choose a small icon with a readable silhouette
For a first digital design, choose an object that can still be recognized when most details disappear. The kite needs a diamond and a short tail. The sailboat needs two triangles and a tapering hull. Neither requires shading, outlines or tiny lettering. This restriction makes it easier to see whether a changed pixel improves the shape or simply adds another stitch. It also keeps the sewing decisions visible when you move from screen to cloth.
Think about the finished use before drawing. A small framed pair or two card inserts gives these icons enough space without enlarging the charts unnecessarily. The general chart-design guide explains the planning stage. Here, the emphasis is on rebuilding and checking specific rows. Avoid tracing somebody else's chart or importing a familiar copyrighted character merely because it is already pixelated. Start with your own simple shapes and keep the original version before experimenting with alternatives.
Keep pixel dimensions separate from display size
Each supplied design has 25 columns and 25 rows, so its editable data contains 625 positions. That does not mean 625 stitches: the kite uses 48 filled cells and the sailboat 102. The rest are intentionally empty. Enlarging a picture on screen makes the cells easier to inspect but should not add new cells to the underlying design. Changing the canvas dimensions is a different operation and needs a fresh check.
On 14-count Aida, the full 25-square grid measures about 1.79 inches, or 4.54 centimetres, on each side. It measures approximately 3.97 centimetres on 16-count and 3.53 on 18-count. Include the blank chart area when planning placement, then add mounting fabric outside it. The PDFs give a practice cut with three-inch margins per edge. Use the fabric calculator for other allowances. A larger printed chart helps your eyes; it does not change these fabric measurements.
Open the project before changing its cells
The free pixel art tool accepts an editable project through its Open project control. The two project files linked near the end contain the exact palette, dimensions and cell assignments used for these PDFs. Download a file, open the tool and load that file. Confirm that the display shows 25 by 25 and the expected number of filled cells before making a change. Keep the original download somewhere separate from your edited copy.
For a new blank drawing, set both dimensions before painting. In this tool, changing a dimension resets the canvas; it is not a safe way to enlarge an existing motif. Choose a palette color and click the intended cells. On a computer, right-click erases a cell; Undo reverses the last recorded action. Save an editable project regularly. A PNG is useful for looking at a design, but the project file is the reliable way to resume its individual cells and palette.
Use two purposeful colors and leave fabric empty
Both charts use blue A and coral B as generic planning colors. They are not manufacturer thread numbers. Choose real cotton that is visibly different against your own fabric and test coverage before committing to a finished piece. Two working strands on 14-count Aida are a sensible starting sample, not a promise of identical coverage from every brand. Keep a material note beside your saved project, because a screen color does not identify the skein in your basket.
Do not paint all the unused cells white to imitate the background. White is a thread color when assigned to a cell; an empty cell is exposed fabric. The project data keeps that distinction explicitly. If you want a white stitched background, it becomes a different, much fuller project with different counts and thread needs. The guide to chart grids and symbols explains why the exported legend must follow the final cell assignments rather than the colors of a styling image.
Rebuild the kite body one row at a time
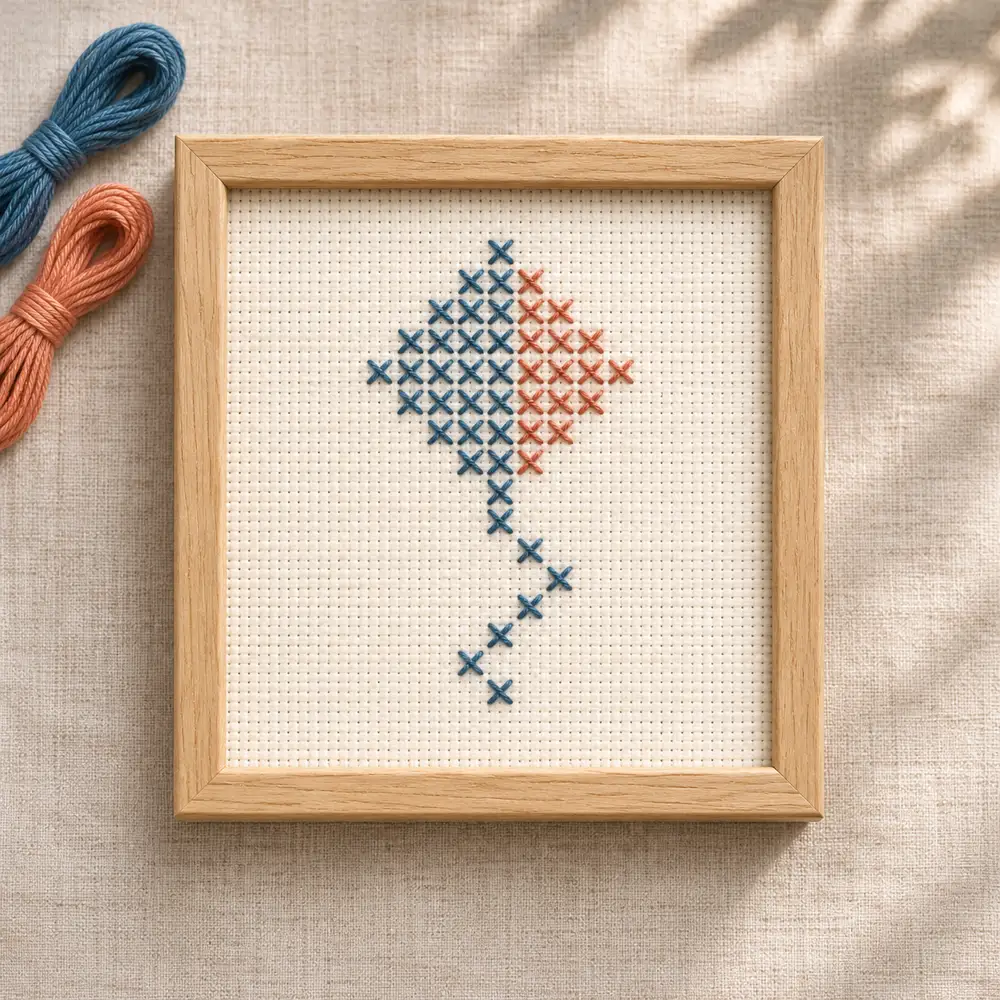
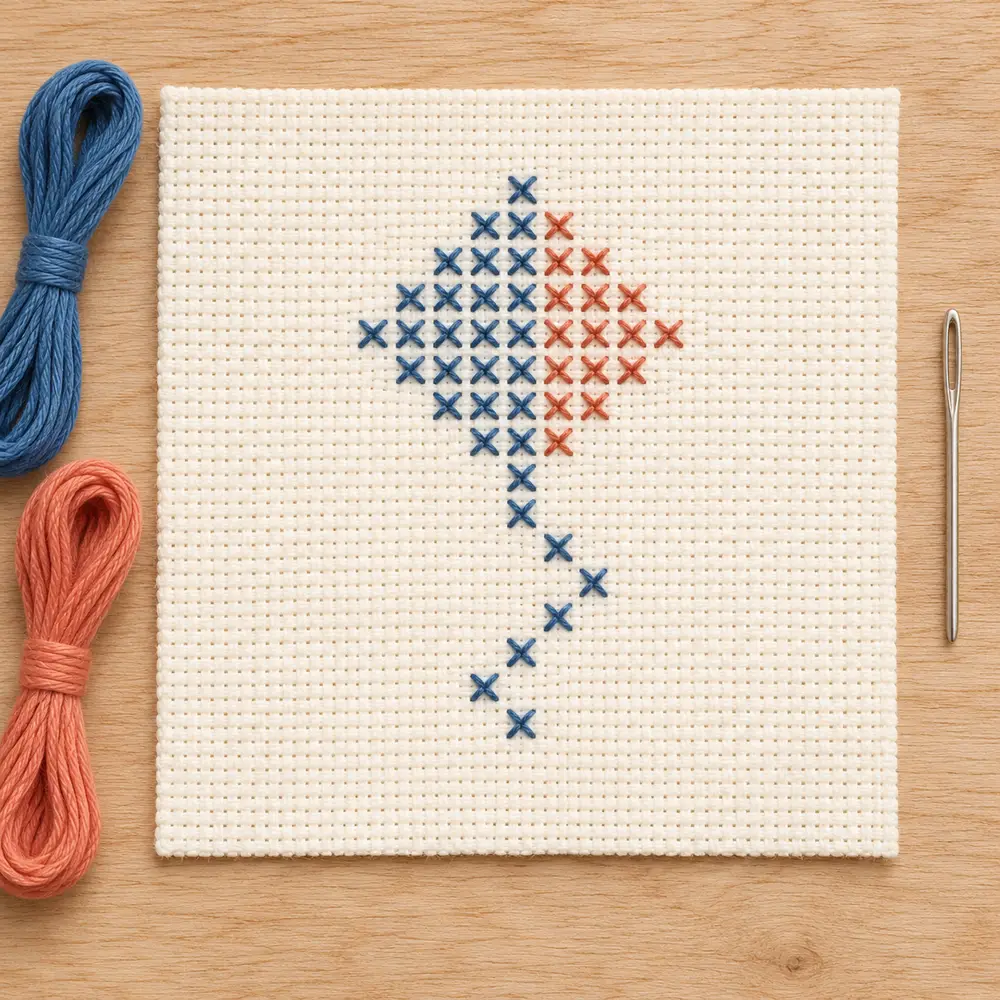
The kite's diamond occupies rows 5 through 13. Its filled row lengths are 1, 3, 5, 7, 9, 7, 5, 3 and 1, always centered on column 13. Columns up to and including 13 are blue; filled cells to the right are coral. Thus the central column belongs to the blue half. This gives the diamond 25 blue crosses and 16 coral crosses. The odd width creates a clear central column rather than a gap between two halves.
Add the seven blue tail cells at column and row pairs 13/14, 14/15, 15/16, 14/17, 13/18, 12/19 and 13/20. Coordinates start at one in the upper-left corner; columns move right and rows downward. The finished kite totals 32 blue and 16 coral crosses, or 48 altogether. The tail is a sequence of full crosses, not a backstitch line. If you straighten it while editing, save that as a new version and recount the blue cells.
Build the sailboat from three counted parts
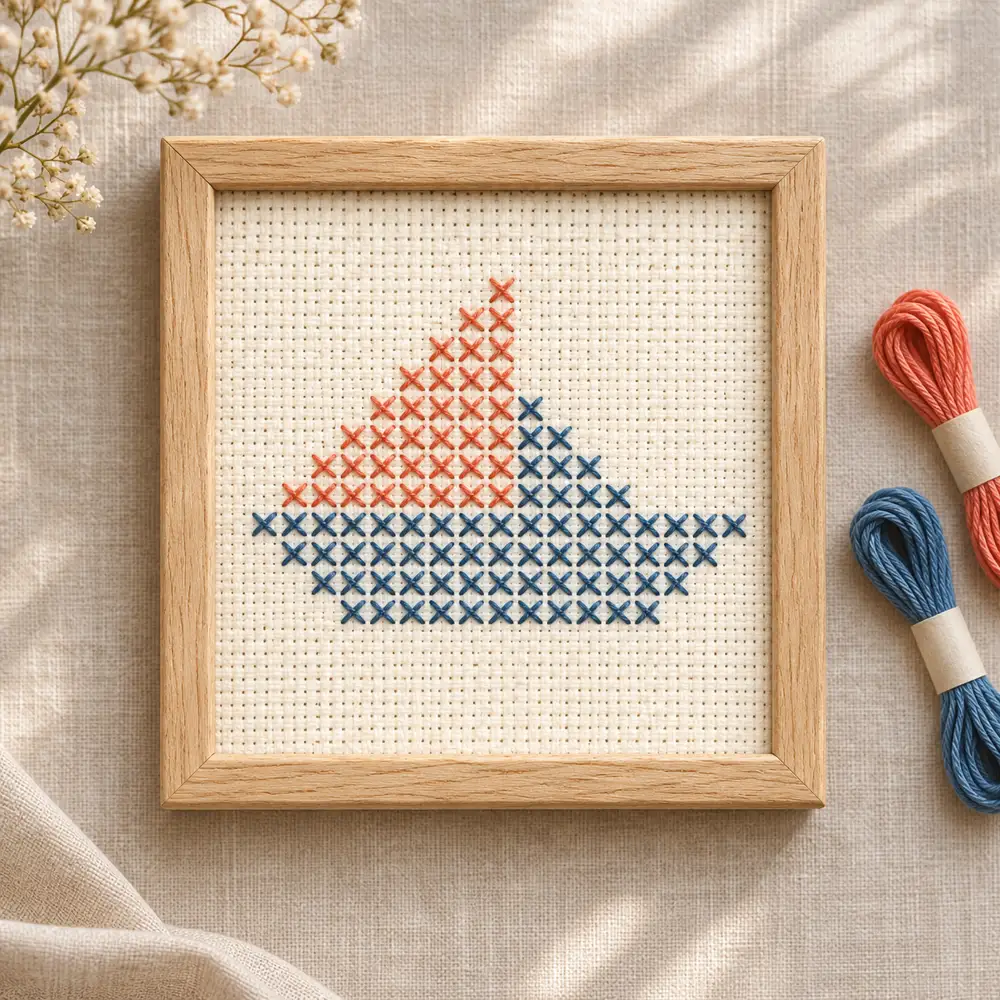
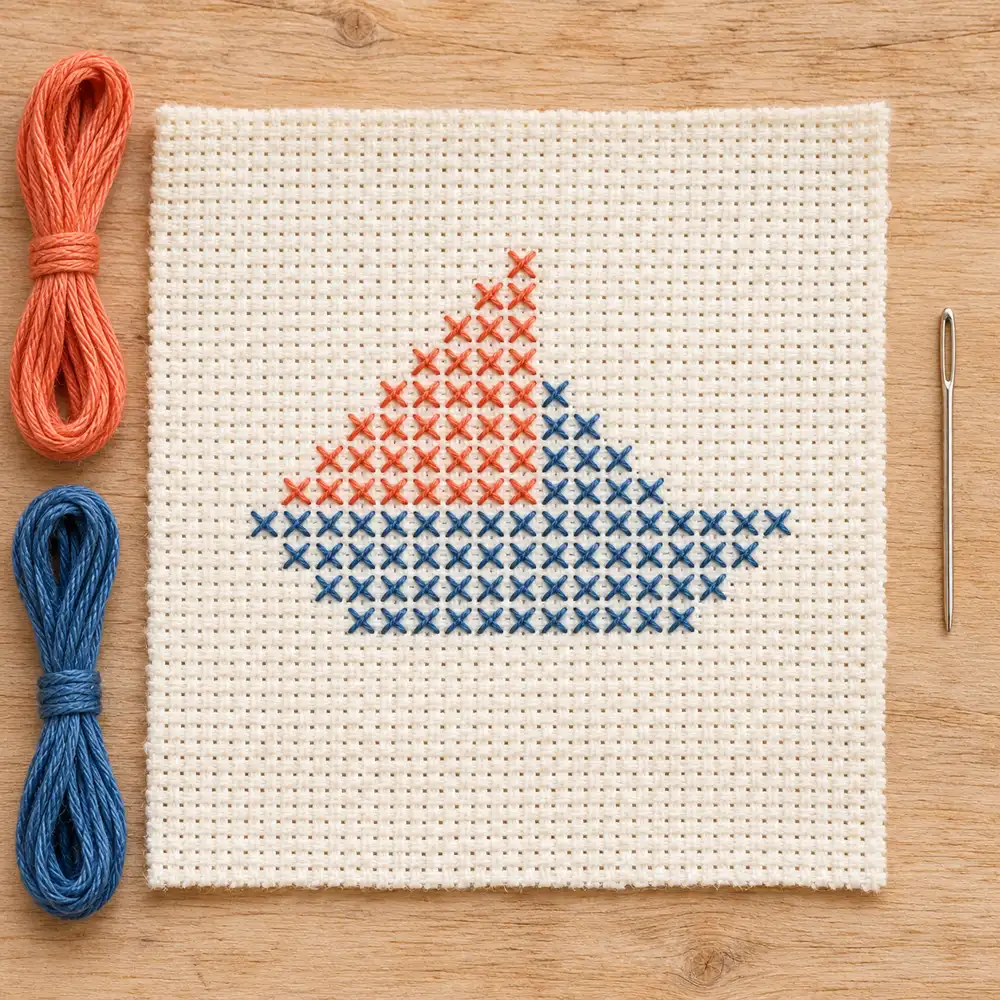
Start the large coral sail at column 13, row 7. For each following row through row 14, extend its left edge by one cell while keeping its right edge at column 13. The row lengths become 1 through 8, totaling 36 coral crosses. The smaller blue sail starts at column 14, row 11 and grows toward the right, ending at column 17 on row 14. Its four rows contain 1, 2, 3 and 4 crosses, totaling ten.
The blue hull begins on row 15, from column 5 through column 21: seventeen crosses. Rows 16, 17 and 18 contain fifteen, thirteen and eleven crosses, each centered on column 13. The hull therefore adds 56 blue crosses. With the small sail, blue totals 66; adding the 36 coral crosses produces 102. This is a stylized two-sail icon with no separate mast or backstitch. Do not fill the empty area around the sails merely to connect every sloping edge into a solid block.
Check diagonals without smoothing away the grid
Pixel diagonals are made of deliberate steps. On the large sail, the left edge moves one column for every row. On the kite, both edges widen and then narrow around the center. Look at those step rhythms at a comfortable zoom, then inspect the whole icon at a smaller view. A single added cell can create a visible bump even when it hardly changes the stitch total. Shape and quantity need separate checks.
Avoid soft brushes, blurred edges and automatic smoothing when preparing a small counted icon in another drawing program. Those operations can introduce intermediate colors without adding useful meaning. If you resize a raster reference, inspect every resulting cell instead of assuming the new image preserves the original chart. For these supplied projects, loading the JSON avoids image resampling altogether. The image size and color guide covers the broader compromises involved when a photograph, rather than a simple icon, is the starting point.
Make one edit and record what it changes
Try a limited exercise before redesigning the entire picture. You might change the kite's two colors while retaining its cells, or shorten the sailboat hull by removing one complete bottom row. A color substitution preserves the stitch total; deleting the eleven-cell bottom hull row reduces the boat from 102 to 91 crosses. The blue count becomes 55, while coral remains 36. Keep that arithmetic with the edited file so it is clear which version you intend to stitch.
Do not assume that every attractive screen edit is easy to sew. An isolated cell in a third color creates another thread decision and potentially a separate start and finish. A thin gap can disappear visually on fabric even though it remains clear on a bright monitor. Work on a duplicate, name the change and compare the whole silhouette. If the result is less readable, reopen the unchanged project. Keeping a simple design is a deliberate choice, not a failure to use every available color.
Plan the stitching route from the actual chart
For the kite, work the blue diamond and tail with careful counting, then add the coral section. Keep the top diagonal of each full cross pointing the same way. Count from a nearby completed row rather than guessing where the tail changes direction. For the boat, you can complete the large coral triangle, check its eight-row progression, then work the small blue sail and the hull. Avoid pulling the joining edge so tightly that the two colors distort the cloth.
Use a suitable blunt tapestry needle for the cotton crosses and anchor thread ends securely under nearby stitches on the back. Long carries across untouched fabric may show through or snag; end and restart when appropriate. Before switching colors, compare both the row length and its starting column. The beginner cross stitch tutorial covers basic handling, and the print-and-read guide helps you follow symbols when two printed colors look similar.
Choose a finish after checking the usable margins
The visible icons occupy less space than the complete 25-square grid. Avoid cutting tightly around the last occupied stitch just because the drawing looks small. You still need cloth for holding, trimming and mounting. For a paired display, decide whether the full grids or the visible shapes should share the same visual center. The kite is taller, while the boat is wider; identical outer squares do not guarantee that both objects appear the same size.
Place a paper window over the fabric before cutting a card aperture or choosing a frame. Check that no tail cell or hull corner disappears behind it. The fabric-margin guide explains how to separate design space from mounting allowance. The removable gift-tag article offers another finishing approach for suitable small thread-only designs. Test any cleaning or pressing according to your chosen materials, and keep the fabric square so an intentional pixel diagonal does not become a distorted diagonal.
Save an editable copy and inspect the printable output
Download the [kite project](/downloads/practice-sampler/pixel-kite-motif-project.json) or [sailboat project](/downloads/practice-sampler/pixel-sailboat-motif-project.json) to explore the cells in the pixel tool. Save project retains editable data. Download PNG provides a visual copy, and Chart SVG provides a symbol view of your current drawing. The free PDFs below are the checked originals; they will not automatically change when you edit a project in your browser. Keep your original and modified files clearly named.
These files support hand-counted cross stitch. They do not supply an embroidery machine's stitch instructions, and renaming a PDF or PNG does not create such instructions. Before printing the supplied PDF, inspect its title, 25 by 25 dimensions, A/B key and counts. Check a few coordinates in both the exact preview and the symbol chart. Our digital validation compares every occupied cell, symbol, color total and dimension. It does not establish the appearance or durability of a physically stitched sample; no physical stitch test has been performed.
If a project link opens the data in your browser, save that page as a .json file before using Open project.
Questions about the editable kite and sailboat patterns
Are the two original PDFs free? Yes, these public charts are separate from optional paid custom-photo PDFs. Do I need the editor to use them? No, you can print the supplied chart and stitch directly. Does a blank square mean white thread? No; it means unstitched fabric in these patterns. Why does the kite have fewer stitches than the boat despite matching dimensions? Dimensions count the whole grid, while stitch totals count only occupied cells.
Can I use a different fabric count? Yes, recalculate the finished size and margins, and test the chosen thread coverage. Can I stitch from an ImageGen photograph? Use the exact chart instead; the photographs illustrate presentation. Will an edited project update the original PDF link? No. Export and review your own edited version separately. For another small project after this exercise, browse the free pattern library and compare its grid dimensions and color key before preparing your next piece of fabric.
Exact charts and free PDF downloads
Two-Color Pixel Kite
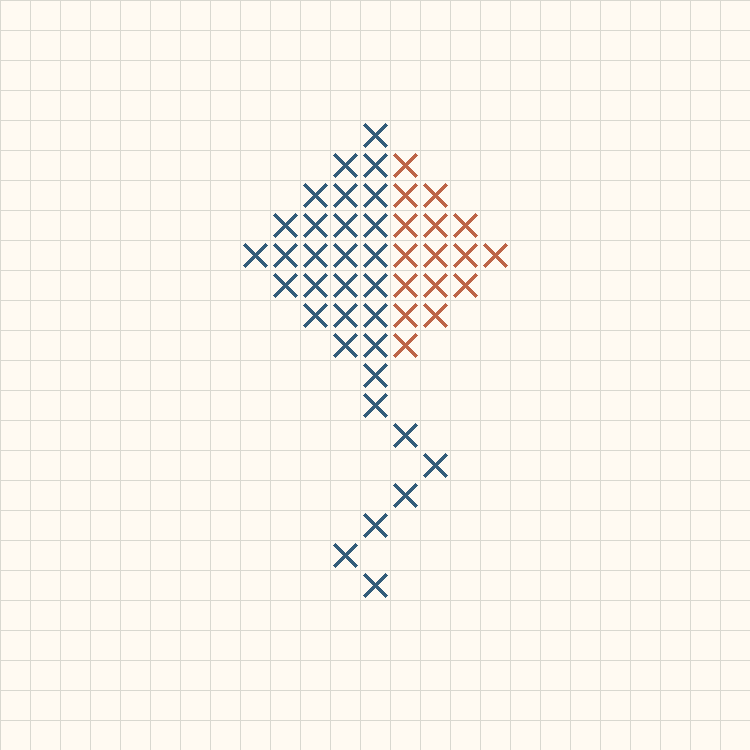
25 × 25 · 48 full crosses
Two-Color Pixel Sailboat
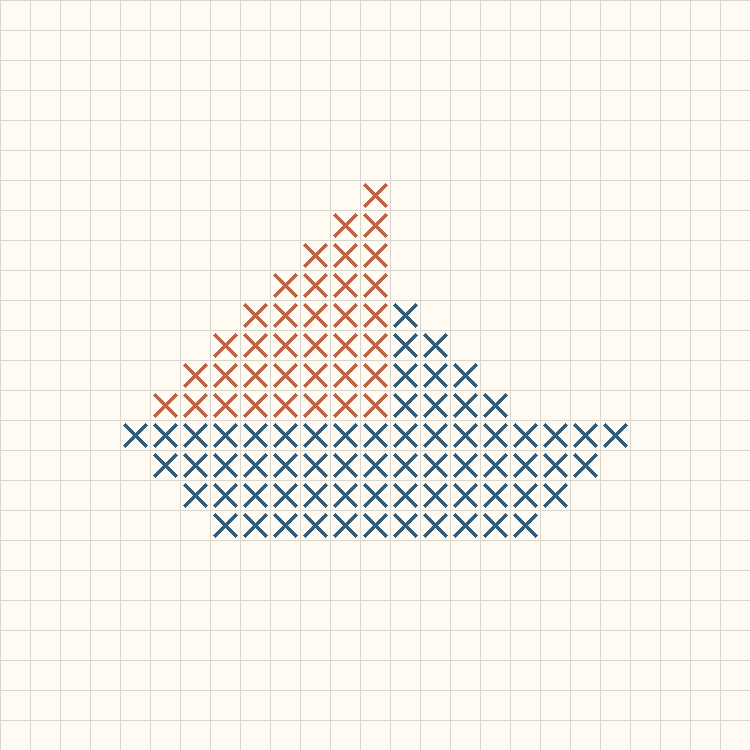
25 × 25 · 102 full crosses
Blank cross stitch grid maker · Download the original pixel kite motif pattern
Examples, diagrams and planning estimates are original Cross Stitch Creator content.