
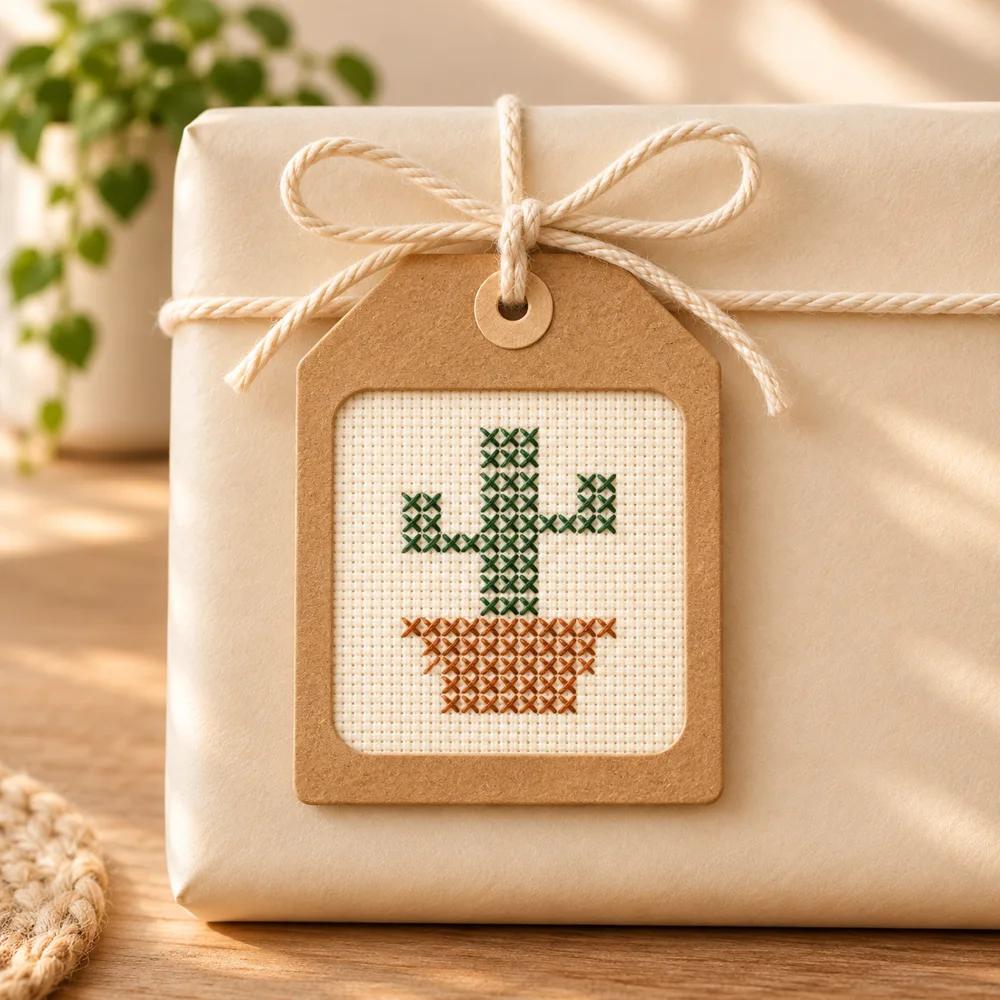
A stitched gift tag can become a small keepsake rather than a piece of packaging that is thrown away. The useful design decision is to keep the fabric removable: a card window supports the embroidery, while separate cord attaches the tag to the parcel. This guide includes two original counted motifs, a potted cactus and a thread spool, with exact previews and free symbol PDFs at the bottom. Both use whole crosses and two colors. The square photographs are illustrative presentation ideas; follow the counted files for stitch placement.
Choose a tag that suits the gift and the recipient
The cactus works as a small plant-themed accent for a housewarming parcel or a gift for someone who enjoys gardening. The spool suits a sewing gift, fabric bundle or handmade present. These are suggestions rather than fixed occasions. A recipient who likes blue may prefer the spool even if the parcel contains something unrelated to sewing. Choose a motif because its shape and colors fit the person, not because every present needs a matching picture.
Decide whether the recipient should be able to remove the fabric and frame it later. That choice changes the mounting method. A glued insert is quick, but a loosely laced card sandwich can be taken apart. Keep any greeting on the backing card instead of adding unplanned letters to the chart. If you want a separate lettering project, the cross stitch alphabet guide explains the planning involved; do not squeeze a name into the finishing margin of these small motifs.
Read the full chart before cutting the fabric
Both charts measure 21 columns by 25 rows. A colored square with a letter represents one complete cross, and a blank square stays unstitched. The grid includes breathing room around the actual motif. That empty area helps you count and position the design, but it is not automatically enough fabric for folding or attaching the insert. The downloadable chart and the exact preview represent the same occupied cells.
The cactus has 92 crosses: 49 green and 43 terracotta. The spool has 121: 77 blue and 44 warm brown. There are no fractional stitches, backstitch lines or hidden extra outlines. Read the legend before starting and identify the top of the page so that the pot or spool is not rotated accidentally. If you are new to symbols, use the chart-reading guide alongside the PDF. Photographs can suggest scale and styling, but their thread texture is not a reliable counting reference.
Separate the stitched size from the tag size
On 14-count Aida, the complete 21 by 25 grid is 1.50 by 1.79 inches, about 3.81 by 4.54 centimetres. On 16-count it is about 1.31 by 1.56 inches, or 3.33 by 3.97 centimetres. On 18-count it is about 1.17 by 1.39 inches, or 2.96 by 3.53 centimetres. These measurements describe the full chart area, not a finished paper tag.
As a starting paper mock-up, try a 3 by 4 inch card with a 1.75 by 2 inch opening for the 14-count version. Check the actual embroidery behind that opening before cutting the final card. The PDF's generous practice-cloth example adds three inches on every side, making a 7.50 by 7.79 inch working piece on 14-count. You can trim it later once the mount is settled. Use the fabric calculator if your cloth count or working allowance differs.
Gather materials for stitching and a reversible mount
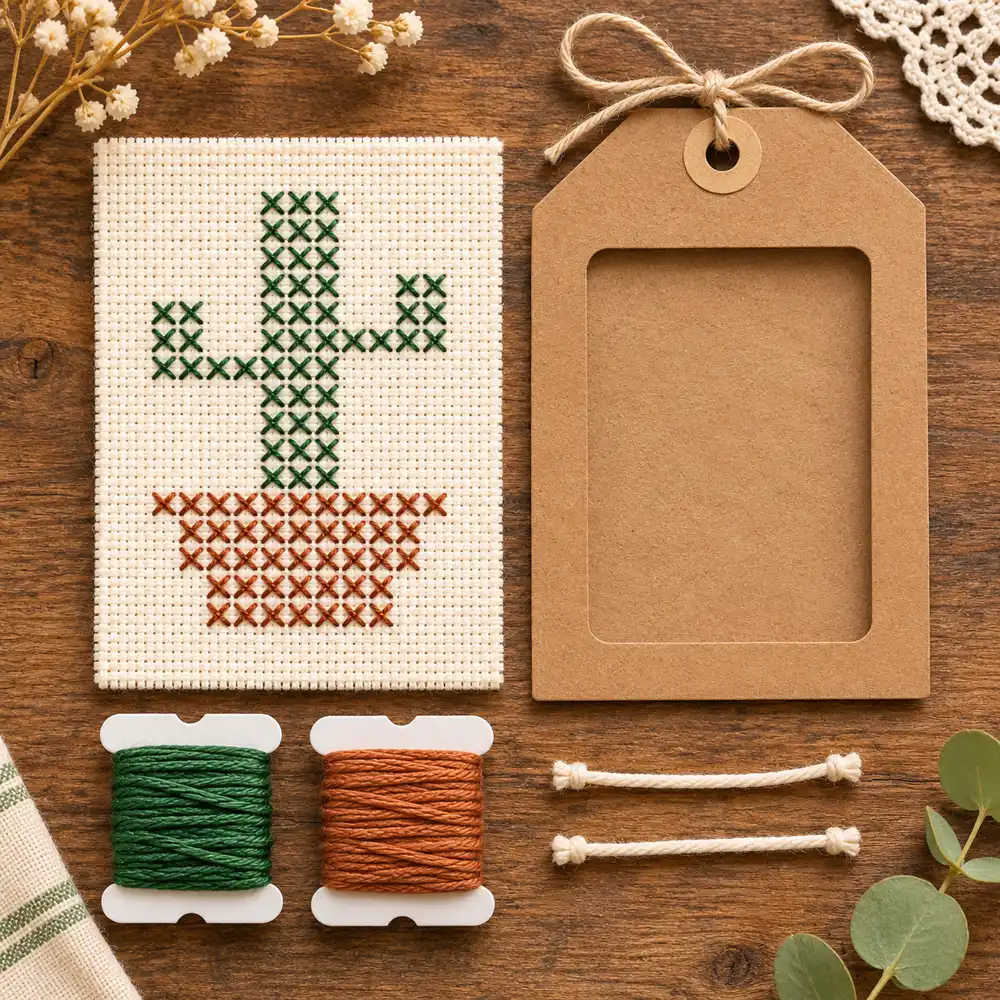
You need evenweave counting cloth such as Aida, suitable cotton, a blunt tapestry needle, small embroidery scissors and the chart. Two working strands on 14-count Aida are a sensible sample to try, rather than a universal coverage rule. For the mount, prepare firm card for the window and backing, a cutting mat, a ruler, a hole punch and plain cotton thread or fine cord. The parcel tie should pass through card, not pull on the embroidery.
The palette uses generic colors, not manufacturer thread numbers. Compare real skeins against your cloth in daylight. Label the cactus green and terracotta separately from the spool blue and brown, even if you choose to reuse one warm shade. Test any new thread for bleeding before washing a finished piece. Keep cutting tools away from the fabric while making the window; cut the card separately and remove loose paper fibres before assembling the sandwich.
Count the cactus from its central stem
The cactus has a three-column central stem with two short side branches. Its branches are deliberately at different heights. Do not mirror one side automatically: count each branch from the actual chart. Work the main stem first if that gives you a useful reference, then check the joins before completing the arms. The green total is 49 crosses. A correct total does not prove placement, so compare the silhouette as well as the count.
The terracotta pot begins immediately below the stem and narrows in steps toward its base. It uses 43 crosses. Check the wide top row before moving down through the narrower rows. Leave the surrounding chart cells blank instead of filling a background. Secure green thread tails without carrying dark strands across exposed pale cloth. If whole crosses are still unfamiliar, the beginner stitching guide is a better starting point than trying to learn every technique while assembling the tag.
Keep the spool straight without pulling the cloth
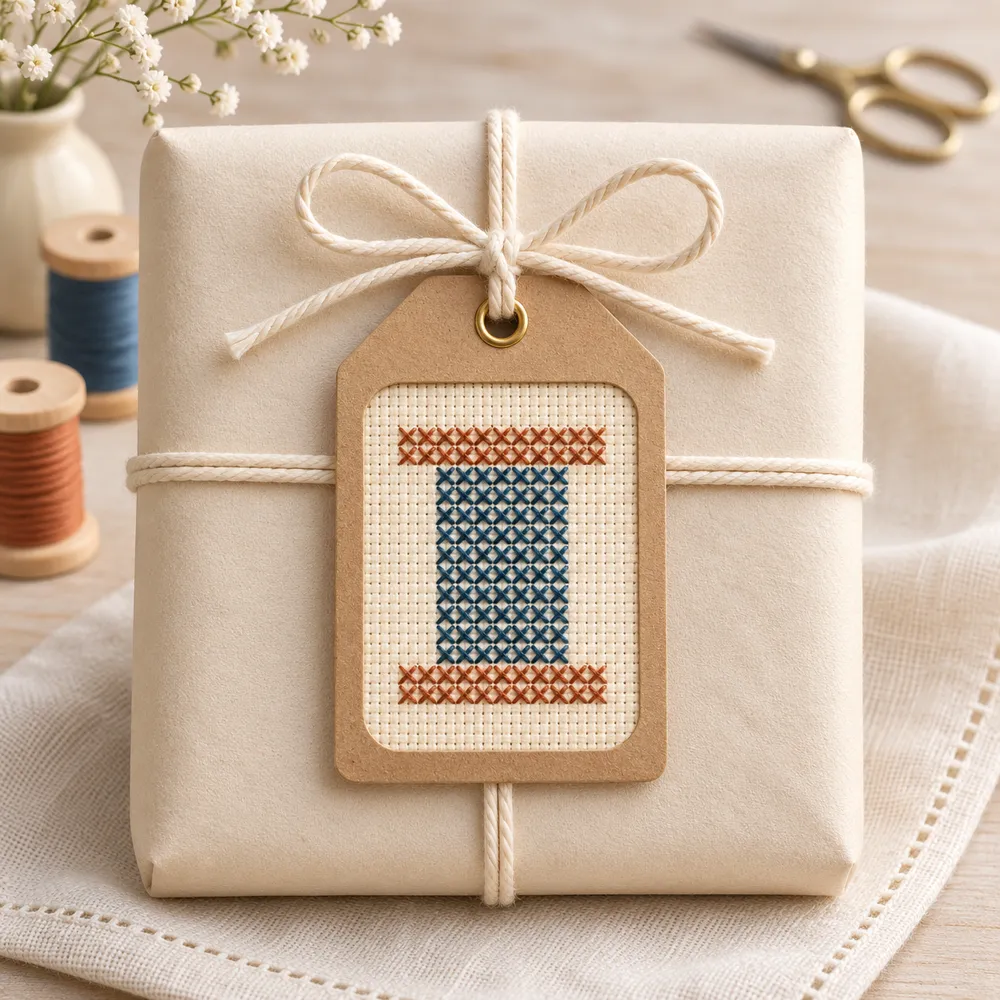
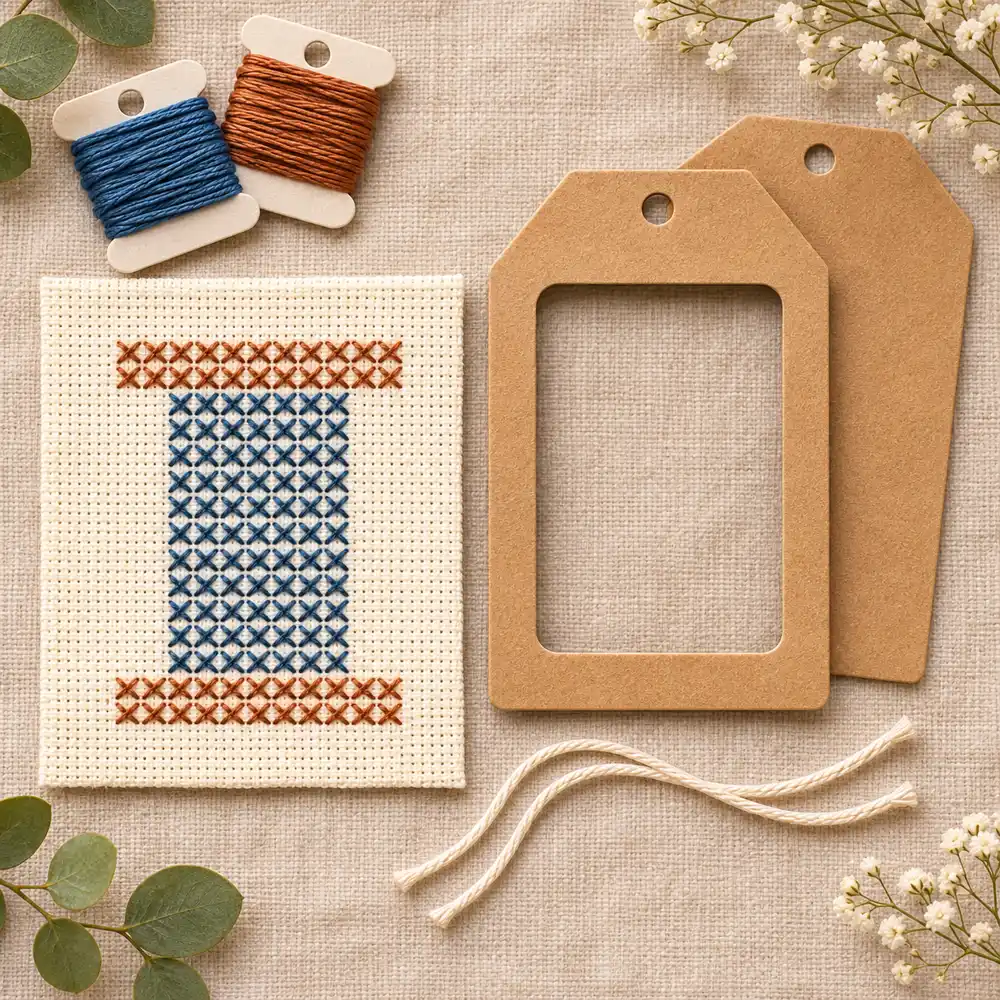
The spool's blue centre is seven columns wide and eleven rows high, giving 77 blue crosses. Its upper and lower warm-brown bars each contain two rows of eleven crosses. Together those bars account for 44 crosses. This straightforward structure makes the motif easy to check, but uneven tension can still make a rectangular area look narrower on one side. Pull each stitch only until it rests on the cloth.
You can work the blue centre row by row and add the bars after confirming its position. Keep all upper diagonals running in the same direction. Do not introduce extra diagonal lines to imitate wound thread: the original counted version is a filled blue rectangle between two wider bars. The photograph may show texture as part of its illustration. If you prefer another color, replace the blue throughout while preserving the cells. Note the substitution so that a later repair uses the same cotton.
Make a paper prototype before trimming the embroidery
Draw the outer tag shape and its window on scrap paper first. Place the paper over the finished cloth and check that the motif sits comfortably inside. The 3 by 4 inch suggestion is only a starting size; different card thickness, cloth count or recipient plans can justify a change. Leave room above the window for a parcel-tie hole, and keep that hole away from the narrow edge of the cutout.
Mark the insert position lightly on the backing card, not across visible stitches. Check the arrangement from the front and the back. If you cannot close the layers without pressing heavily on the crosses, enlarge the frame or choose a less bulky fold. Do not solve a tight fit by cutting almost to the outer stitches. A paper rehearsal is inexpensive and lets you correct a crooked opening before putting the embroidery or a good sheet of card at risk.
Assemble the removable card sandwich
Cut a front window and a matching backing card. Fold the surplus cloth behind the stitched area without folding through the motif. Hold the fabric temporarily in position between the two card layers, using clips on the outer card edges if needed. Make matching small holes through card-only margins around the sandwich. Keep those holes outside the fabric insert, then lace the two layers together with cotton thread. Tie the ends where the recipient can untie them.
This mount relies on the window and backing holding the folded cloth gently; it is not a load-bearing construction. Check that the insert cannot slide into the opening when the tag is moved. If it slips, adjust the folds or the card dimensions before tying it to a gift. Do not pull the lacing hard enough to bend the card or crush the stitches. Put the separate parcel cord through a reinforced card hole above the window, leaving the embroidery free of that pulling force.
Finish the back with useful information
Write the greeting on the backing card before inserting the embroidery, so the pen cannot press through onto the fabric. Add a short note explaining that the cotton lacing can be untied to release the stitched insert. If you know the exact thread and fabric used, write those details on a separate small slip. Do not promise that every material is washable without checking its own care instructions.
Trim paper corners if they feel sharp, and check for loose thread tails that could catch on wrapping. Keep the tag away from wet foliage, damp tape or fresh ink. The purpose of a removable mount is to preserve choices, not to claim museum-quality storage. For a recipient who wants to display the piece, the fabric margins and framing guide offers further planning. The cloth should still have a usable margin when it comes out of the card.
Adapt the idea without losing the counted design
Changing colors is simpler than changing the outline. A monochrome cactus or spool can work if the shape remains readable, but retain every blank cell and every occupied cell. A different fabric count changes physical size while keeping the same number of crosses. Enlarging the printed page changes readability only. If you want to add a flower, label or border, draw the addition on a new grid and recalculate its dimensions and counts.
For a different small object, compare the printable bookmark patterns. Their long format requires a different finish from this card sandwich. If you prefer a framed geometric accent, the modern geometric guide uses open shapes and deliberate negative space. Choose the format before stitching extra decorations, rather than spending the mounting allowance on details that later disappear behind the paper window.
Check the files and the finished tag separately
Digital validation checks the grid dimensions, cell positions, symbols, color totals, finished measurements and exact preview. It does not test how your particular card, lacing or fabric behaves in a real tag. These two patterns have not been physically stitch-tested. The generated editorial images are illustrative and are not evidence of a tested sample. Use the precise preview and PDF below for counting, then test the assembly with your actual materials.
Before gifting, compare the cactus branches and pot steps with the chart, or check both spool bars and the centre rectangle. Inspect the back for loose ends. Lift the finished tag by its card tie, move it gently and confirm that the fabric stays secure without being stretched. Untie and reopen it once if removability is important. That practical check is more useful than assuming a mount works simply because the front looks tidy in a photograph.
Questions about these free cross stitch gift tags
Are the PDFs free? Yes, the two public chart downloads below do not require buying a custom-photo pattern. Can a beginner make them? Yes, with whole-cross practice and careful counting; card cutting is a separate skill. Can I put a name inside the chart? Only after designing enough extra grid space. For a quick personal touch, write the name on the backing card instead.
Must the tag be glued? No, the laced sandwich described here keeps the layers removable. Can I wash the assembled tag? Remove the fabric first and follow its materials' care instructions; paper card is not washable. Can I stitch from the photo? Use the exact PDF instead. Explore the free pattern library for more motifs, and keep the difference between a verified counted chart and an untested physical finish clear when planning your own version.
Exact charts and free PDF downloads
Potted Cactus Gift Tag
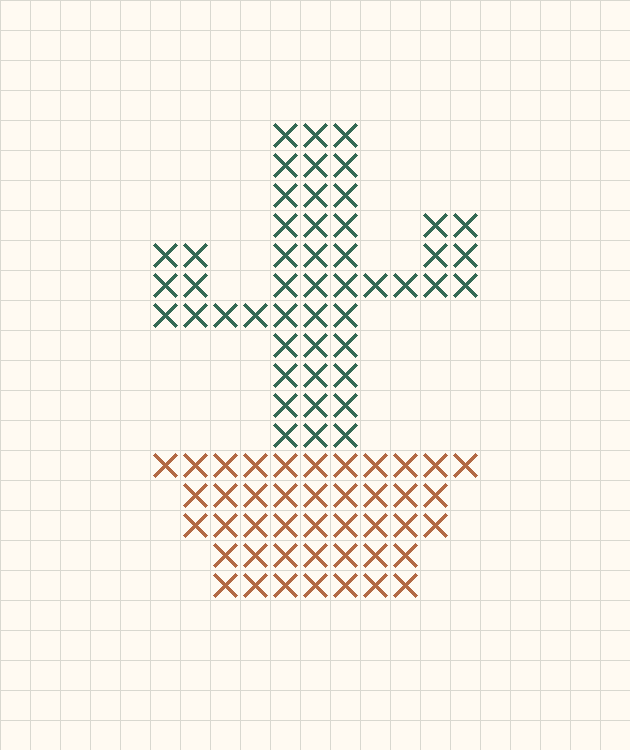
21 × 25 · 92 full crosses
Thread Spool Gift Tag
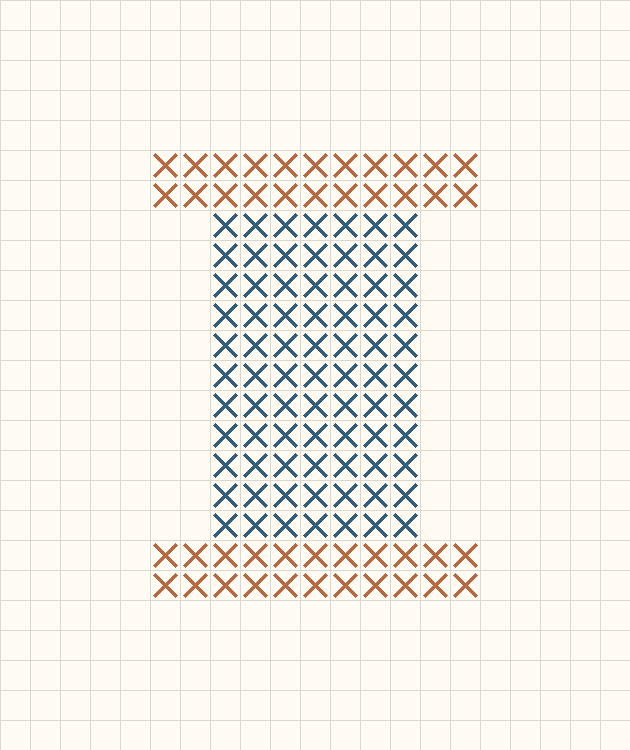
21 × 25 · 121 full crosses
Cross stitch fabric size calculator · Download the original potted cactus gift tag pattern
Examples, diagrams and planning estimates are original Cross Stitch Creator content.