
Modern cross stitch does not need a large palette or a complicated picture. A small design can feel considered when its empty spaces, repeated shapes and final frame work together. This guide uses two original 19 by 19 charts to explain those choices: nested stepped arches and a tile of four open windows. Exact previews and free symbol PDFs are at the bottom. The square photographs suggest presentation; they are illustrative, while the counted charts determine where every cross belongs.
Start with one clear design decision
Decide what you want the finished piece to emphasize before choosing extra details. The arches use repetition at different sizes, with one shape sitting inside another. The window tile repeats equal shapes and changes their color placement. Both approaches provide structure without lettering, fractional stitches or backstitch. Neither needs a claim about current trends to be useful: the practical question is whether the small shapes remain readable on your chosen cloth.
Choose one motif for a small frame, a card insert or a practice panel. Do not combine both automatically just because they share a palette. If you are still learning whole crosses, begin with how to cross stitch. For other compact gift designs, the tulip and star guide shows how the intended finish influences the choice of motif. Here the focus is on arranging simple geometry with deliberate space rather than filling every available square.
Treat blank cells as part of the drawing
Each chart has 19 columns and 19 rows. A lettered colored cell means one whole cross; an empty cell is left unstitched. The open areas inside the arches and windows are not missing color. They allow the fabric to participate in the composition. Filling them would change the design, increase the stitch count and make the surface much denser. Keep the PDF nearby rather than working from the styling photograph.
Look at the exact preview from normal viewing distance as well as close up. The arches should remain separate outlines, and each window should retain a visible interior. If the contrast is too weak to see those distinctions, test different threads before changing the grid. Mark completed groups on a working copy without covering symbols you still need. A clear chart and regular checking are especially useful when a minimal design offers few surrounding details to reveal a misplaced stitch.
Calculate the size before selecting a frame
At 14 stitches per inch, a 19 by 19 grid measures about 1.36 inches, or 3.45 centimetres, square. On 16-count Aida it is about 1.19 inches, or 3.02 centimetres; on 18-count it is about 1.06 inches, or 2.68 centimetres. These figures describe the chart area, including its blank cells. They are not the outside dimensions of a frame or the amount of fabric to buy.
Add fabric for holding, mounting and edge finishing. The PDF gives an example with three inches beyond every chart edge; on 14-count cloth that means a working cut of approximately 7.36 inches square. You may choose a different allowance once the construction is known. Use the fabric size calculator to compare counts and margins. A frame opening should show enough background around the outer crosses, so check the actual aperture instead of relying only on the frame's advertised outside size.
Choose two physical threads, not two screen swatches
The supplied palette uses generic ink blue and terracotta. It does not claim exact equivalents in a manufacturer's floss range. Compare real skeins on your cloth in daylight and test several crosses. Two strands on 14-count Aida are a reasonable starting point, but coverage depends on the cotton, tension and fabric. Separate the strands before reuniting them so they lie smoothly instead of twisting into a heavy cord.
Think about value as well as hue. A dark blue can anchor the outer arch, while a warmer medium tone distinguishes the inner one. On very dark fabric, both may need changing to preserve their outlines. In the window tile, opposite shapes share a color. This arrangement is a counted placement choice, not a requirement to purchase a particular brand. Keep the thread labels and note substitutions on the chart so you can return to the project without confusing similar shades.
Stitch the nested arches from verified landmarks
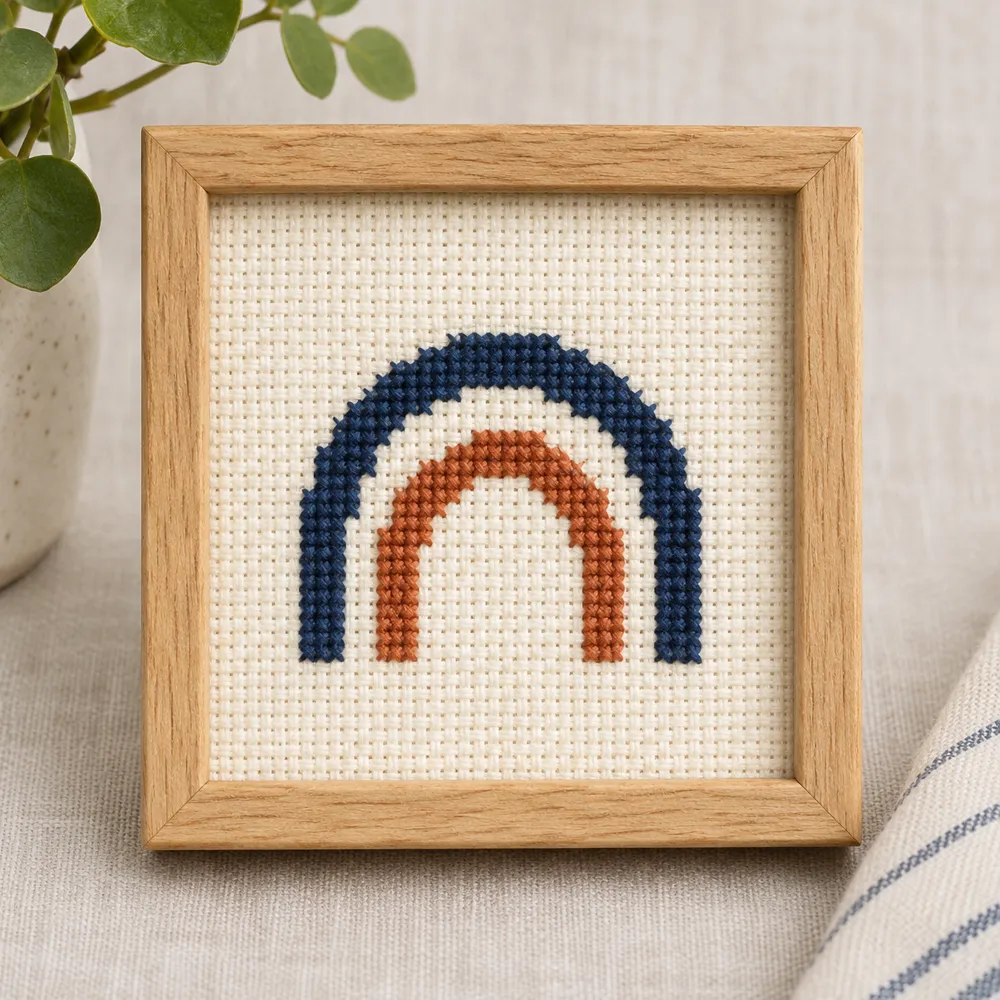
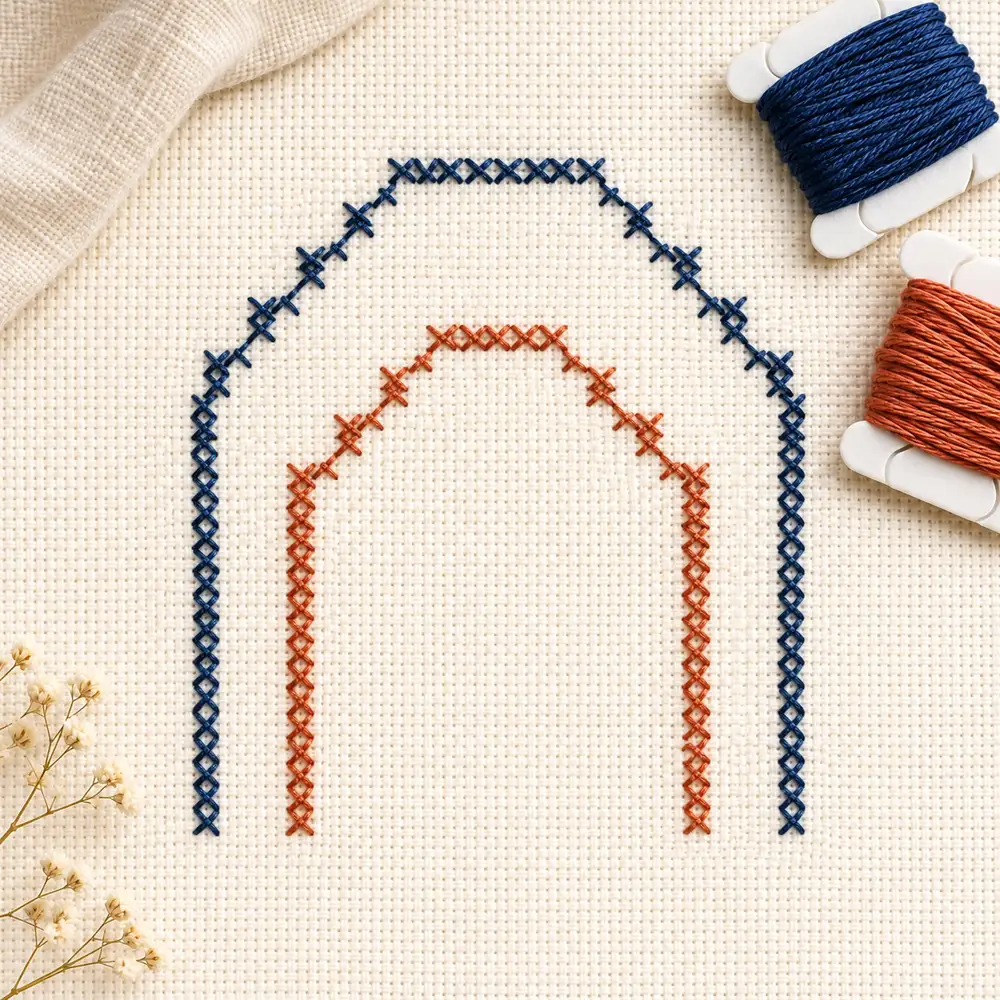
Nested Stepped Arches contains 48 whole crosses: 29 ink blue and 19 terracotta. The larger arch sits outside the smaller one, and both are open along the bottom. Their stepped shoulders belong to the counted drawing; do not smooth them into continuous curved lines or replace the crosses with backstitch. Locate a measured starting point and check the top of each arch before working down its sides.
You may complete the outer outline first as a reference, then count inward to place the smaller arch. Keep the space between them unstitched. Check that the two lower ends of each arch finish at the charted level. Do not tighten one side to make it look shorter or longer. A small counting error is better corrected immediately. The source chart and exact preview agree cell by cell, while the photograph is a presentation idea and cannot serve as a placement guide.
Build four windows without closing their interiors
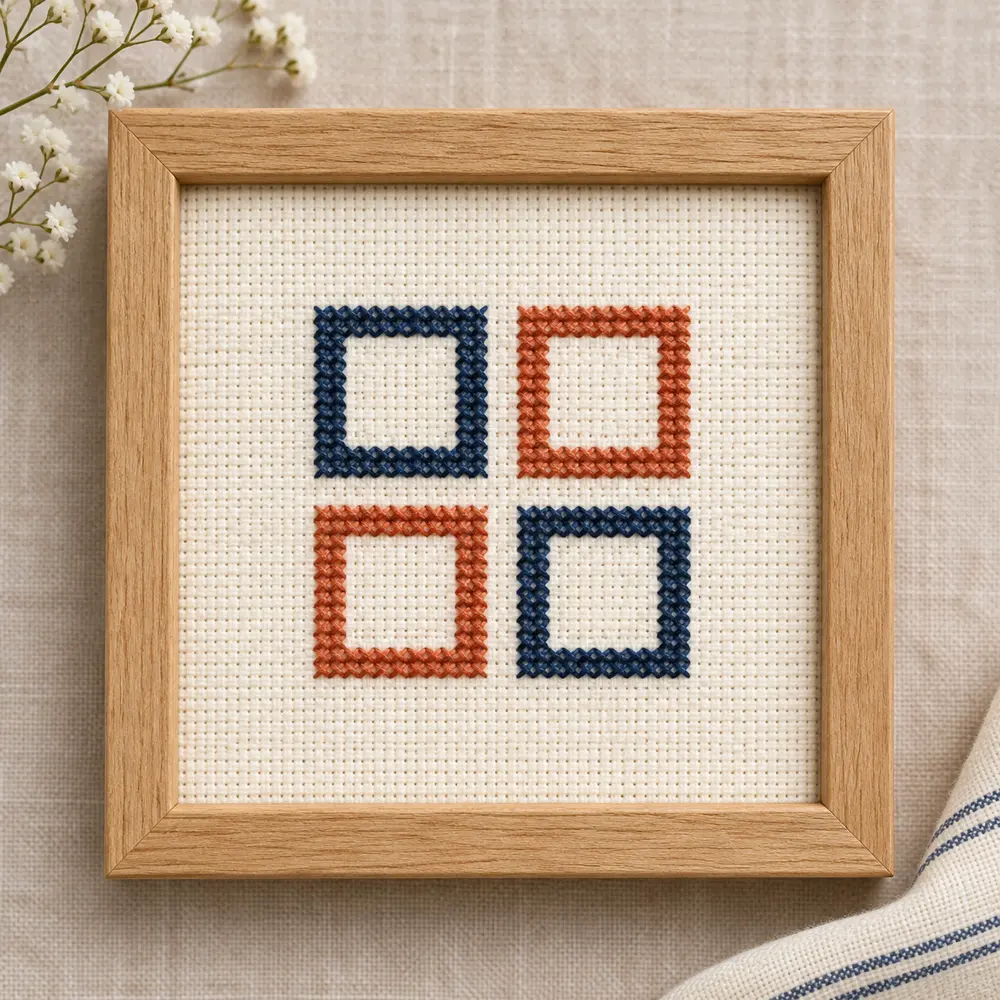
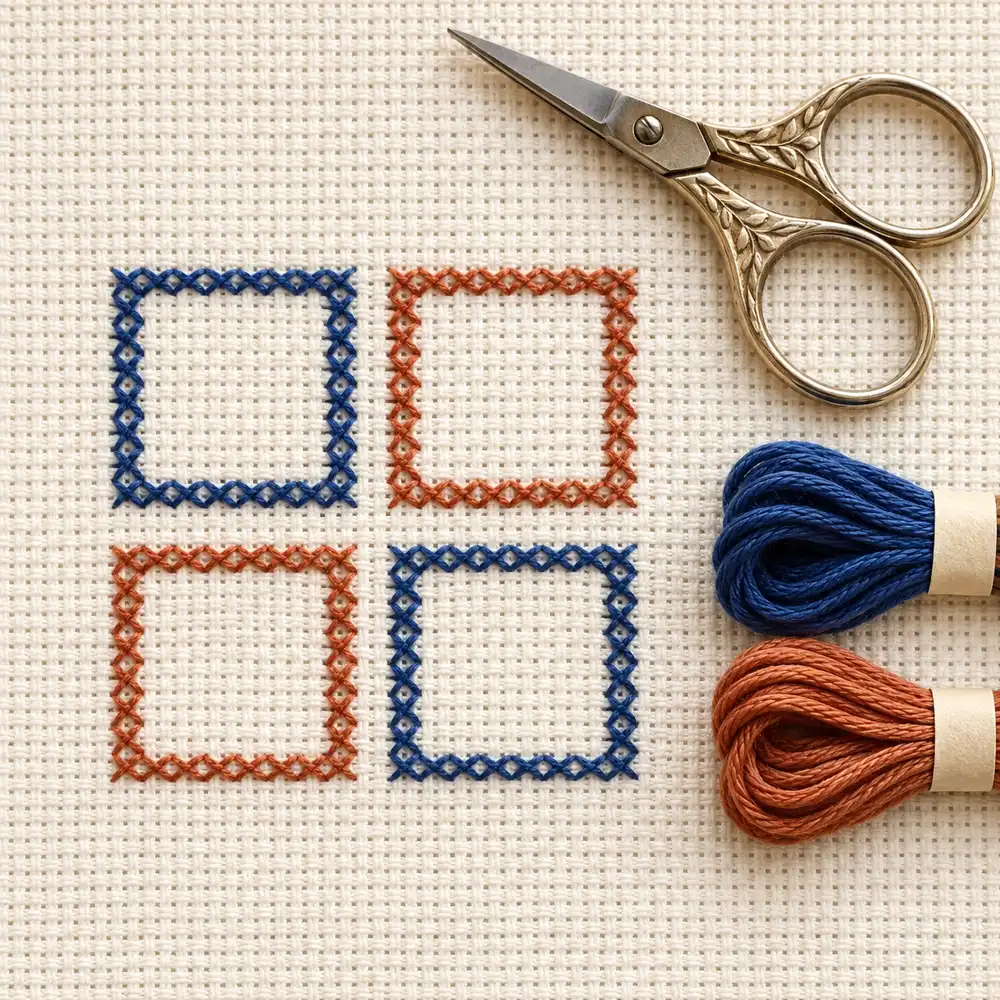
Four Window Tile contains 64 whole crosses, split equally between the two colors: 32 ink blue and 32 terracotta. Each little window is an open square outline. Diagonally opposite windows share a color, producing an alternating arrangement across the tile. Work one outline and check its width and height before repeating it. The empty area inside each square stays bare, as do the gaps between the four shapes.
Count the position of the next window instead of placing it by visual estimate. Repetition makes a design easy to recognize, but it can also repeat the same error. Check the first outline completely and use it as a reference only after confirming its location. Keep upper diagonals consistent when changing direction around a corner. Before finishing, compare the four interiors and the gaps between them. Matching color totals alone will not reveal a window shifted by one column.
Make the background support the palette
Cream or pale natural cloth gives the two supplied colors a quiet setting, but you can choose another ground. Test thread coverage and visibility on a scrap before committing. A cloth that looks neutral alone may make one color appear weak beside the other. View the sample under the light where the piece will be displayed as well as in daylight, especially if you are planning a gift for a room with warm lighting.
Do not add a filled background merely to make the project look more complete. The empty fabric is intentional and keeps the stitch count manageable. If you prefer monochrome, use one cotton for both symbols while preserving every blank cell. Write that adaptation on your working copy. Changing colors does not change the grid, but adding a background does; it also changes how much thread you need and how densely the fabric is covered.
Keep tension and thread travel quiet
Work with a comfortable thread length and let the needle hang briefly if the strands twist. Pull a cross only until it rests on the fabric. Distorting the holes will not improve a geometric outline; it makes the shape less regular. If you use a hoop, hold the cloth evenly without stretching the grid, and release it when you put the work away for a long break.
Avoid long dark carries behind open interiors. End the thread and restart when the route would show through the fabric. Secure tails under nearby stitches without making a bulky knot near the mounting edge. If a cross is wrong, lift the thread gently with the needle instead of scraping the fabric with scissors. The five-motif sampler offers practice in separated groups if the open areas make it difficult to choose a sensible route.
Plan the margin as carefully as the motif
Place the finished embroidery behind a temporary paper opening before cutting anything. A very tight aperture can make the arches look cramped and hide the square rhythm of the windows. More surrounding cloth may be appropriate, but an oversized opening can make a tiny motif disappear. Test a few paper rectangles and choose the one that supports the actual stitched piece rather than the enlarged image you saw on screen.
Center the grid first, then assess the visual balance. The arches concentrate their stitches toward the top and sides, so the optical impression may differ from a solid square. Do not trim the fabric to adjust that impression while you are still experimenting. Keep enough cloth for the mounting method. For a card, check folds and lining; for a frame, check the support and aperture. A clean finish begins with those physical measurements, not with a final-minute attempt to stretch the embroidery into place.
Adapt the design without confusing scale and structure
A different Aida count changes the physical size but not the 19 by 19 chart or the stitch totals. Enlarging the print changes readability, not the embroidery. If you want a larger picture with the same thread texture, you need to design additional counted cells rather than stretching the PDF and treating the result as a new chart. Keep an unchanged copy of the original files before experimenting.
Adding another window or a third arch requires new spacing, measurements and stitch counts. Draw the extension on a grid and check that repeated gaps remain deliberate. Do not place extra elements in the fabric reserved for mounting. If the goal is a usable object rather than a framed tile, the printable bookmark patterns demonstrate how an elongated layout changes the finish. For plain clothing, use the removable canvas guide instead of assuming the same counting method works directly on any weave.
Check the finished work against the exact files
Compare every occupied group with its letter chart, then check the blank interiors and outer margins. The arches total 48 crosses and the windows 64, but a correct sum does not prove correct placement. Look for displaced corners, missed shoulder steps or an interior filled accidentally. Examine the reverse for loose tails and visible dark carries before mounting, when those problems are still easy to reach.
Digital validation compares dimensions, cell positions, color totals, PDF symbols and exact preview pixels. Physical stitch testing has not been performed for these two patterns. The generated styling images are illustrations rather than evidence of a stitched sample. Use the downloads below as the counted references and test your actual cloth and cotton before a final presentation. If you press the work, follow the care instructions and protect the raised stitches instead of flattening them directly with a hot iron.
Questions about a restrained modern cross stitch project
Are these suitable for beginners? Yes, if you can form whole crosses and count blank cells. The arches need attention at the shoulders; the windows need consistent placement of repeated outlines. Must modern work use neutral colors? No, strong colors can work if the shapes remain readable. Do these require backstitch? No, every marked square is a full cross, including the stepped curves and corners.
Can you stitch both in one frame? Yes, after planning a new layout with measured space between the two grids. Do not simply place them wherever the fabric seems empty. Can the photo replace the PDF? No, use the exact counted file. Are the colors brand-specific? No, choose physical threads that suit your cloth. Browse the free pattern library for more projects, and evaluate each by its dimensions, density and finish rather than assuming that a simple-looking picture always needs the same preparation.
Exact charts and free PDF downloads
Nested Stepped Arches
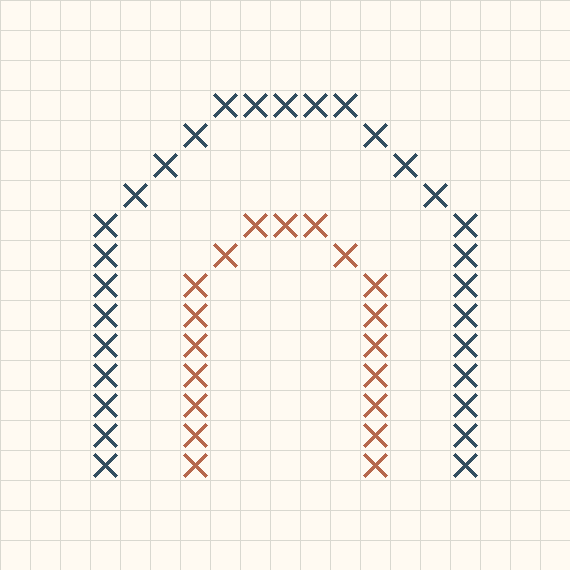
19 × 19 · 48 full crosses
Four Window Tile
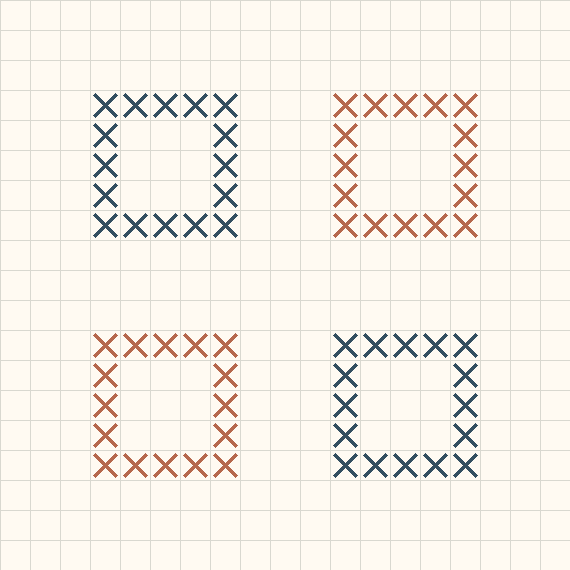
19 × 19 · 64 full crosses
Cross stitch fabric size calculator · Download the original nested stepped arches pattern
Examples, diagrams and planning estimates are original Cross Stitch Creator content.