
Small cross stitch embroidery designs work best when the drawing, the counted chart and the intended finish agree. These two original designs turn a 15 by 15 grid into a folk tulip for a greeting card and a geometric evening star for a small framed gift. You get a practical stitching guide, exact previews and free symbol PDFs at the end of this article. The decorative photographs are illustrative; use the counted charts, rather than the photographs, to place each stitch.
Choose a design by the job it needs to do
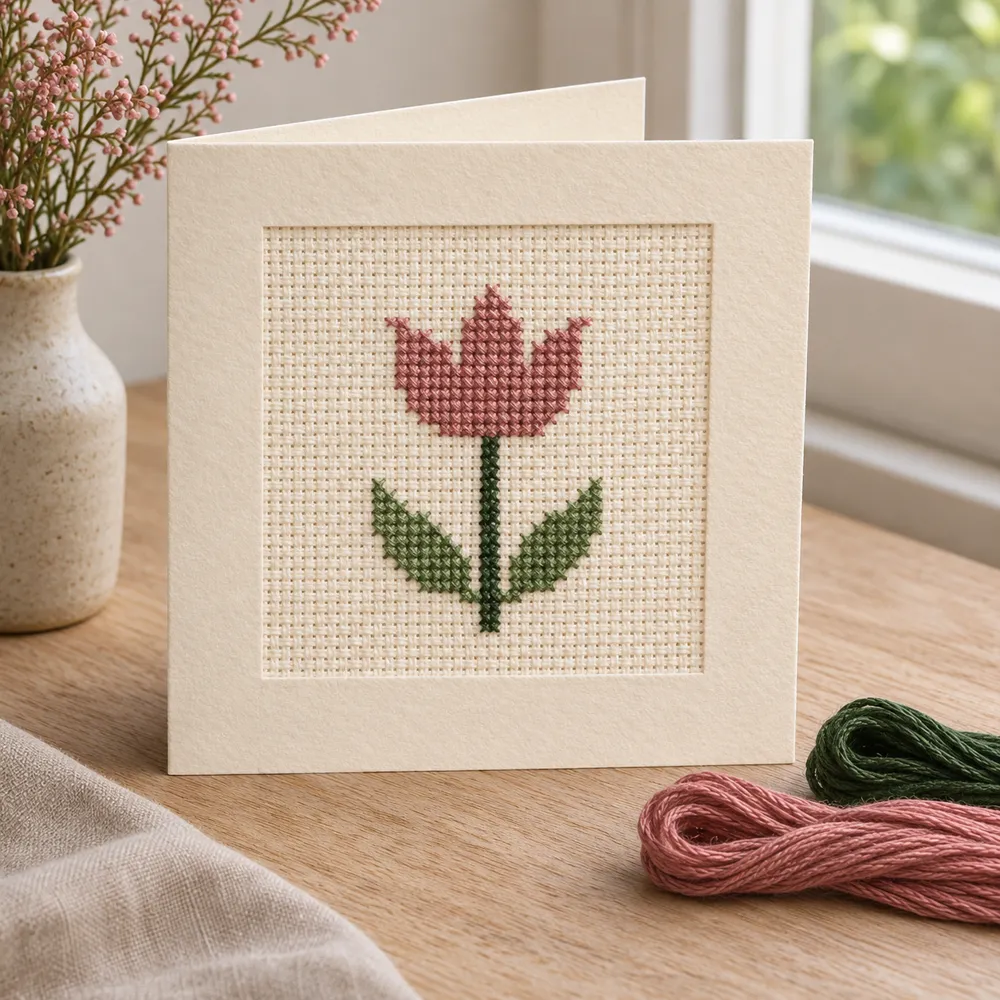
A motif that looks attractive on a screen may disappear inside a large card opening. Begin with the object you want to make, then choose the fabric count and mounting arrangement. The tulip has a clear upright stem and an open background, making it a useful choice for a narrow greeting card. The star occupies more of its square and suits a small frame, gift enclosure or patch. Neither chart requires fractional stitches, backstitch or beads.
If you are choosing your first project, read how to cross stitch before preparing the cloth. For a broader set of counting exercises, use the five-motif practice sampler. Here the goal is different: finish one small design neatly, without increasing its complexity just to fill the space available.
Read the chart rather than tracing the photograph
Both charts contain 15 columns and 15 rows. Every colored square with a letter represents one full cross; blank squares remain unstitched. Letters distinguish colors when printing in black and white. Row one is the top row, column one is the leftmost column, and the central square is column eight, row eight. These coordinates remain the same whichever fabric count you choose.
The source grids generate the exact previews and the PDF charts. The styling images show possible presentation, not a stitch placement reference. Keep a working copy beside you and mark completed groups lightly. If the fabric is rotated while stitching, rotate the chart mentally with care, or return both to their original orientation before counting another section. This prevents mirrored leaves and displaced star points.
Measure the cloth before cutting
The stitched design occupies 15 divided by the fabric count in each direction. On 14-count Aida, that is approximately 1.07 inches, or 2.72 centimetres, square. On 16-count it is about 0.94 inches, or 2.38 centimetres; on 18-count it is about 0.83 inches, or 2.12 centimetres. These measurements cover the chart area, not a finished card or frame.
Allow extra fabric for holding, mounting and turning under edges. A generous three-inch margin on every side makes the starting piece about 7.07 inches square on 14-count cloth. You may choose a smaller allowance for an aperture card once you know its construction, but do not cut down to the stitch boundary. Use the fabric size calculator to compare counts and margins before committing your best fabric.
Prepare a modest materials kit
Gather evenweave Aida, stranded cotton in two colors, a blunt tapestry needle suitable for the holes, sharp embroidery scissors and your printed chart. A small hoop is optional: it should support the fabric without stretching the holes into rectangles. Two separated working strands are a reasonable starting point on 14-count Aida. Make several test crosses on a scrap because coverage changes with thread thickness, tension and the cloth itself.
The palettes use generic color references, not manufacturer thread numbers. For the tulip, choose dusty rose and a dark leafy green. For the star, use slate blue and warm ochre. Compare actual skeins in daylight and choose enough contrast against your cloth. A hexadecimal swatch describes a screen color; it cannot guarantee an exact physical floss match. Keep your selected thread labels with the project.
Stitch the folk tulip from its central stem
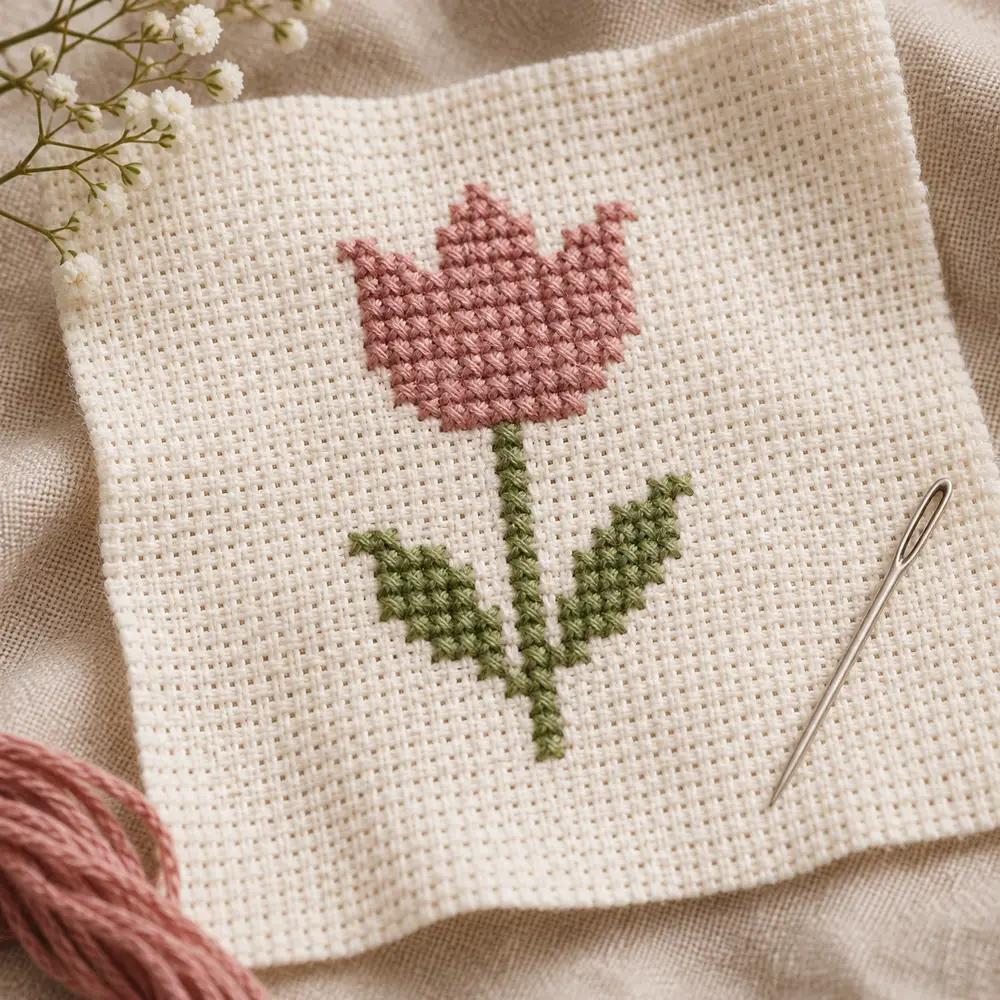
The Folk Tulip Card chart contains 59 full crosses: 34 in dusty rose and 25 in green. Its filled area sits within a 15 by 15 grid. Locate column eight and work the green stem with regular tension. The two leaf groups step outward from the stem; check their placement against the chart rather than estimating their distance by eye. Empty squares between leaves and petals are part of the design.
Work the rose flower as short rows or small counted blocks. The three upper tips establish the flower's silhouette, so count those gaps carefully before filling the wider middle. End a thread if reaching the next isolated group would create a conspicuous dark carry across the open background. A light card mount can reveal long carries more clearly than a hoop display. Keep knots and bulky thread tails away from the aperture edge.
Build the evening star in checked sections
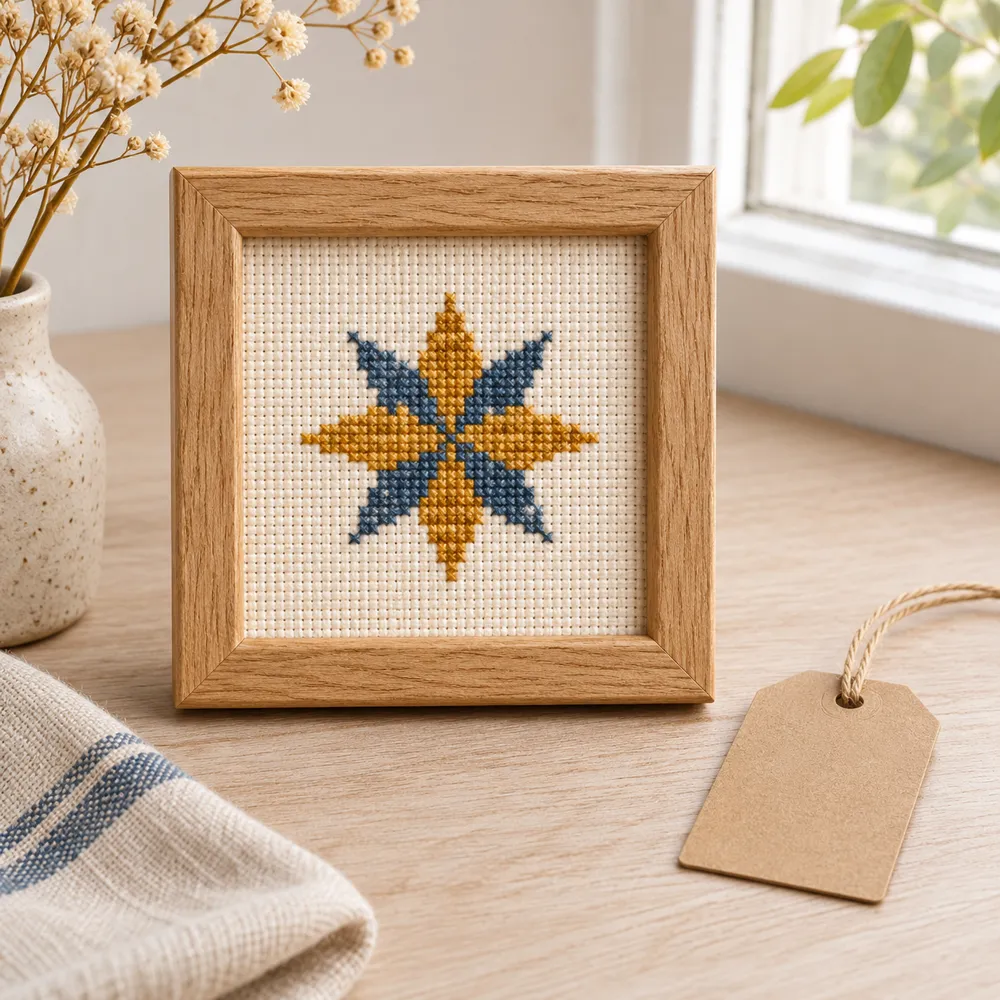
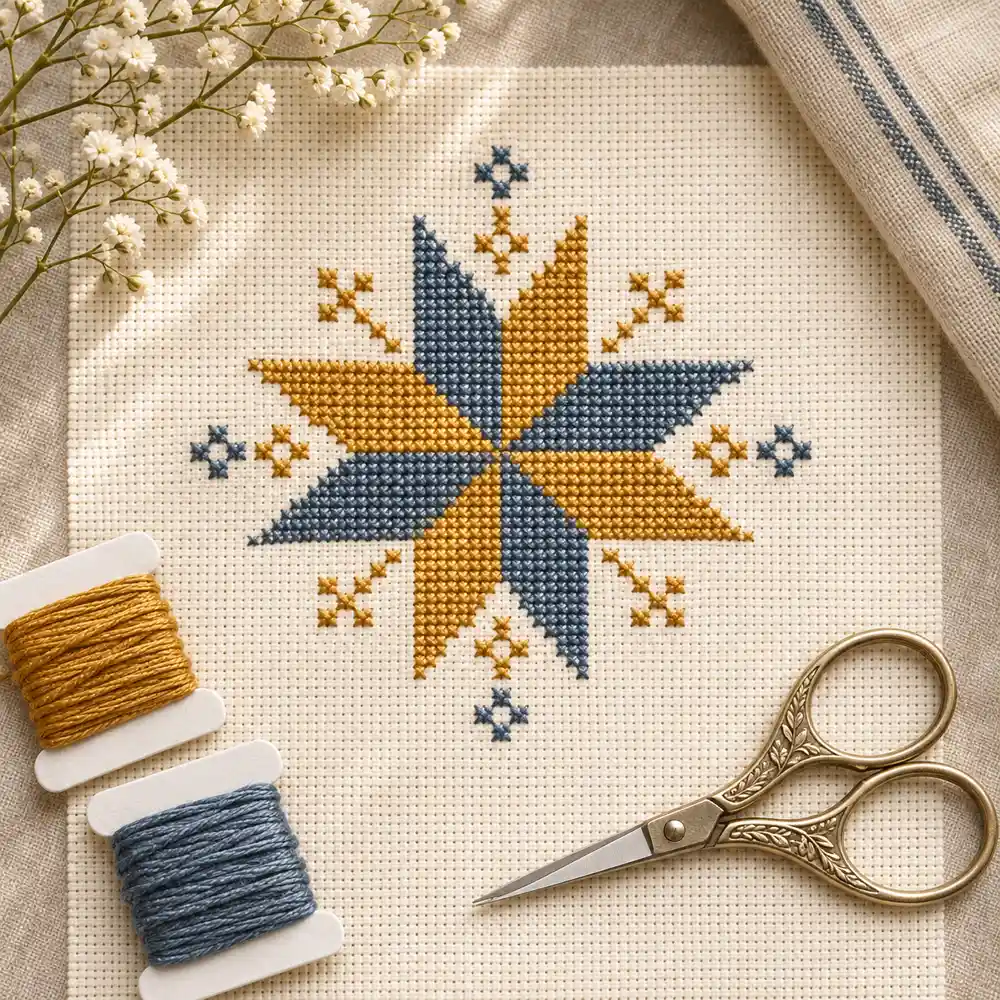
The Geometric Evening Star chart contains 87 full crosses: 58 in slate blue and 29 in ochre. Start at the center or at a carefully measured chart corner, whichever you can track more comfortably. The central ochre group provides an anchor. Complete one surrounding blue section, compare it with its opposite, and then continue around the design. Symmetry is a useful checking aid, but the chart remains the authority.
The diagonal ochre wedges include empty cells around them. Do not fill those spaces merely to make a solid star. Work small groups and keep the same upper diagonal on every cross. Before the last thread is secured, count the height and width of the outer tips and confirm that the design remains centered. The star is denser than the tulip, so avoid pulling its center tight enough to pucker the fabric.
Keep tension and thread travel under control
Separate the required strands, bring them together smoothly and use a comfortable working length. If the thread twists, let the needle hang briefly and allow the twist to relax. Draw each stitch until it rests on the fabric; tightening harder will not improve coverage. The aim is a consistent surface with visible, undistorted fabric holes between neighboring stitches.
For open motifs, neat travel matters more than an elaborate reverse side. Secure a short tail under nearby stitches and avoid crossing a large blank area with dark floss. Turn the work over before adding the second color. If a carry would show through, finish the thread and restart. When unpicking, lift one strand at a time with the needle instead of scraping the cloth with the scissor tips.
Change colors without losing the design
Color changes are easiest when value contrast stays similar. A medium rose and a deep green separate clearly on cream cloth; two pale colors may merge at normal viewing distance. For the star, retain a visible difference between the main points and the smaller wedges. Test a few stitches of each candidate thread beside one another before making a complete substitution.
You can stitch a monochrome version by using one thread for both chart letters, while retaining every empty cell. Record that choice on your working copy so you do not accidentally treat a blank as another color. Changing the fabric count alters size, not the number of stitches. Adding a name, border or date requires extra chart space and a fresh measurement rather than squeezing letters into the mounting margin.
Turn the tulip into an aperture card
Choose an aperture that comfortably reveals the design and a little unstitched fabric around it. Center the embroidery behind the opening while looking at the card from the front. The tulip's visual weight is concentrated in the flower head, so check both the geometric center and the balance of the finished view. Temporarily hold the cloth in place before attaching anything permanently.
Trim only after you have checked the card construction. Keep adhesive away from the stitches and use materials suitable for your intended finish. A separate lining can cover the reverse and protect loose thread tails. Avoid pressing a hot iron directly onto the stitches; if pressing is necessary, work gently from the reverse over a soft towel and follow the fabric and thread care instructions.
Frame the star with room around its points
A small design does not need a tight opening. Leave enough space around all four outer tips to preserve the shape, and confirm that the mounting method will not pull the cloth sideways. Square the fabric threads before positioning it over a support. Work gradually from opposite sides rather than stretching one edge firmly and hoping the others will match.
For a gift tag, mount the embroidery on a clean backing and keep any punched hole outside the stitched area. Do not punch through a star point. For a fabric patch, allow a separate finishing border and secure the edges appropriately; these charts do not include seam allowance. Store an unfinished piece flat and clean so the light background does not collect marks while you choose a final presentation.
Check the work before downloading another design
Compare each completed color with the letter chart, including isolated stitches near the outline. The tulip total is 59 crosses and the star total is 87; a matching total alone cannot prove correct placement, but an unexpected total can flag a missed group. Check row and column positions as well as the silhouette. Inspect the reverse for loose tails or long dark carries visible from the front.
The digital review checks grid dimensions, color counts, occupied chart cells and agreement between PDF and preview. It does not replace a physical stitch test, which has not been performed for these patterns. If your cloth or thread behaves differently, make a small sample and adjust strand count or tension before continuing. The exact charts and download buttons below remain the working references for both designs.
Questions about these small embroidery designs
Can a beginner make them? Yes, if you can count blank squares and form a full cross consistently. The tulip is the lighter project; the star needs more attention to separated groups. Can they be stitched on linen? They can, but count fabric threads carefully and recalculate the effective stitch count when working over two threads. The measurements given above assume one cross per Aida block.
Do you need the exact colors? No. The charts use generic shades, so choose your own cotton and preserve useful contrast. Does printing at a different scale change the finished embroidery? No: your fabric count determines the stitched size. Can you use the photograph instead of the PDF? Use the exact chart for placement; the photograph is an illustration. For more projects, browse the free pattern library and keep the measured cloth allowance appropriate to each new chart.
Exact charts and free PDF downloads
Folk Tulip Card
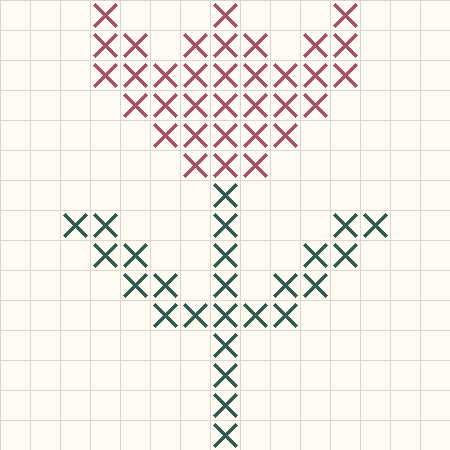
15 × 15 · 59 full crosses
Geometric Evening Star
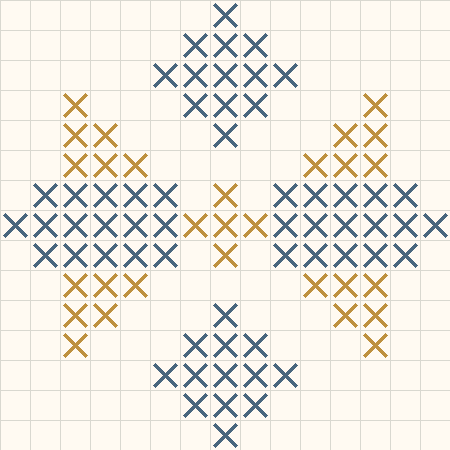
15 × 15 · 87 full crosses
Cross stitch fabric size calculator · Download the original folk tulip card pattern
Examples, diagrams and planning estimates are original Cross Stitch Creator content.