
You do not have to draw every cross on a tote bag or a shirt pocket. A removable counting guide supplies a temporary grid while the stitches pass through the fabric underneath. This guide explains how to plan a small project, choose between waste canvas and a water-soluble guide, and remove the guide without treating ordinary Aida as a disposable material. Two original 21 by 13 charts are included. Their exact previews and free PDFs are at the bottom; the square styling images are illustrative rather than counted references.
Match the counting guide to the project
Waste canvas and water-soluble canvas solve a similar problem through different removal methods. Waste canvas has threads that are taken out after stitching; a soluble guide is designed to disappear in water. They are not interchangeable with every stabilizer sold for embroidery. Check the product name and instructions before buying, and make sure its removal method is compatible with the base fabric and thread. Manufacturer references are provided below for the underlying material distinction.
Ordinary Aida is intended to remain part of an embroidery. Do not assume a piece of regular Aida can be pulled away neatly after you stitch through it. For a first attempt, use a scrap of washable, stable woven cotton. If the basic stitch is new to you, practice with our beginner cross stitch guide. A small successful test gives better information about your materials than attempting a large garment design immediately.
Test the fabric before choosing a visible position
Check the garment care label, seams, pockets and access to the reverse side. A pocket opening may look like an easy location until you discover that the needle would sew it to the garment behind. Put your hand or a thin removable barrier inside to understand the layers before you start, then keep unused layers out of the stitch path. Do not leave a barrier where the needle cannot be controlled safely.
Wash and dry a test piece according to the base material's care requirements if that is appropriate for the item. Test the chosen floss for color transfer and check how the cloth behaves when wet. Avoid beginning with stretchy knits, very delicate fabric or an item you cannot risk marking. This guide's sample calculations use a regular counting grid; they do not guarantee the result on every garment. A stable scrap helps you separate counting errors from fabric movement.
Use guide count to calculate the motif size
Both supplied charts occupy 21 columns and 13 rows. At 14 stitches per inch, the grid measures 1.50 by 0.93 inches, or about 3.81 by 2.36 centimetres. At 16 count it is approximately 3.33 by 2.06 centimetres; at 18 count it is about 2.96 by 1.83 centimetres. Use the count of the temporary guide, not an assumed count for plain cotton, to calculate the design area.
The PDF's three-inch margins describe an optional practice piece of Aida, not an instruction to cut a hole or rectangle from your garment. For the actual item, leave the base fabric intact and cut only the guide according to its instructions, with enough spare area to baste and remove it. Use the fabric size calculator to compare dimensions. Place a paper rectangle of the calculated size on the item before committing to the position, and check clearance from seams.
Align and baste without stretching the cloth
Mark the intended center using a method tested on a hidden scrap, or use temporary basting instead of a permanent mark. Align the guide squarely with the item while both layers rest naturally. A garment held under tension during setup may contract when released and distort a straight motif. Baste the guide beyond the stitch area, leaving its edges available for removal. Follow the specific guide's instructions for securing and handling it.
Choose a needle that passes through the base fabric appropriately; the blunt tapestry needle you use on Aida may not penetrate a closely woven cloth comfortably. Test thread coverage rather than forcing an oversized needle through the layers. If you use a hoop, support both layers without stretching the garment. Check the reverse regularly to confirm that no lining, second pocket layer or folded fabric has been caught. The small charts below are useful because you can review the entire area frequently.
Stitch the pocket mountain motif in small groups
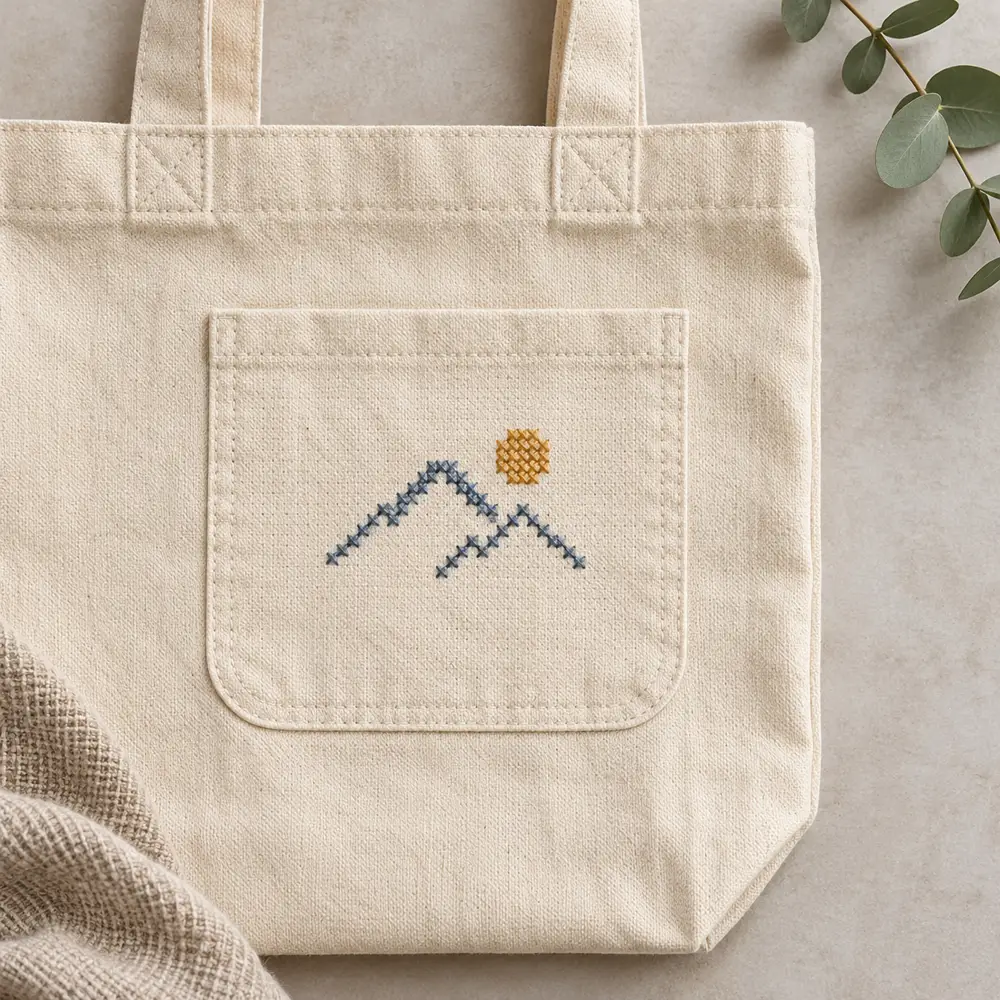
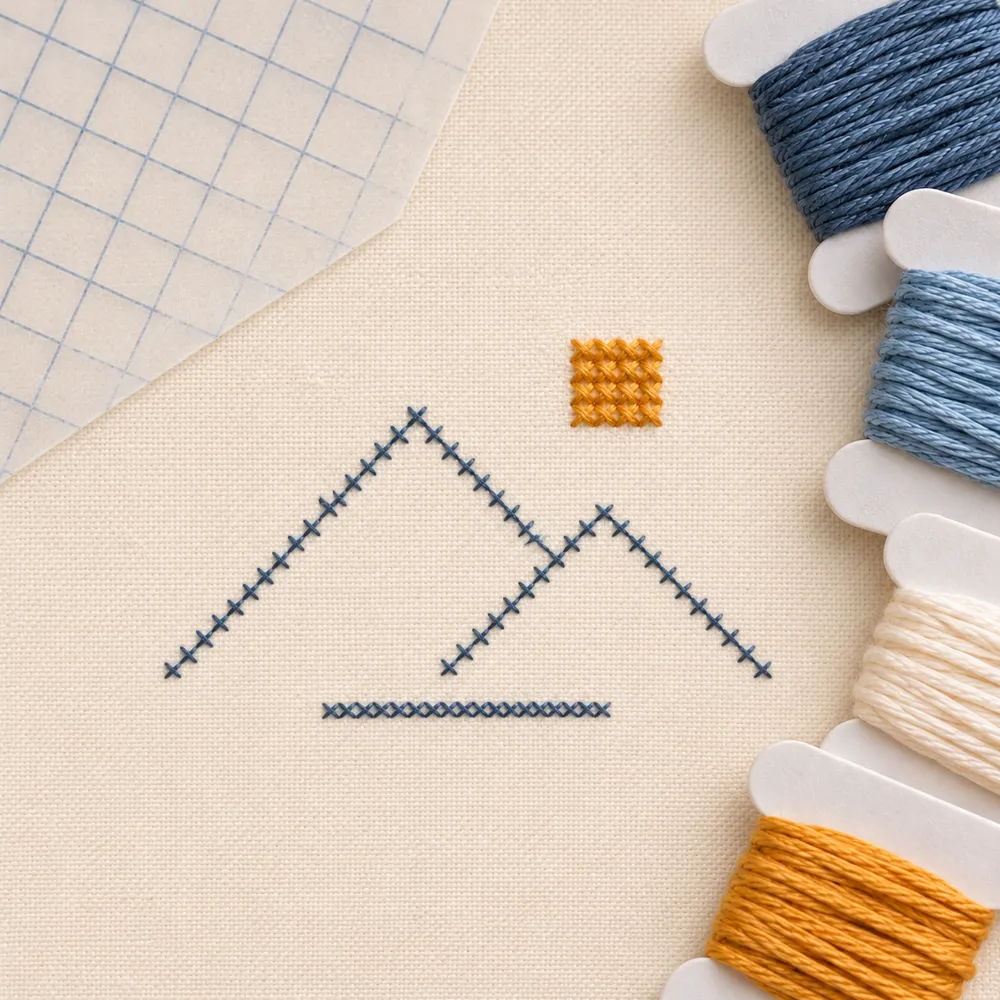
The Pocket Mountain Motif contains 44 whole crosses: 40 slate blue and four ochre. The blue forms two stepped mountain outlines and a low horizontal line, while the ochre creates a small square sun. Begin from a measured chart corner or the marked center. Count every blank cell between the peaks, the sun and the lower line; those open areas define the design and should not be filled to imitate a photograph.
Work one outline section and compare it with the PDF before continuing. The two peaks differ in height, so do not mirror one automatically to make the other. Keep the same upper diagonal across the blue and gold areas. Finish the thread rather than making a long dark carry behind the open background. Check that the four sun stitches remain a separate group. The exact preview is generated from the counted cells; the editorial image shows a possible use on plain cloth, not a tested garment sample.
Place the open diamond row with careful spacing
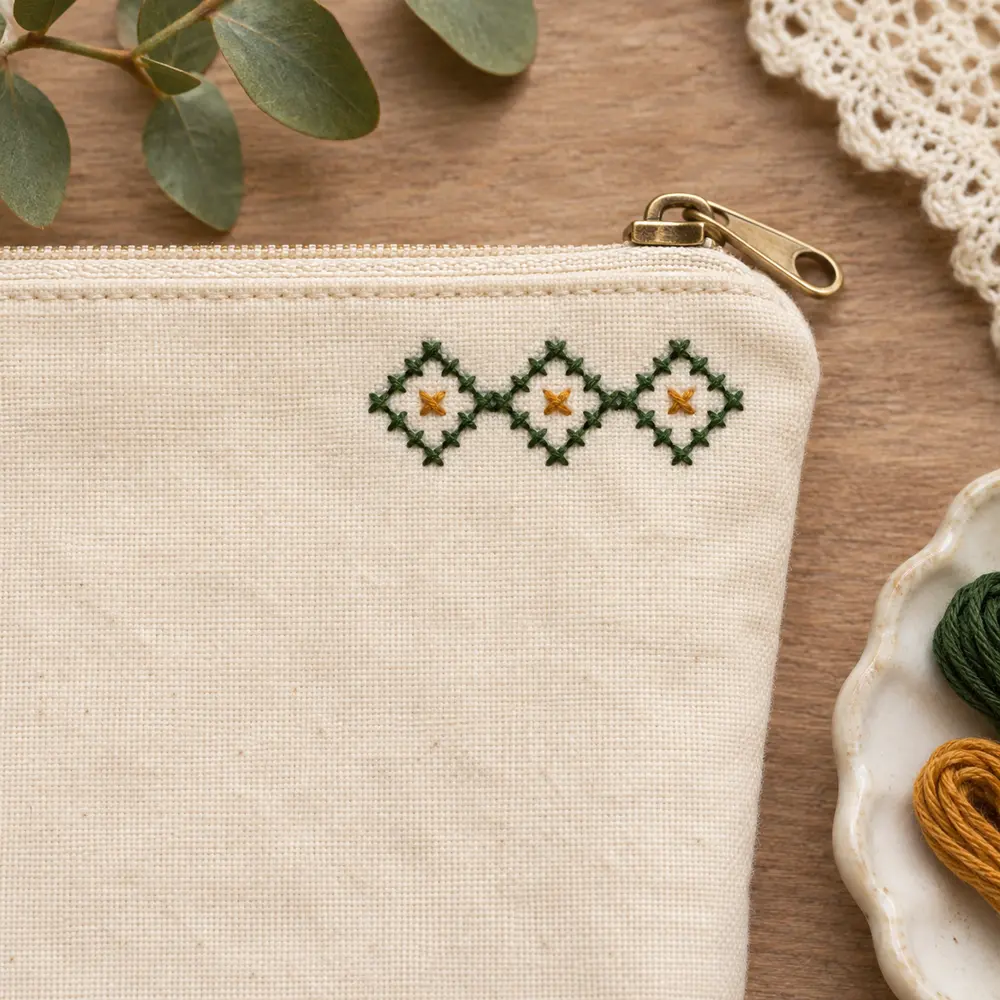
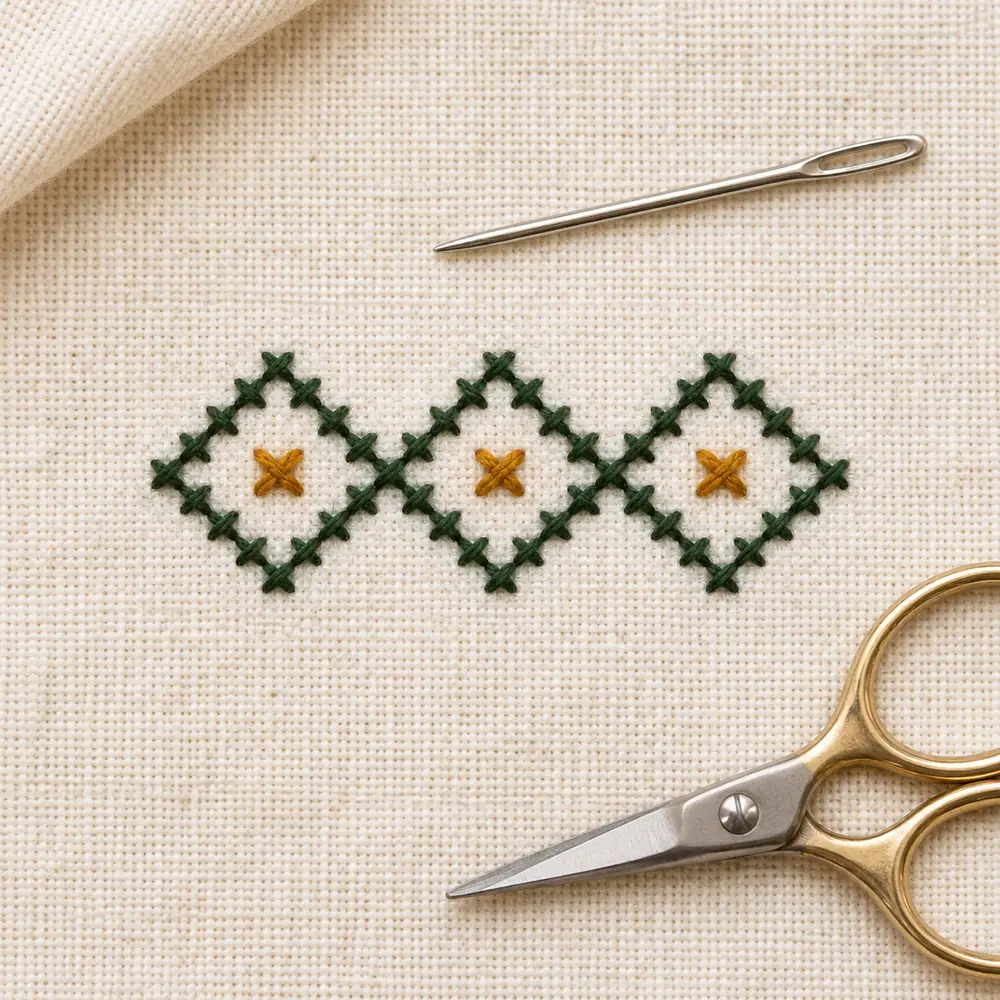
The Open Diamond Row contains 37 whole crosses: 34 green and three ochre. Three open diamonds share the horizontal arrangement, with a small ochre center in each. Some outline points meet, so count the source cells rather than multiplying an imagined standalone diamond total. Start with the central shape and check its position before adding the neighbors, or count from a secure corner if that suits your working method.
Leave each diamond's interior blank except for its marked center. The open spaces keep the small band readable without a solid block of stitching. Work the outlines in short sections and review both upper and lower points. Do not pull a cross tight to hide a placement error: unpick and recount instead. Before the final thread is secured, compare the alignment of the three centers and confirm that the band sits squarely on the garment rather than following an accidentally tilted guide.
Protect the guide while forming each cross
Make each stitch through the guide opening and the base cloth, keeping the required fabric layers together. With thread-removal canvas, avoid splitting its structural threads, because a pierced guide thread can become trapped by the embroidery. Work with moderate tension so the crosses settle on the fabric rather than cinching the temporary grid into it. Test the movement on the scrap before changing your tension on the actual item.
Keep thread tails short enough to manage and secure them beneath neighboring stitches. A tidy reverse is useful, but there is no need to force a decorative back at the expense of the front. If the needle catches a guide thread, stop and correct that stitch early. Check the guide alignment after an interruption or after moving a hoop. For practice with spaced groups and blank cells, the five-motif sampler provides a simpler exercise on permanent Aida.
Remove waste canvas without yanking the stitches
First confirm that your material is actually thread-removal waste canvas. Read its instructions for any dampening needed to release its finish. Remove the temporary basting only when it is no longer needed to hold the work. Support the base fabric and draw out guide threads gradually rather than pulling a whole dense bundle. The aim is to separate the temporary grid from the embroidery, not to drag the stitched crosses across the cloth.
If a thread resists, stop. Check whether it was pierced, trapped under a tight stitch or caught by a tail. Do not solve the problem by tugging harder or cutting blindly next to the embroidery. Work on the test piece first and choose another method if removal damages the base fabric. Manufacturer descriptions explain the general construction, but the handling of your exact product matters. A guide that has been partly removed cannot be repositioned reliably as though it were an intact counting grid.
Rinse a soluble guide only as the materials allow
A water-soluble counting guide is removed with water according to its product instructions. Do not borrow a temperature or soaking time from another brand or from an unrelated soluble stabilizer. Check the garment care label and your thread test before wetting the finished motif. If the required process is incompatible with the item, that guide was not a suitable choice; this is why the preliminary scrap test matters.
Support the fabric during rinsing and avoid scrubbing the little crosses as a shortcut. Follow the product directions for removing residue, then dry the item as its materials require. Do not describe a guide as completely removed merely because it is no longer easy to see while wet. Assess the cloth after drying and compare it with the test. The DMC references below describe a specific soluble guide; they do not establish universal instructions for every film, canvas or stabilizer sold under similar names.
Inspect and care for the embroidered area
Once the temporary material is removed, check that the crosses lie on the base cloth and that no loose guide strands remain caught around the outline. Inspect the reverse for tails and accidental stitching through extra layers. Let the item settle flat before judging its shape. If you press it, follow the fabric and thread care requirements and protect the stitch relief rather than crushing it directly under a hot iron.
Use care appropriate to the least tolerant material in the finished piece. A washable garment does not automatically make every added thread, lining or adhesive suitable for the same treatment. Keep a record of your floss choice and guide type, especially for a gift. Avoid promising that a small motif is permanent, colorfast or suitable for repeated machine washing without evidence from the actual materials. A brief care note is more useful than an unsupported durability claim.
Check the PDFs and understand what was validated
The supplied files use lettered squares for whole crosses and leave the background unstitched. Their legends list generic colors rather than manufacturer thread numbers. Digital checks compare grid dimensions, occupied cells, color totals and agreement between each PDF and the exact preview. The mountain has 44 crosses and the diamond row has 37, but matching totals alone cannot confirm that your stitches are in the correct places.
No physical stitch test on clothing has been performed for these two designs. The generated photos are illustrative presentations. Use the PDF as the placement reference and make a real scrap test with your chosen fabric, guide and cotton before stitching a valued item. Download the files below after checking the measurements. If you prefer a project without temporary canvas, the printable bookmark patterns offer a counted project where the Aida remains in the finished piece.
Questions about moving a counted pattern onto plain fabric
Must the design be traced first? No, a temporary counting grid lets you follow the chart directly. Can any soluble embroidery stabilizer replace counted canvas? Not automatically; it must provide the regular counted openings you need and have compatible removal instructions. Can you use ordinary Aida and pull it away? Do not assume so: choose material intended for removal or leave the Aida as a visible patch instead.
Does changing the printed chart size change the garment motif? No, the guide count sets the stitched size. Are the shown colors compulsory? No, test your own physical floss and keep useful contrast. Can a beginner start on a favorite shirt? A scrap or expendable item is a better first trial because tension, penetration and removal introduce extra variables. Browse the free pattern library for more motifs, and choose a design whose stitch density and dimensions suit the fabric rather than only its appearance in a photograph.
Exact charts and free PDF downloads
Pocket Mountain Motif
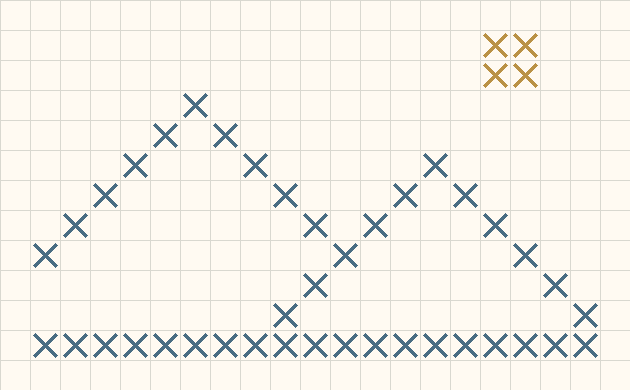
21 × 13 · 44 full crosses
Open Diamond Row
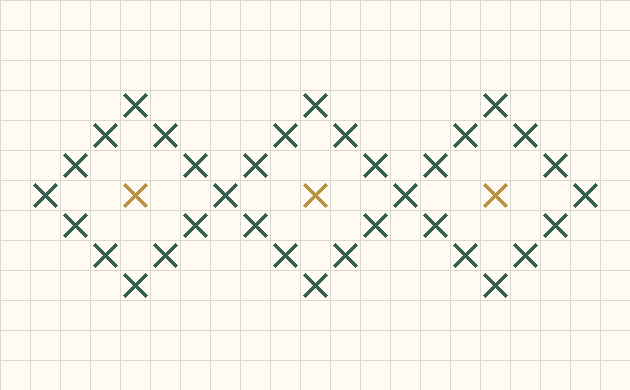
21 × 13 · 37 full crosses
Material references
Cross stitch fabric size calculator · Download the original pocket mountain motif pattern
Examples, diagrams and planning estimates are original Cross Stitch Creator content.