
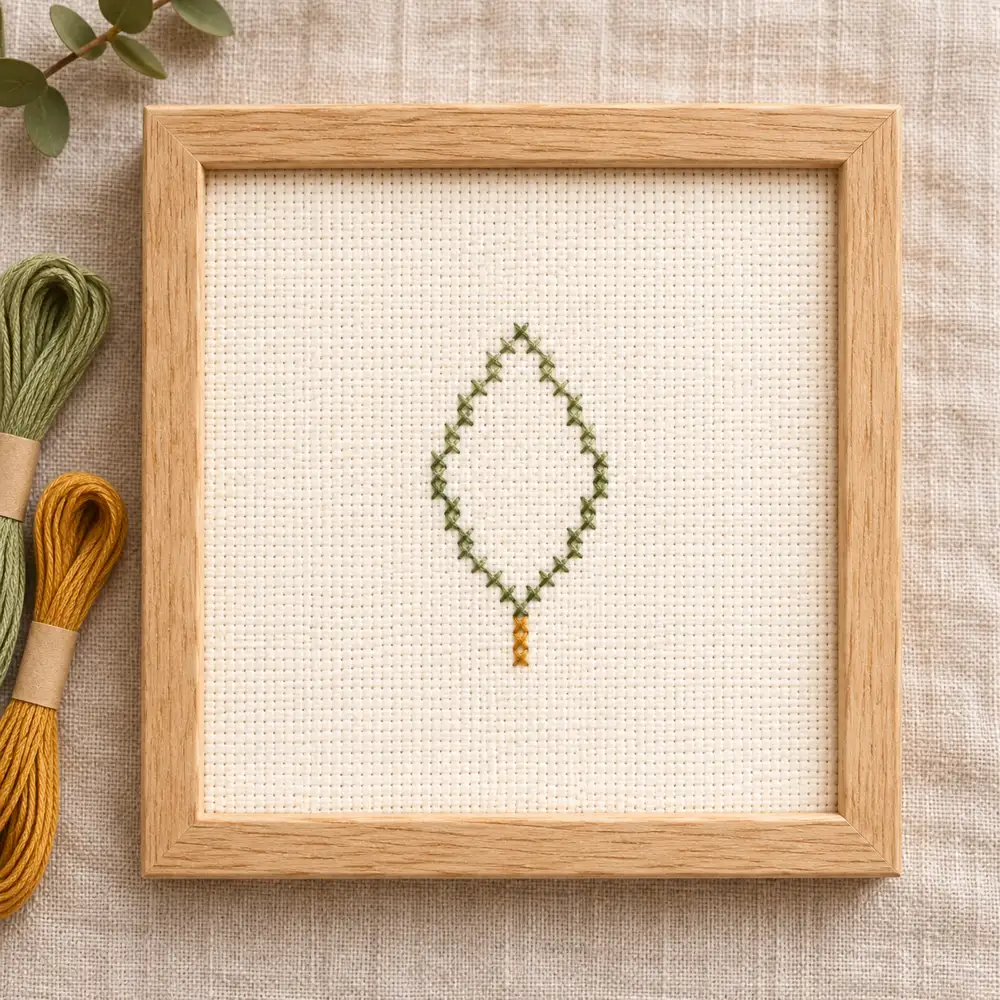
Cross stitch is a form of embroidery, so the useful choice is usually between counted cross stitch and a freehand or surface-embroidery project. Both can use a needle and stranded cotton, but they ask you to follow different kinds of information. This guide compares those choices through two original leaf studies: an open outline and a filled silhouette. Both use full crosses, the same fabric count and the same outer dimensions. Their different stitch totals make the practical trade-offs visible. The exact previews and free symbol PDFs are at the end; the square styled photographs are illustrations, not charts to copy.
Separate the craft family from the individual technique
Embroidery decorates a ground material with stitches. Cross stitch belongs within that family; it is not the opposite of embroidery. In everyday shopping language, an “embroidery kit” often means a surface-embroidery kit with a transferred drawing and several stitch types. That label is convenient but incomplete. Read the contents and the instructions before buying. A counted kit, a printed cross-stitch kit and a freehand outline kit can all legitimately be described as embroidery.
Construction sewing has another primary job: joining, shaping or finishing fabric. A running stitch may join a seam in one project and decorate a surface in another. The movement alone does not tell you the purpose. For your first purchase, ask whether you want to build a picture from counted cells, follow drawn curves or assemble an object. Our counted cross stitch explanation develops the first option without assuming that you already know chart notation.
Choose the kind of instruction you enjoy following
A counted cross-stitch chart assigns a position to each cross. Rows, columns, symbols and empty cells describe the design. You normally transfer that information by counting the fabric rather than tracing a printed outline. Surface embroidery often uses a drawing on the cloth as a placement guide, with separate instructions for stitch direction, length and filling. A curved line can be followed with stitches of changing length instead of being converted into square cells.
Neither system removes judgment. Counted work still needs even tension and careful starts and finishes. Freehand work still benefits from clear reference points and a planned sequence. If you enjoy checking addresses and completing small units, try counted work first. If you prefer following a flowing drawing and adjusting individual stitches, a simple outline embroidery kit may suit you. Do not choose a dense botanical image merely because its packaging says beginner; inspect how many decisions it actually requires.
Match the fabric and needle to the technique
For these two leaf studies, use 14-count Aida, two working strands of divisible cotton and a blunt tapestry needle that carries the thread comfortably through the existing holes. Aida gives a visible framework for equal crosses. This is a starting setup, not a universal prescription for every embroidery project. The Aida-count guide explains how a different count changes the physical size.
Surface embroidery on closely woven cotton usually needs a needle capable of piercing the cloth at the desired position. A blunt needle intended for ready-made holes may be awkward there. Conversely, repeatedly piercing the bundles of Aida instead of using the corner holes can distort a counted cross. Choose the needle from the fabric and thread together. If you want counted crosses on an ordinary garment, the removable-canvas guide explains a separate support method; do not assume a garment already has an even, countable grid.
Compare size, density and time separately
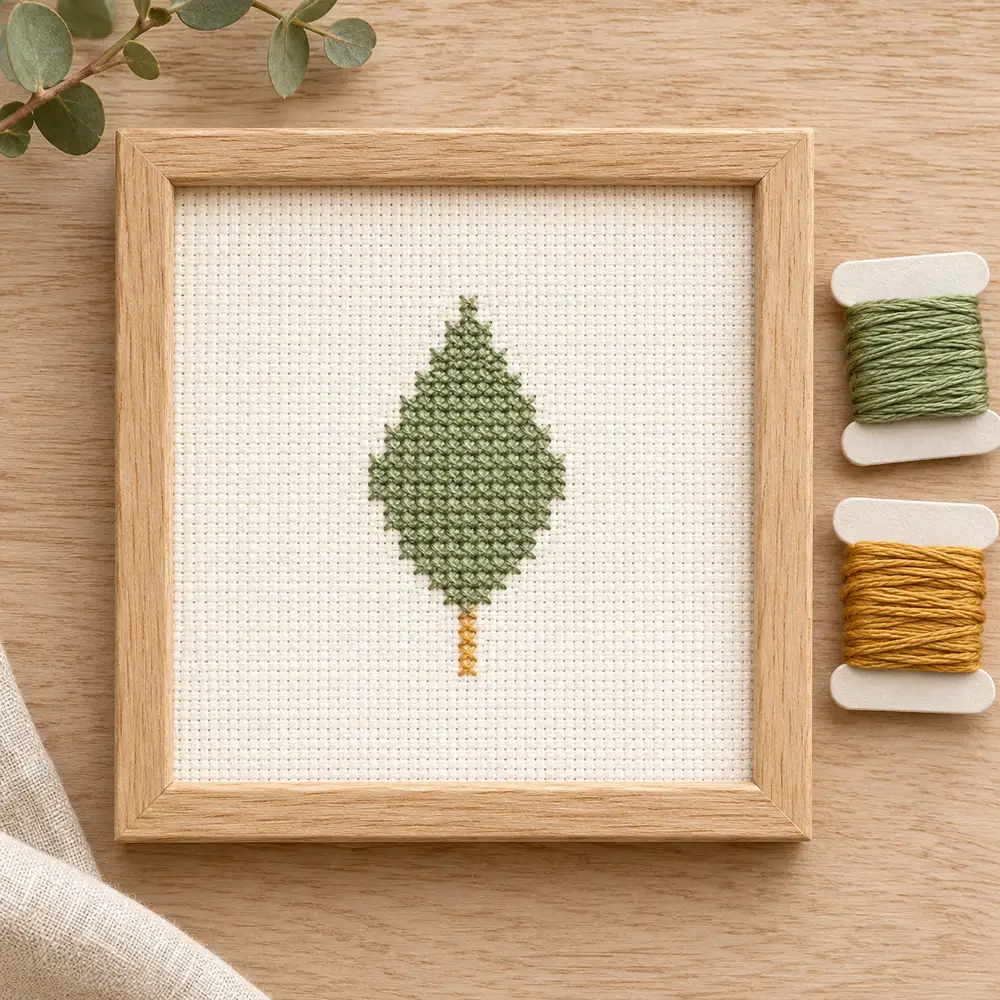
Both supplied charts contain 31 columns and 31 rows. The actual stitched outline, including the stem, occupies 13 columns by 20 rows. On 14-count Aida the complete chart area measures about 5.62 cm square, while the occupied design measures about 2.36 × 3.63 cm. The open version uses 33 crosses; the filled version uses 116. Identical outside dimensions therefore do not mean identical amounts of work.
The difference is 83 interior crosses. It is not an instruction to multiply your finishing time by 116 divided by 33: reading the outline, starting threads, checking positions and mounting the cloth also take time. Time a comfortable practice session if you need a personal estimate. Compare small-project planning with the floss estimator, entering the correct stitch total. A large empty chart can be quicker than a smaller dense picture, but counting across empty space introduces its own demands.
Prepare one controlled comparison
Use two pieces of the same fabric and the same two thread colors if you want to compare the studies fairly. Green A is generic palette reference #52765A; ochre B is #B88C4B. These are digital color references, not verified manufacturer floss numbers. Select real threads against the cloth in daylight and keep their labels. Using a very dark cloth for one sample and pale cloth for the other would also change visibility, so it would no longer be a density-only comparison.
Allow handling and finishing fabric outside the full chart. Adding 3 cm to every edge of the 5.62 cm chart gives a working square of about 11.62 cm on 14-count cloth; a hoop or chosen mount may require more. The PDF also gives a more generous alternative of three inches per edge. These are different allowances, not interchangeable units. Use the fabric calculator before cutting, and keep both pieces large until their final mounts are decided.
Read the open leaf as crosses, not a line stitch
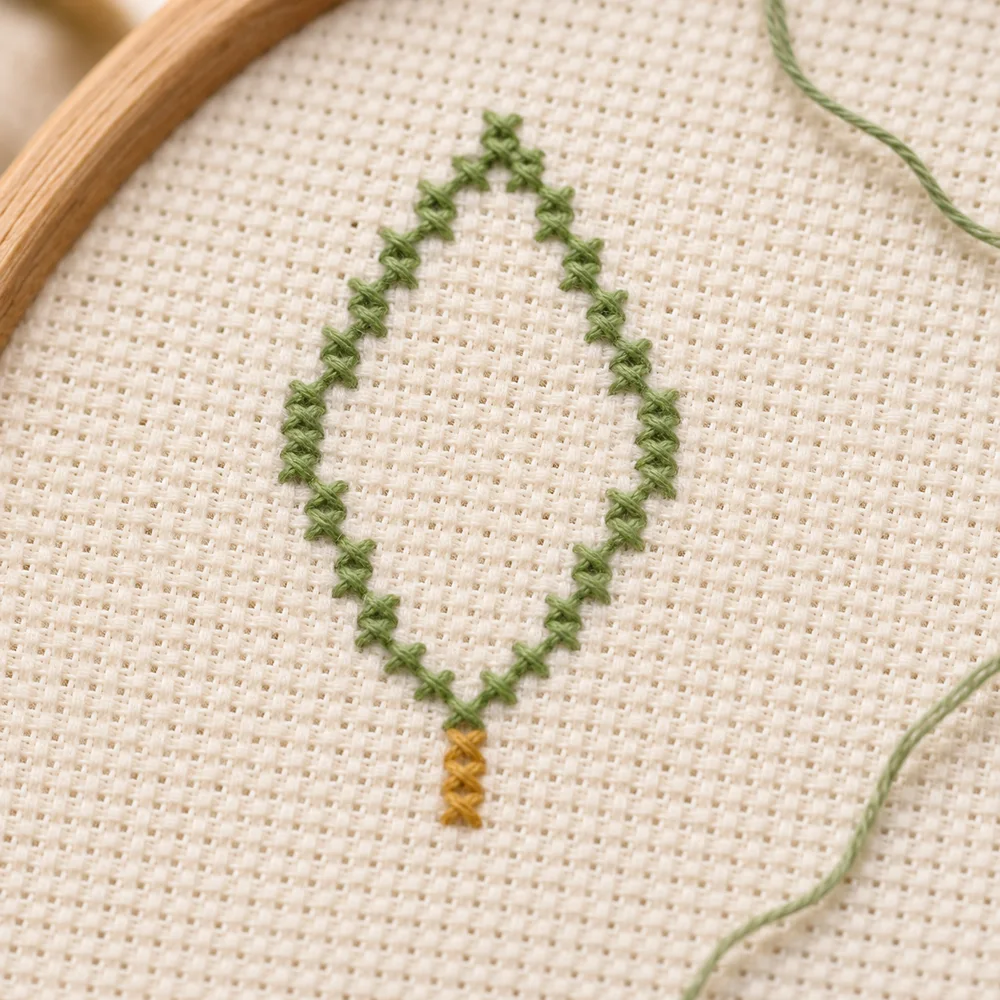
Open Leaf Study Mini contains 28 green crosses and five ochre crosses. Its green top is column 16, row 6, and its green bottom is column 16, row 20. Between those tips, the left and right boundaries step outward and inward. At rows 12, 13 and 14, the green crosses sit at columns 10 and 22. The ochre stem continues down column 16 from rows 21 through 25.
Every marked cell is a complete X. Do not replace the diagonal-looking boundary with one long straight stitch, backstitch or a satin stitch. Those would be different techniques and would no longer match the supplied chart. Count each boundary position against the center column and nearby completed stitches. The five stem crosses sit below the green tip without an empty row. For the physical needle movements, use the first-cross tutorial; this comparison focuses on choosing and reading the project.
Keep the open interior genuinely empty
The open leaf has 83 unstitched interior cells inside the silhouette used by its filled partner. Those cells are not white thread, missing stitches or an instruction to add a vein. On the three widest rows, eleven empty cells lie between the two green boundary crosses. Mark completed symbols on a working chart rather than coloring every square inside the outline. A chart highlight should record what you actually stitched.
Avoid a long dark carry straight across the open center. On pale fabric it can show from the front, even when the front has no misplaced cross. Travel under nearby completed stitches only when that route is short and secure; otherwise finish the thread and begin again near the next section. Keep the upper diagonals consistent on both sides. If the tip appears off-center, check its column before tightening the surrounding thread. Excess tension cannot move an incorrectly placed stitch into the right cell.
Build the filled leaf in measured rows
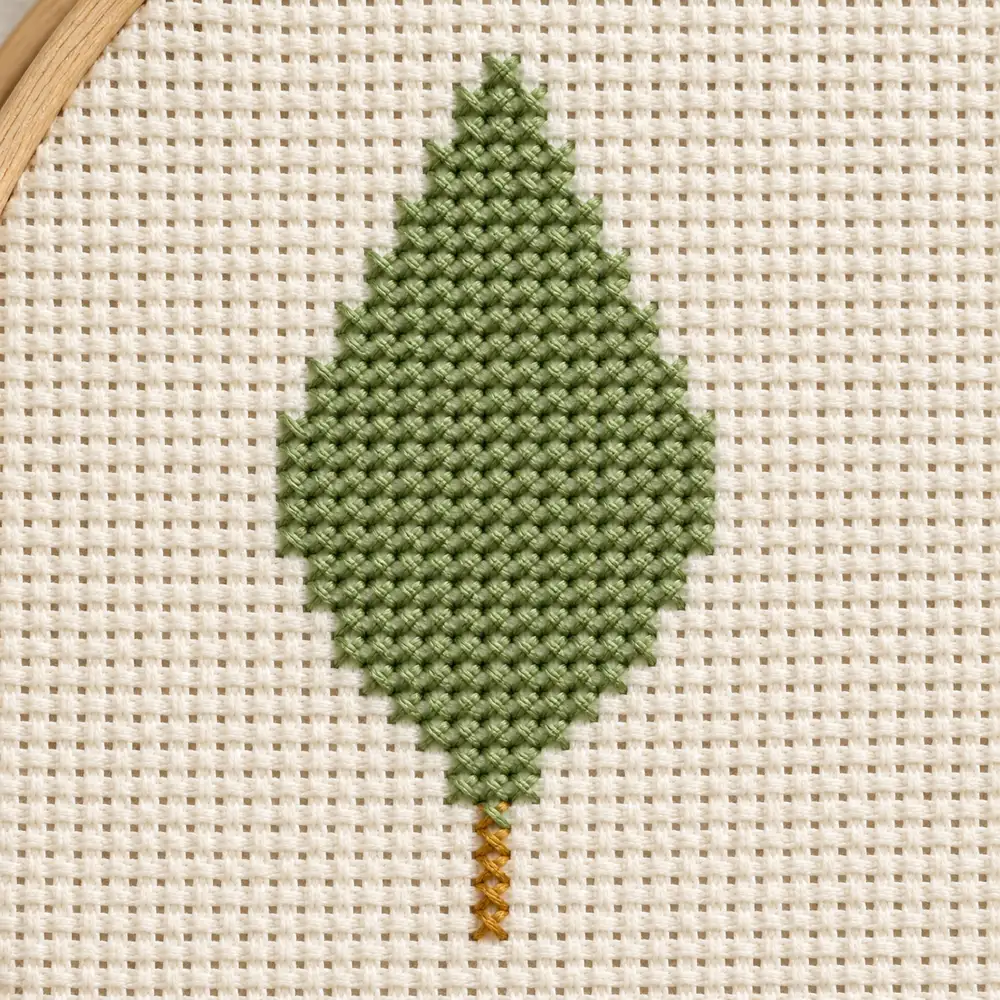
Filled Leaf Study Mini uses 111 green crosses and the same five ochre stem crosses, for 116 in total. The green row widths from row 6 through row 20 are 1, 3, 5, 7, 9, 11, 13, 13, 13, 11, 9, 7, 5, 3 and 1. Each row is centered on column 16. These widths describe occupied cells, not numbers of holes to skip. The longest rows begin at column 10 and end at column 22.
Work a small group and compare it with the chart before continuing. You can complete individual crosses or work a row of lower diagonals and return with the upper diagonals, provided the top direction stays consistent. The chart-reading guide helps separate symbols from the grid lines. Keep the same thread setup as the open study at first; increasing strand count here would introduce another variable instead of showing the effect of filling alone.
Decide what the samples actually teach you
The open study asks you to place separated boundary cells accurately and manage thread behind empty cloth. The filled study adds a repeated row rhythm and exposes changes in tension across a solid area. A smoother-looking filled patch does not prove that you would prefer every counted project. A small outline is also not a test of all freehand embroidery: both supplied leaves are counted full-cross patterns.
After stitching, compare three things: how easy it was to find your next position, how comfortable the thread handling felt, and which finished surface you prefer. Record those observations with the fabric count and strand number. If the open leaf felt fiddly, a compact filled motif may be a better next counted project. If you wanted to draw continuous curves instead, choose a separate surface-embroidery exercise with instructions for the actual line stitch. The beginner pattern guide offers a way to assess difficulty beyond the label.
Change one variable when you adapt a design
To try another fabric count, keep the chart unchanged and recalculate both dimensions. The full 31-square grid becomes about 4.92 cm on 16-count fabric or 4.37 cm on 18-count. The stitches become physically smaller; printing the PDF at a different scale does not have that effect. To change colors, preserve enough contrast between the leaf, stem and ground fabric and write your substitutions beside A and B.
Adding a vein, a border, beads or a stitched background creates a new version with different counts and possibly different spacing. Make those changes on a duplicate in the blank-grid tool, then recalculate before stitching. Do not fill the open leaf by intuition and continue claiming its total is 33. The supplied filled chart is the checked alternative. Save the original so that an experiment can be compared against a stable reference rather than overwriting your only readable instructions.
Check the files and plan a practical finish
The free static PDFs each have two pages: a numbered symbol chart followed by its legend and notes. The separate exact previews show the same occupied cells. Their colors are generic references, while the square styled images show an illustrative presentation. Use the chart for coordinates. The digital review checks every occupied position, symbol, color count and measurement calculation; it is not a claim that these samples have been physically stitched or washed.
Before mounting, check both green tips, the three widest rows and the five-cell stem. The green count alone cannot reveal every shifted stitch. Secure the reverse, test cleaning suitability for your actual materials and press from the back with appropriate protection. Keep the design clear of the mount opening and allow fabric to attach at the back. The framing and margins guide helps avoid trimming away the cloth needed for a neat finish.
Common questions and free leaf downloads
Is cross stitch easier than embroidery? It depends on the project and the kind of guidance you prefer. A clear counted mini can be easier to follow than a complicated freehand design, but dense counted charts can be demanding. Can the same cotton floss serve both crafts? Often yes, when its thickness and behavior suit the instructions and fabric; using the same thread does not make the needle or placement method interchangeable.
Can these leaves be sewn onto a bag? You can mount a finished cloth patch if its edges and attachment are planned, or follow the removable-canvas method for direct counted work. Do not stitch through a bag lining accidentally. Which leaf should come first? Try the open version for a short boundary exercise, or the filled version if you prefer connected rows. Download both exact charts below, keep their legends with them and browse the free pattern library for a next project that matches what you learned.
Exact charts and free PDF downloads
Open Leaf Study Mini
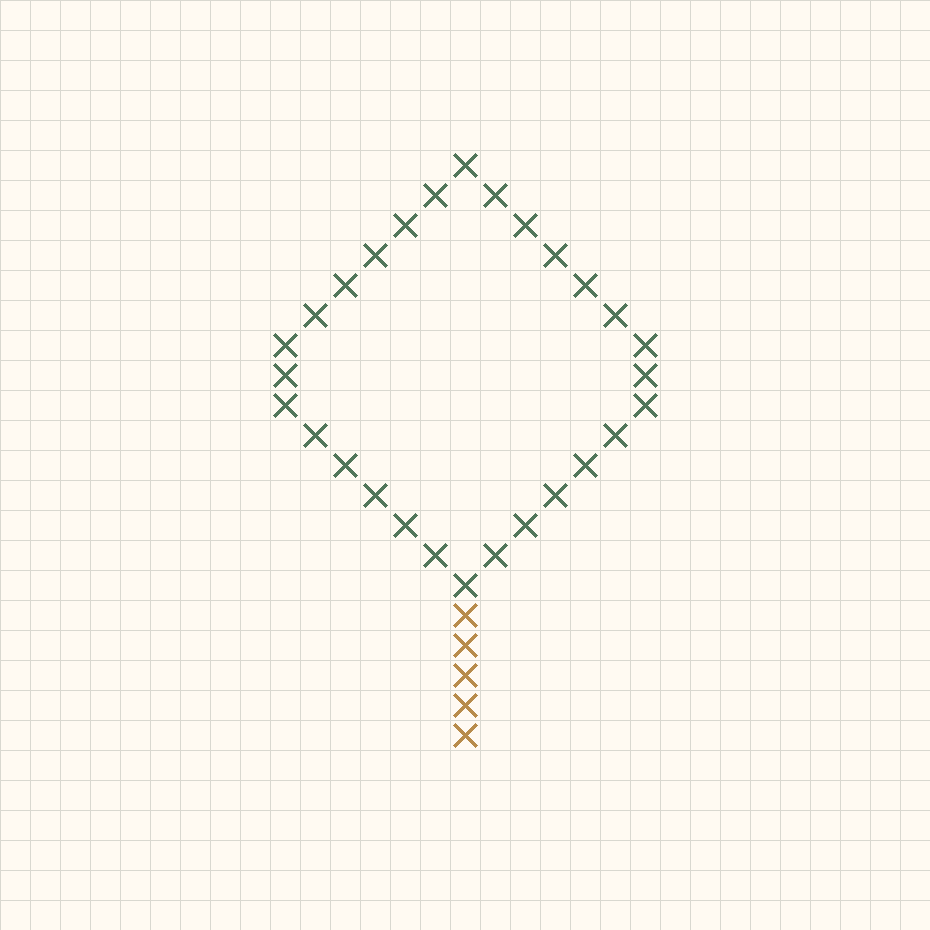
31 × 31 · 33 full crosses
Filled Leaf Study Mini
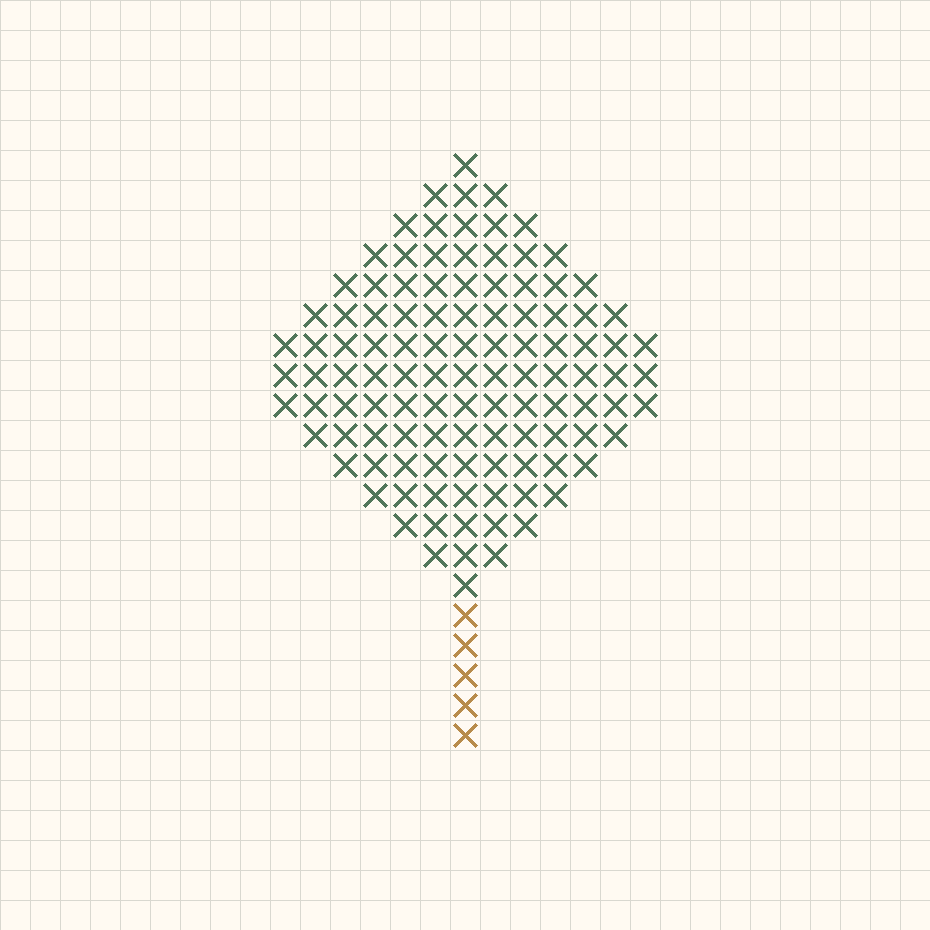
31 × 31 · 116 full crosses
Blank cross stitch grid maker · Download the original open leaf study mini pattern
Examples, diagrams and planning estimates are original Cross Stitch Creator content.