
Learning a few embroidery stitches is easier when each one has a clear job. Full cross stitches fill a shape; backstitch adds a narrow line; running stitch can mark a temporary guide; and whipstitch can join a finished piece to a backing. This guide introduces all four through two original counted projects: Rain Umbrella Mini and Sealed Envelope Mini. Their downloadable charts use full crosses and backstitch only. The temporary guides and finishing seams are separate, optional operations. Read the steps first, then find the exact previews and free PDFs below the final section. The square editorial images illustrate the ideas; the counted charts determine the actual stitch positions.
Give each stitch a specific job
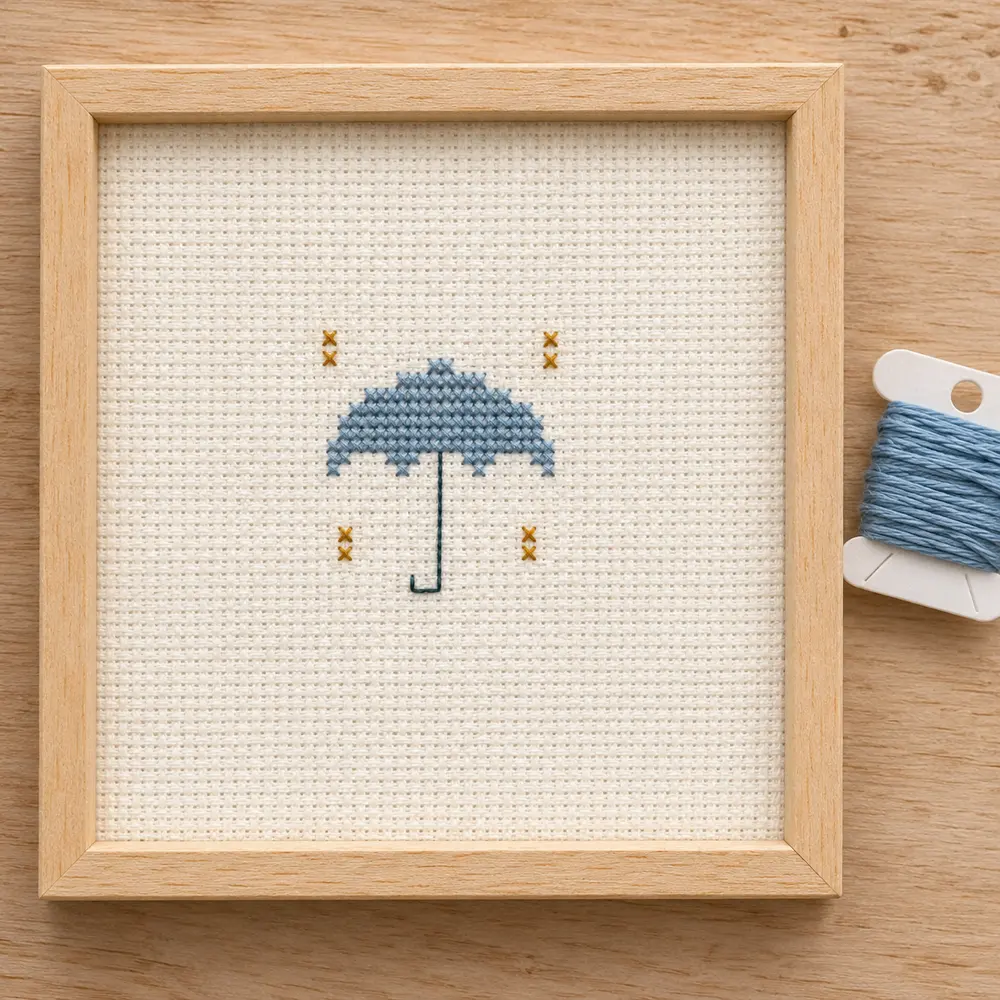
A full cross covers one fabric square with two diagonal passes. Repeating crosses makes a filled area such as the blue canopy of the umbrella. Backstitch travels between fabric holes, producing a narrow line that can turn a simple colored rectangle into a recognizable envelope. It is a separate stitch, not another full cross squeezed into the same cell.
Running stitch alternates visible and hidden lengths along a line. Here it is useful for removable center guides or temporary placement, not for drawing the finished motifs. Whipstitch passes over an edge to attach layers. It belongs to the finishing stage and does not replace the stitches shown in the chart.
You do not need to learn an entire stitch dictionary before beginning. Try the umbrella first if you want a modest amount of filling and a short angular handle. Choose the envelope if repeated rows feel comfortable and you want to practice an outline with corners. Our [cross stitch and embroidery comparison](/blog/cross-stitch-vs-embroidery) explains where these techniques overlap, while the [first cross stitch tutorial](/blog/how-to-cross-stitch) gives a slower introduction to making the X itself.
Prepare fabric, needles and three thread colors
Use 14-count Aida for the worked examples. Start with two separated strands of cotton embroidery floss for the full crosses and one strand for the backstitch. Those are working strands, not two complete six-strand lengths. Test the coverage on a spare edge before committing to the project; fabric, floss and personal tension affect the appearance.
Each design has two cross-stitch colors plus a third outline color. The umbrella uses dusty blue, ochre and a deep blue-green outline. The envelope uses muted sage, terracotta and the same deep outline. The PDFs show generic color swatches and digital values, not manufacturer thread numbers. Select actual floss by comparing the skeins together in daylight. A dark outline needs enough contrast to remain visible over the filled envelope.
A blunt tapestry needle suits the existing Aida holes. Choose an eye that carries the thread without excessive friction. For a backing seam through felt or another material without ready-made holes, a suitably sized sharp sewing needle may be more practical. Keep scissors, a spare fabric scrap and the printed chart nearby. The [cross stitch supplies guide](/blog/cross-stitch-supplies) explains these choices without requiring a large starter kit.
Separate chart cells from grid-hole coordinates
Both charts occupy a 31 × 31-cell square. The full-cross chart numbers columns and rows from 1 to 31. A symbol inside a cell means one complete X. A blank cell stays empty. The center cell is column 16, row 16; it is not necessarily a stitched cell in both designs.
Backstitch is located on the holes around those cells. Its coordinate system starts at hole (0,0) in the top-left corner: x increases to the right and y increases downward. Consequently, cell 16,16 lies between holes x=15 and x=16, and between y=15 and y=16. This distinction prevents an outline from shifting one square away from its filling.
The backstitch instructions list path ends and turns, but you must insert the needle at every intervening hole. A line from (15,13) to (15,24) has eleven short segments, not twelve and not one long stitch. Count the spaces between the holes. The [counted cross stitch explanation](/blog/counted-cross-stitch-explained) and [chart-reading guide](/blog/print-read-cross-stitch-chart) help if coordinate systems and symbols are new to you.
Make consistent full crosses before adding outlines
Begin with a short, manageable length of floss. Separate the strands individually, bring the two working strands together and thread the needle. Secure the beginning on the reverse using a method suitable for your thread and design; leave enough tail to weave under nearby completed stitches when needed.
For one cell, bring the needle up at the bottom-left hole and down at the top-right hole. Complete the X by coming up at the top-left hole and going down at the bottom-right. The second pass sits on top. You may reverse that direction throughout the project, but keep the upper diagonal consistent across all crosses.
Along a filled row, work a sequence of first diagonals and return with the crossing diagonals if that feels convenient. Complete small isolated groups separately rather than carrying dark thread across large blank areas. Pull until the floss rests on the fabric, without making the holes visibly wider. Finish the full-cross areas before backstitch so the later crosses cannot cover or distort the narrow outline. Pause after a few rows to compare their lengths with the chart.
Work short backstitches through the marked holes
Practice on spare fabric before working over the filled envelope. Imagine three consecutive holes on a horizontal line: (2,2), (3,2) and (4,2). Bring the needle up at (3,2), take it back down at (2,2), then come up at (4,2) and return down at (3,2). The visible segments join end to end, even though the needle repeatedly goes backward on the front.
Use one working strand for the outlines in these projects. Let it lie flat rather than pulling hard enough to cut into the crosses underneath. When passing through a hole already used by a full cross, guide the needle beside the existing floss instead of splitting it deliberately. If the eye will not pass easily, check the needle and thread rather than forcing the hole.
At a corner, change the direction of the next short segment. You may end a thread and restart a path when that makes the reverse neater; the visible line should still match the chart. Do not stitch an entire canopy handle or envelope edge as one long floating thread. Short segments follow the fabric more securely and preserve the counted geometry.
Stitch the umbrella canopy and four raindrops
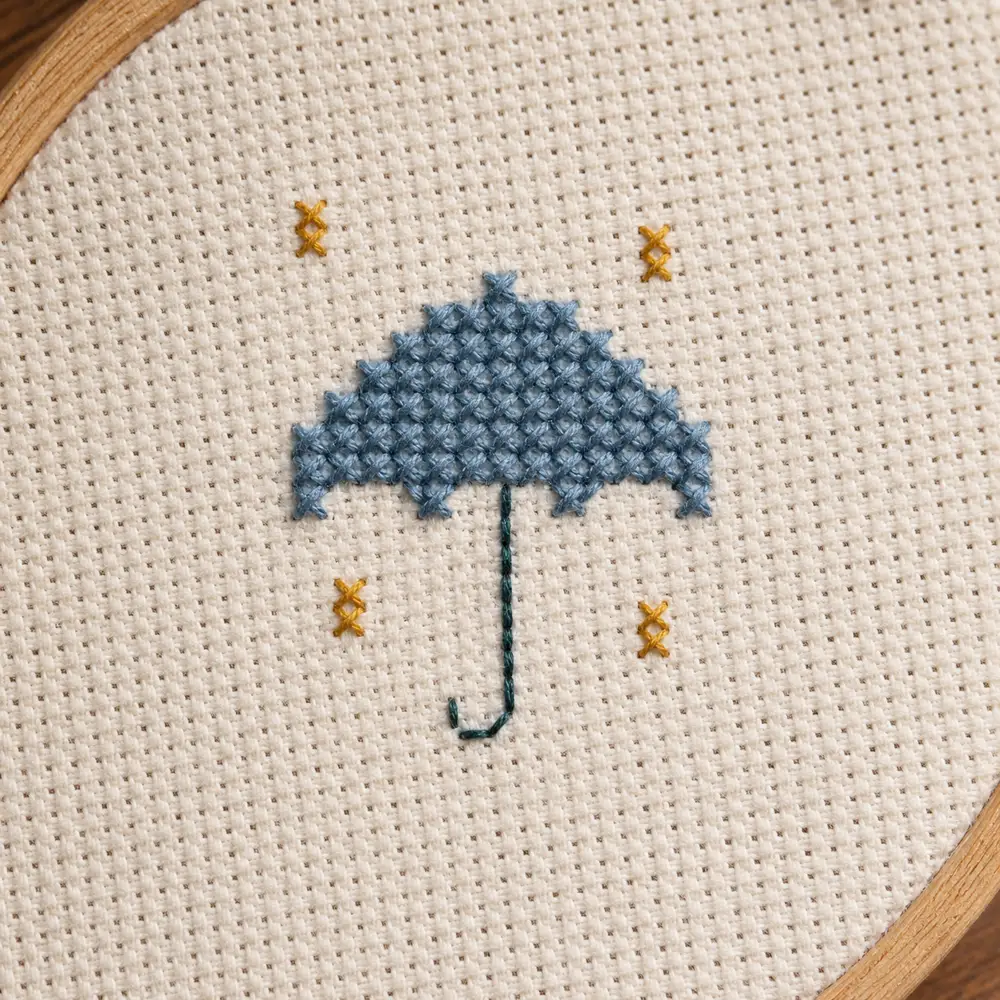
Rain Umbrella Mini contains 95 full crosses: 87 dusty blue and eight ochre. The canopy starts on row 7, centered on column 16. Its successive filled row widths are 3, 7, 11, 15, 19 and 21 crosses on rows 7 through 12. These six rows account for 76 blue crosses.
Row 13 adds eleven more blue crosses in three groups: columns 6–8, 14–18 and 24–26. Count the gaps carefully. Filling across those gaps changes the lower edge and adds stitches that do not belong to the design. The chart makes those empty spaces visible, so use it rather than estimating from the editorial photograph.
The ochre raindrops are four vertical pairs. Stitch column 7 on rows 5–6, column 25 on rows 5–6, column 5 on rows 17–18 and column 27 on rows 17–18. Check each pair independently from the chart grid. They are separated from the canopy; a long thread carried behind the pale unstitched fabric may show through. Secure and restart as appropriate rather than treating all four drops as one continuous route.
Add the umbrella handle with sixteen backstitches
The umbrella handle uses the third, dark outline color. Its main shaft follows holes (15,13) to (15,24), making eleven vertical backstitches. The bottom then runs from (15,24) to (12,24), making three horizontal stitches. The short return runs from (12,24) to (12,22), adding two vertical stitches. The total is sixteen.
Follow the line chart with zero-based hole labels, not the numbered full-cross cells. Before stitching, locate the shaft's upper hole below the central canopy group. Trace the intended route with a needle without drawing thread through if that helps you see the change in coordinate system.
The handle is deliberately angular. Do not round its corners by adding diagonal stitches or extra crosses. The photographic illustrations may soften small details; the exact preview and PDF preserve the intended shape. After finishing, verify the 11 + 3 + 2 segments and check that the open area around the handle remains unstitched. You now have a compact example of how a thin line can add information that would look heavy if made from filled crosses.
Fill the envelope and its terracotta seal
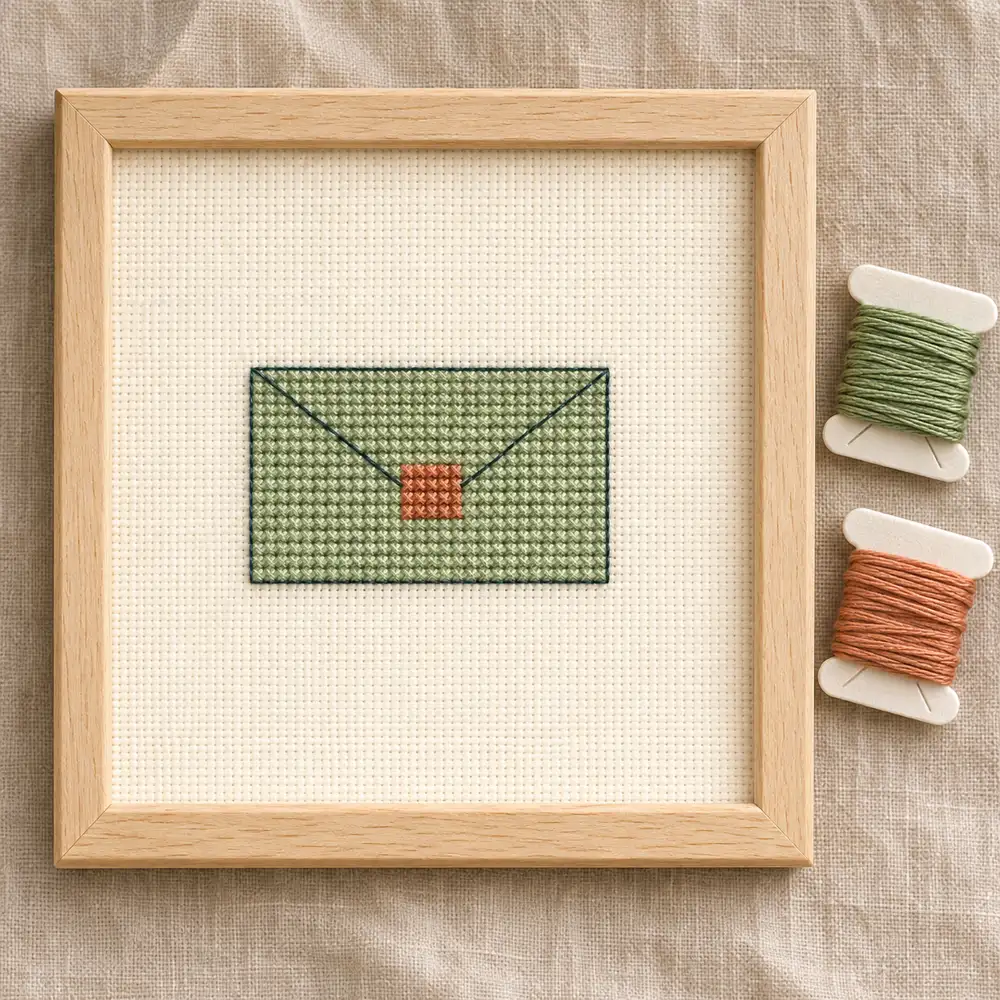
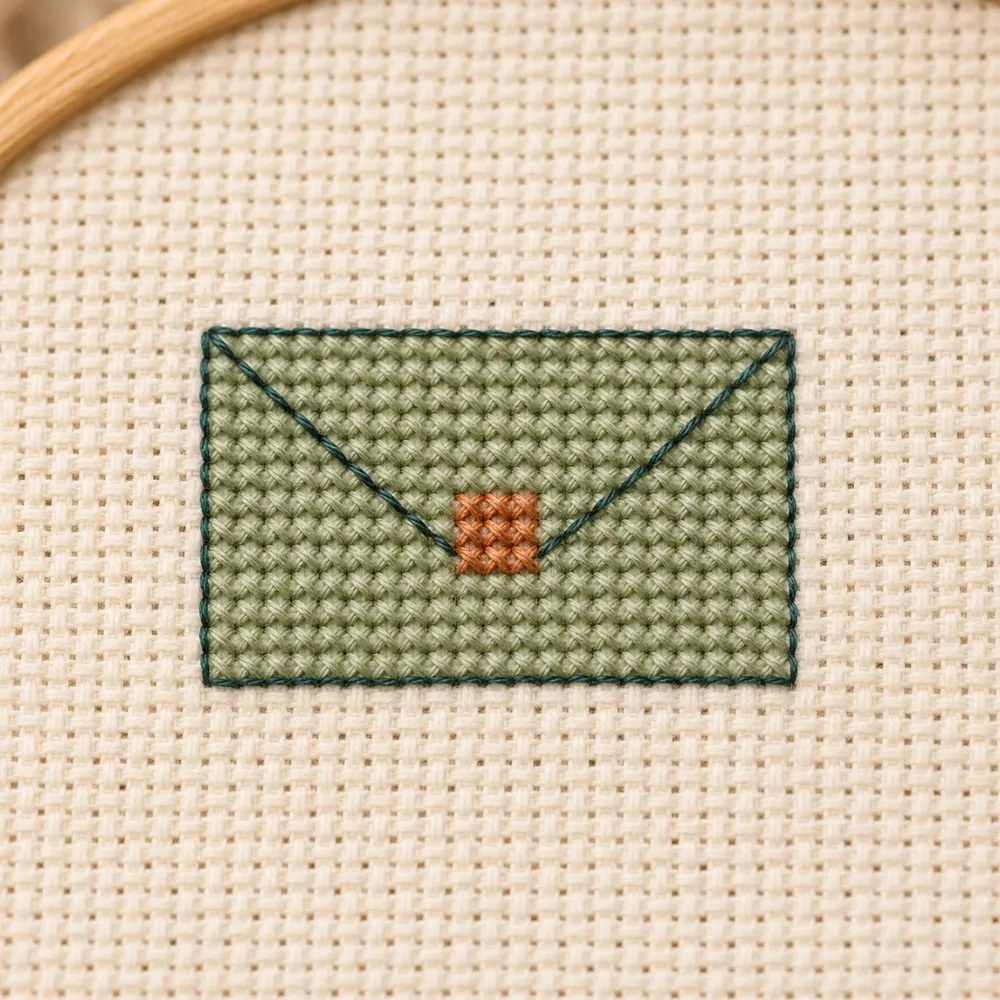
Sealed Envelope Mini contains a rectangle eighteen cells wide and twelve cells high. It covers columns 7–24 and rows 10–21, for 216 full crosses in total. Most are muted sage. A central terracotta seal occupies columns 14–17 and rows 14–17, a four-by-four block of sixteen crosses. The remaining 200 crosses are sage.
Work the upper rows first or start near the center and expand outward; either approach is valid if you keep the coordinates correct. On the four rows that contain the seal, there are seven sage crosses, four terracotta crosses and seven sage crosses. This 7 + 4 + 7 structure is a useful check against an accidental extra column.
The seal replaces the underlying sage cells. It is not a second layer of crosses stitched on top of a completed green rectangle. Mark completed chart cells as you work, keeping a clean copy for reference. Finish and secure the cross-stitch threads before adding the flap lines. The [free pattern library](/patterns) offers smaller projects if the repeated filling feels too much for a first session.
Outline the envelope and count the diagonal flap lines
The outer rectangle follows holes (6,9), (24,9), (24,21), (6,21), then back to (6,9). Its sides contain 18, 12, 18 and 12 short segments, totaling sixty backstitches. Close the rectangle once. Returning to the starting corner does not mean retracing the first edge.
Two diagonal paths form the flap: (6,9) to (15,18), and (24,9) to (15,18). Each path moves one hole horizontally and one hole vertically at each step, producing nine diagonal backstitches. Together they add eighteen, so the complete envelope uses 78 backstitches alongside its 216 full crosses.
The diagonal lines pass over the existing filling. Their meeting point is below the terracotta seal. Do not stop them at the seal just because a generated illustration suggests that arrangement. A diagonal backstitch is one line segment, not a half-cross instruction for every touched square. Check the two equal diagonal lengths and the rectangular border before securing the final thread. An extra pass along an already finished edge makes that side darker and changes the specified stitch count.
Use running stitch and whipstitch for supporting tasks
For a temporary running-stitch guide, use a contrasting, removable thread that is unlikely to shed or leave color. Bring the needle up and down at regular intervals along an intended center or placement line. Keep the tension light. A guide outside the stitched area is often easier to remove than one trapped beneath completed crosses. Test any marking thread first and remove it before final washing or mounting.
Running stitch is not included in either pattern's stitch totals. It should not become an extra visible line across the finished motif. If you prefer folding the fabric gently to find the center or counting from a marked margin, a sewn guide is optional.
For a small felt-backed ornament, complete and press the embroidery as appropriate, turn the fabric edges under and hold the backing in place. Use whipstitch by taking successive small bites through the folded edge and backing, passing the thread over the edge each time. Keep the bites evenly spaced and avoid pulling the edge into a tight cord. This joins layers; it is different from winding thread around an existing decorative stitch. Try the seam on scraps before trimming your finished piece.
Check counts, thread choices and common mistakes
The two projects contain 311 full crosses altogether, plus 94 backstitches. Those totals remain separate because the stitches use different paths and working-strand counts. The cross-stitch floss estimates do not include the additional outline thread, starting tails or unusually long carries. Allow separate thread for the backstitch and for any optional finishing seam; the [floss estimator](/tools/floss-estimator) is a planning aid for the crosses, not a precise measure of these added lines.
If an outline is shifted, compare hole coordinates before removing the whole filled area. If one side looks thicker, look for a repeated segment or two working strands where only one was intended. If the fabric puckers, check the tension of both the crosses and the later outline. A dark trail through a blank area usually calls for a shorter carry or a fresh start on the reverse.
The chart data, counts, previews and PDFs have been checked digitally. Physical stitch testing has not been performed. Printed swatches and generated pictures cannot guarantee the exact appearance of your floss, fabric or lighting. Keep the chart as the positional reference and make a small material test when changing supplies.
Plan the finished size and download the charts
At 14 count, a full 31-cell grid measures about 2.21 inches, or 5.62 cm, on each side. At 16 count it measures 4.92 cm; at 18 count, 4.37 cm. The actual motif occupies less space than that full grid. The umbrella, including its handle and drops, spans 23 × 20 cell intervals, approximately 4.17 × 3.63 cm on 14-count fabric. The envelope occupies 18 × 12 intervals, approximately 3.27 × 2.18 cm.
Changing fabric count changes size, not the number of stitches. The [Aida-count guide](/blog/choose-aida-count) explains the trade-off between a larger, easier-to-see grid and a smaller finished motif.
Add margins for the intended finish rather than cutting directly around the grid. Three inches on every side gives an approximately 8.21-inch square cut for the full 14-count grid; this is a planning example, not a requirement for every ornament. Use the [fabric-size calculator](/tools/fabric-size) and [framing-margin guide](/blog/fabric-margins-framing) before cutting.
Can you use different colors? Yes: keep enough outline contrast and retain the separate color roles. Can you omit the outline? You can, but the umbrella loses its handle and the envelope loses its identifying flap. Must you use all four stitch types? No: only full crosses and backstitch are required for these charts. The free three-page PDFs below separate full-cross symbols, backstitch hole coordinates and the legend. Follow those pages and the exact previews when stitching, then choose a backing or frame that suits your finished fabric.
Exact charts and free PDF downloads
Rain Umbrella Mini
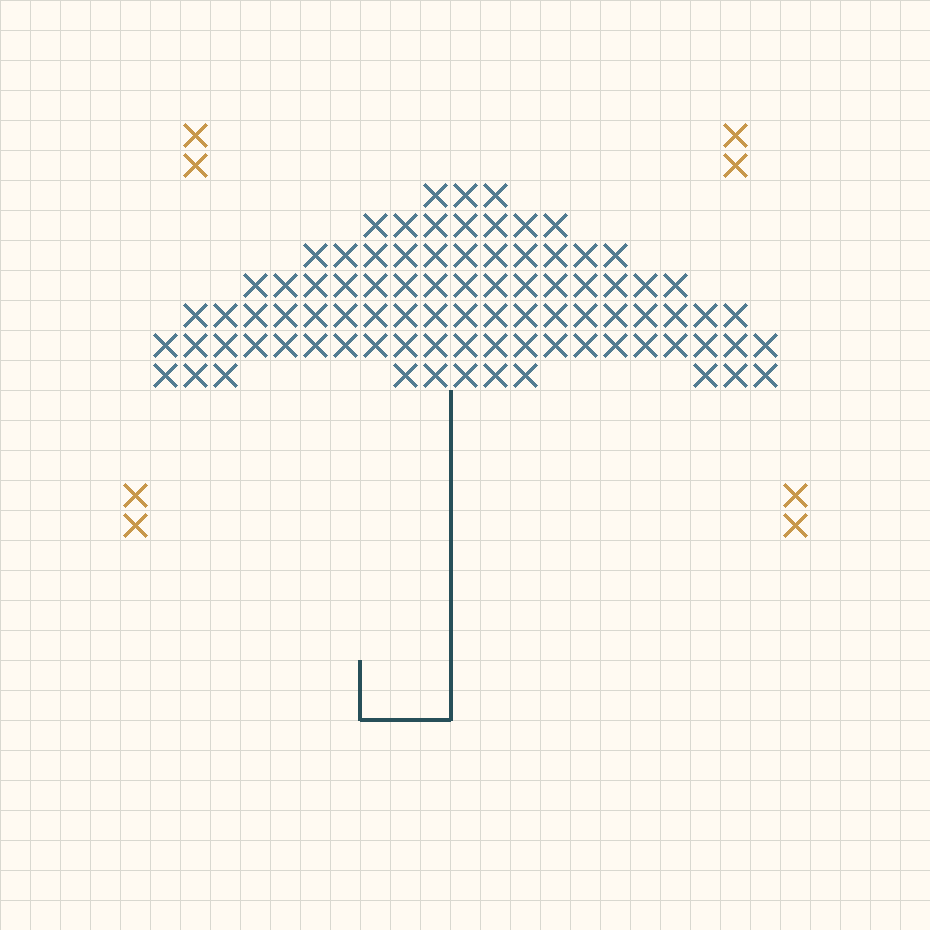
31 × 31 · 95 full crosses · 16 backstitches
Sealed Envelope Mini
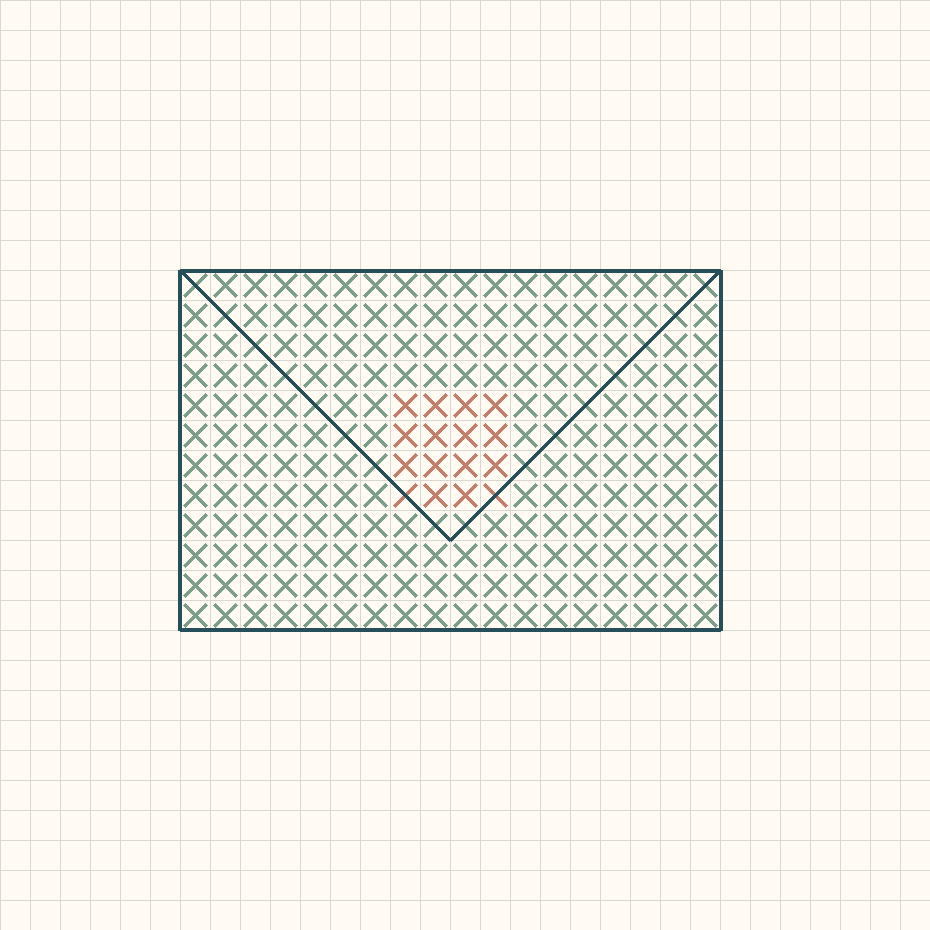
31 × 31 · 216 full crosses · 78 backstitches
Cross stitch fabric size calculator · Download the original rain umbrella backstitch mini pattern
Examples, diagrams and planning estimates are original Cross Stitch Creator content.