
The right fabric cut starts with stitch dimensions, fabric count and a finishing margin. Use the worked examples in this guide to size Aida for small turkey, pumpkin, wreath, card and bookmark charts without guessing from the preview.
Use stitch count rather than the preview size
Every counted cross stitch chart has a width and height measured in stitches. Those two numbers control the finished design. A thumbnail can look large on a phone and small on a desktop without changing the chart at all, so never estimate cloth from the displayed image. The Thanksgiving Turkey pattern is exactly 35 × 35 stitches, the mini turkey is 24 × 24, and the pumpkin is 32 × 32. Write the dimensions beside the selected fabric count before shopping or cutting. Blank chart squares inside the stated boundary are still part of the layout, while decorative whitespace around a website preview is not. Download the free PDF and confirm the dimensions in its project summary. When adapting a motif for a card, hoop or bookmark, preserve the one-square-to-one-stitch relationship. Printing a PDF at a smaller percentage only shrinks the paper symbols; it cannot reduce the number of Aida blocks the design requires.
Apply the basic fabric-size formula
For Aida stitched over one block, finished width in inches equals chart width in stitches divided by fabric count. Finished height uses the same calculation. A 35 × 35 turkey on 14-count Aida is 2.50 × 2.50 inches. On 16-count it is about 2.19 × 2.19 inches, and on 18-count about 1.94 × 1.94 inches. In centimeters, multiply inches by 2.54. These results describe the stitched design only. The cloth cut must also include a margin on the left and right, and a margin on the top and bottom. Therefore cut width equals finished width plus twice the chosen margin. Use the fabric size calculator to avoid rounding too early. Record the exact result and round the cloth cut upward to a practical measurement. A little extra fabric is easier to manage than a shortage discovered when the stitching is complete.
Add margins for the intended finish
Margin is working and finishing cloth outside the design. Its size depends on the final mount. A greeting card may need about one to one-and-a-half inches per side so the fabric can be positioned and secured behind the paper opening. A small hoop finish is safer with at least two inches per side because the outer ring must grip cloth while you center and tighten it. Conventional framing often benefits from three inches per side for lacing, blocking and handling. A bookmark may use a narrower allowance at its long edges if it will be backed and hemmed, but the finishing method should be chosen before cutting. Add the margin twice to each stitched dimension. Do not add a three-inch total when the instruction means three inches on every side. If uncertain, cut generously and mark the intended design boundary. Trimming after mounting is possible; restoring missing cloth is not.
Compare 14, 16 and 18 count with the same chart
Fabric count tells you how many Aida blocks fit in one inch. Higher count produces a smaller finished motif and finer holes. The 32 × 32 Thanksgiving pumpkin measures about 2.29 inches square on 14-count, 2 inches on 16-count and 1.78 inches on 18-count. The chart detail does not increase because the same 1,024 possible grid positions remain. Choose count for the desired physical scale, thread coverage, eyesight and stitching comfort. Two strands commonly provide useful coverage on 14-count, but thread brand, color, personal tension and fabric shade affect the result. Make a test row on an offcut. Dark fabric and 18-count may require stronger lighting or magnification. A small card does not justify a fabric that makes stitching unpleasant. If a motif must fit a narrow opening, compare a smaller chart such as the mini turkey before moving to a count you do not enjoy.
Understand evenweave and stitching over two threads
Evenweave and linen are often stitched over two fabric threads. In that case the effective count is the fabric thread count divided by two. A 28-count evenweave worked over two behaves like 14-count Aida for finished size: a 35-stitch design measures 2.5 inches. A 32-count evenweave over two behaves like 16-count Aida, and 36-count over two behaves like 18-count Aida. If you stitch over one thread, use the full fabric count and expect a much smaller motif. Specify the “over” value in the fabric size calculator; do not mentally mix fabric count with effective count. Linen threads may vary slightly in thickness even when the nominal count is stable, so measure a real inch in both directions for precision. Beginners working a compact seasonal design often find Aida easier because its blocks are explicit, but evenweave offers more flexibility for fractional placement when a chart requires it. These Thanksgiving charts use full crosses only.
Worked example: 35 × 35 turkey in a hoop
Suppose you want the Thanksgiving turkey on 14-count Aida in a small hoop. The stitched area is 35 ÷ 14, or 2.5 inches square. If you choose a two-inch margin on every side, the minimum cloth cut is 6.5 × 6.5 inches: 2.5 plus four inches across each direction. A six-inch display hoop might seem to match that cloth, but the outer hoop still needs fabric to grip and you need room to reposition the motif. A larger temporary working hoop or stitching in hand may be easier before transferring to the final display hoop. If you prefer a three-inch margin for flexible framing, cut 8.5 × 8.5 inches. Mark the fabric center at 4.25 inches from each edge. After stitching and pressing, center the 2.5-inch motif within the chosen opening. Do not trim to the display hoop until the front position and back-finishing method are confirmed.
Worked example: 24 × 24 mini turkey card
The mini turkey is 24 × 24 stitches. On 16-count Aida the motif is exactly 1.5 inches square. With a 1.25-inch mounting margin on each side, cut at least 4 × 4 inches. Plan a card window a little larger than the stitched motif, perhaps around 1.75 inches square, while keeping enough fabric hidden behind the paper. Make a paper prototype before stitching because rounded corners and mat layers change the visible opening. On 14-count the same motif is approximately 1.71 inches square, so a 1.75-inch opening would be uncomfortably tight; use a larger opening or 16-count cloth. On 18-count the motif is 1.33 inches square and leaves more visual space, but the finer holes may be less comfortable. The Thanksgiving cards guide covers mounting and mailing. Keep the 4-inch fabric square intact until the card front, window and inner cover have been dry-fitted.
Worked example: a 32 × 32 pumpkin ornament
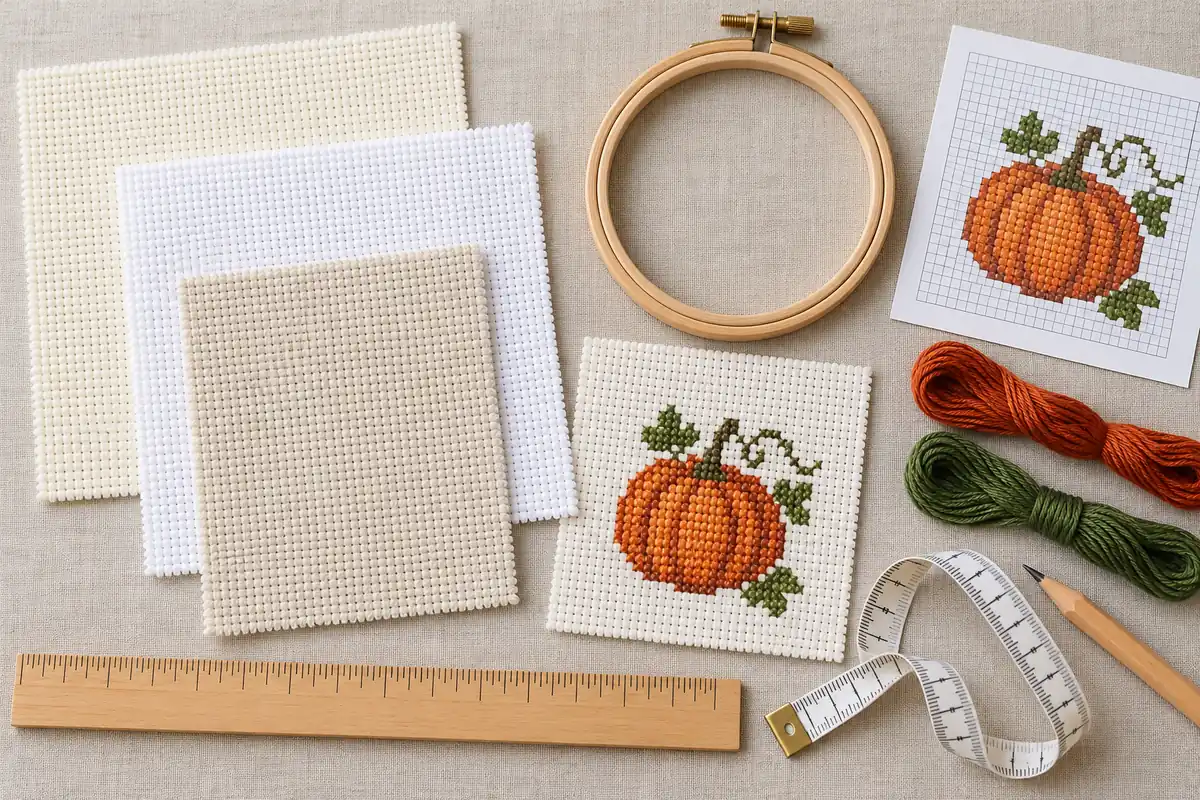
The Thanksgiving pumpkin is 32 stitches in each direction. On 14-count Aida, 32 ÷ 14 is approximately 2.29 inches. If a padded ornament needs a 0.75-inch seam and handling allowance around the stitched boundary, a theoretical minimum cut is 3.79 inches square. Round up generously to at least 4.5 or 5 inches so the fabric can be hooped and aligned before sewing. Seam allowances and embroidery margins are related but not identical: the seam line must sit outside the visible motif, and you need enough material beyond that line to construct and turn the ornament. Draw the intended seam on a fabric offcut or paper pattern first. On 18-count Aida the stitched pumpkin is 1.78 inches, which creates a smaller ornament without editing the chart. Recalculate every time you change count. Do not assume the same backing template will fit both versions. Include the hanging loop position in the paper mock-up before cutting the stitched cloth.
Plan narrow bookmarks separately from square motifs
The Thanksgiving Bookmark is 18 × 54 stitches, so its proportions matter more than a single hoop diameter. On 14-count Aida it stitches to about 1.29 × 3.86 inches. On 16-count it is 1.13 × 3.38 inches, and on 18-count exactly 1 × 3 inches. Decide whether the finished bookmark will retain visible Aida borders, be folded at the sides or be trimmed and backed with felt or cotton. Each construction needs a different cut. For a simple backed 14-count bookmark, adding one inch per side produces a 3.29 × 5.86-inch working piece, but you may choose narrower side allowances after testing the seam. Keep extra length for top and bottom finishing. A standard three-inch framing margin would be unnecessarily bulky for this small sewn object. The general formula still works; the selected margin changes with the finish. Make a full-size paper model and slide it into a book before stitching.
Arrange several motifs on one fabric cut safely
Stitching multiple small fall motifs on one cloth can reduce waste, but each design still needs its own finishing boundary. Calculate the stitched width and height of every chart at the shared fabric count. Add the necessary margin around each motif, then add a cutting gap between those margin boxes. Draw a scale layout on paper before marking the fabric. Keep the weave direction consistent if motifs will become a set. Place large or fixed-size projects first, then fit small cards or ornaments into remaining areas. Do not nest charts so closely that one finished edge removes the margin needed by another. Mark each center and label it with removable thread. If different motifs will use different hoops, confirm that the working hoop can attach without crushing neighboring stitches. One generous rectangular cut can be practical, but separate squares are easier to rotate, wash and finish. The least expensive layout is not the one that risks two completed projects when the cloth is divided.
Allow for fabric shrinkage and squareness
Some fabrics change dimensions after washing, and a nominal square count can be slightly different across width and height. If the final size is critical, wash and dry the uncut fabric according to the intended care method, then measure the actual blocks per inch in both directions. Use those measured counts for a precise calculation or add extra margin. Check that the cut follows the fabric weave rather than a skewed retail edge. Pulling one thread and cutting along the gap can establish a straight line on suitable evenweave; Aida can be cut along a visible block line. Test any marking tool on the same washed offcut. A card window can disguise a small dimensional change, while a rigid frame or ornament template may not. Avoid prewashing when the fabric or dye instructions advise against it. The goal is not to force every fabric through the same process; it is to understand how the chosen material behaves before the final cut is committed.
Record calculations with the project
A reliable project note includes chart name and URL, stitch width and height, fabric type, stated count, over-one or over-two choice, calculated stitched size, margin per side, final cut size, strand count and palette substitutions. Add the date and actual measured fabric count if it differs from the label. Keep this note with the PDF and thread. When the project is finished, record whether the margin was comfortable and how much cloth was trimmed. That evidence improves the next calculation more than a generic rule. Photograph the laid-out materials with a ruler before stitching. If you make a coordinated set, give each motif its own row in a small table. Never rely on the hoop label as the cloth requirement, because working hoops, display openings and exterior ring sizes describe different measurements. Clear records also help if you pause the project or need to explain the finish to a framer.
Fix a cut that feels too small before stitching
If the unstitched cloth is smaller than planned, stop and reassess. Recalculate the stitched area and subtract it from the fabric width and height to see the actual margin on each side when centered. A reduced but even margin may still support a card or small sewn finish, while it may be unsuitable for professional framing or lacing. Change the finishing method before starting rather than hoping the cloth will grow. You can choose a higher fabric count to make the motif smaller only if that material is already suitable and comfortable; changing count on the existing cloth is impossible. Do not remove outer chart rows arbitrarily, because that can damage the silhouette. A purpose-built smaller pattern such as the mini turkey is safer. Fabric extensions sewn to the edge can provide working-hoop grip, but they do not restore mounting cloth beside the design. When the remaining margin cannot support the intended finish, save the fabric for another chart and cut a larger piece.
Use the full Thanksgiving library as a size-planning set
The Thanksgiving cross stitch collection includes 12 original charts with varied proportions: square turkeys and pumpkin, compact acorn and pie, a horizontal cornucopia, a circular wreath, a narrow text sampler and a tall bookmark. That range lets you choose a design that fits the object instead of forcing one chart into every finish. Open each pattern page to compare exact stitch count, color count, full-cross total and 14-count size. Downloading a public pattern PDF is free and needs no account. The separate photo pattern maker offers a free custom preview and charges $2.99 only for the saved custom PDF. If you convert an image, select the target stitch width before calculating cloth; photo patterns can be much larger than these purpose-built motifs. Whatever the source, use the same sequence: confirm grid dimensions, select effective count, calculate stitched size, add finish-specific margins, round the cut upward and record the result before scissors touch fabric.
Cross stitch fabric size calculator · Download the original thanksgiving turkey cross stitch pattern
Examples, diagrams and planning estimates are original Cross Stitch Creator content.