
Thanksgiving cross stitch cards turn a small counted motif into a keepsake without requiring a full frame. Learn how to choose a chart, calculate the fabric, prepare a clean window and secure the stitched piece so the card opens and mails neatly.
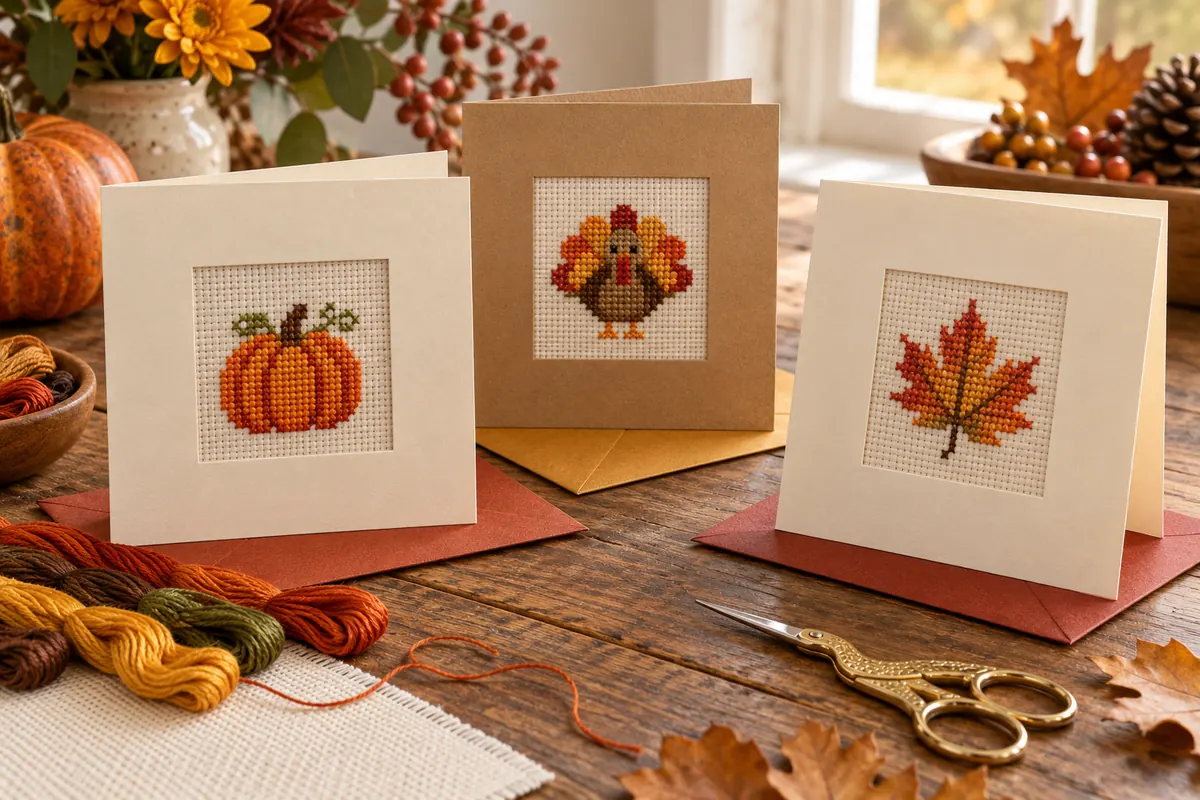
Choose a motif that fits a card opening
A stitched card begins with the window, not the size of the folded card. Measure the visible opening and choose a motif whose stitched dimensions leave a quiet border inside it. The Thanksgiving Pumpkin pattern is 32 × 32 stitches; on 14-count Aida the stitched area is about 2.29 inches square, on 16-count it is 2 inches and on 18-count about 1.78 inches. The Mini Thanksgiving Turkey is smaller at 24 × 24 stitches and works comfortably in many compact windows. Acorns, leaves and pie slices can suit landscape or portrait cards. Look at the exact chart dimensions on every pattern page rather than judging the preview thumbnail. A window should hide the raw fabric edge while showing the complete motif and some unstitched cloth. If the stitched edge touches the paper opening, small alignment differences become obvious and the card can feel crowded.
Calculer la toile avant de la couper
Enter the pattern width, height and intended Aida count in the calculateur de taille de tissu. For card mounting, one to one-and-a-half inches of fabric around each side usually gives enough cloth to position and secure behind the opening, but the card design and mounting method control the final allowance. A 32-stitch square on 16-count Aida finishes at 2 × 2 inches. Adding a 1.25-inch margin on each side requires a fabric cut of 4.5 × 4.5 inches. Write both the stitched size and cut size on the project bag. Cut with the weave straight so the motif can align with the paper edges. If you plan several cards from one strip, include cutting gaps between pieces and mark each center before separating them. Never reduce a chart by printing it smaller: that makes the symbols smaller but does not change the number of fabric squares. Change fabric count or select a smaller chart to create a smaller stitched result.
Pick card stock and an acid-free mounting method
Use a folded blank strong enough to support the fabric without bowing. A separate window panel attached to the card front is easier to cut neatly than a hole through an already folded card. Choose acid-free, lignin-free paper and mounting materials when the card is intended as a keepsake. Avoid household tape touching the stitched area; adhesive can migrate, discolor fabric or release over time. Photo-safe double-sided tape placed only on the generous fabric margin can work for a simple project, while hand lacing around an acid-free backing board creates a more reversible mount. A second paper panel inside the front cover hides the fabric back and gives the card a clean interior. Test the full stack before assembly. Thick foam, bulky knots and multiple card layers can make the envelope too tight or push the parcel into a higher postal category. The best construction is firm, flat and easy to open.
Coordinate floss, fabric and paper colors
Treat the card as one palette. White Aida and cream paper can look mismatched when placed together, while natural Aida may harmonize with kraft or warm ivory card stock. Lay the fabric, floss and paper beside one another in daylight before stitching. The chart’s generic numbered colors are planning swatches rather than verified manufacturer codes, so select real thread by value and contrast. A pumpkin needs enough difference between orange ribs, stem and fabric. A turkey needs the body and feathers to remain separate at the small viewing scale of a card. Photograph the proposed materials in grayscale; if two important sections merge, replace one color. Repeat a floss color in a narrow paper border, envelope liner or handwritten message for cohesion without adding more stitching. Avoid glitter that sheds onto the cloth and textured paper that abrades the thread. Keep a note of every color substitution with the downloaded chart so a second card can match.
Mark the center and stitch within a safe boundary
Lightly mark the fabric center with a tested removable method and match it to the chart center. Before the first stitch, outline the planned visible window on the fabric margin with removable thread or a temporary marker. The motif should remain comfortably inside that boundary. Mount the fabric square in a hoop only if enough margin remains for the hoop to grip without covering the stitch area. Keep the weave straight and use moderate tension. Start near the center for a symmetrical pumpkin or turkey, then work outward in verified blocks. Check the boundary after the first major color area. If the motif is drifting toward one side because the starting point was off by a square, a larger fabric margin may still allow you to reposition it during mounting. Do not trim at this stage. Mark the printed chart as you work, rely on symbols when colors look similar, and keep the top legs of all crosses facing one direction.
Keep the back flat enough for paper mounting
A card shows bumps more readily than a padded ornament. Use secure tails rather than knots, and avoid carrying thread across long blank areas. Start with a loop where appropriate or run a short tail under nearby stitches. End each color beneath several existing stitches and trim without cutting the cloth. If a thread path would create a dark diagonal behind pale unstitched fabric, stop and restart. The back does not need to look identical to the front, but it should have no loose loops that can catch on tape or board. Use shorter thread lengths to reduce tangles and bulky wear. When adding a tiny eye or accent far from its matching color, a separate short strand is cleaner than a long carry. After stitching, lay the work face down on a padded white towel and inspect the back under good light. Secure anything loose before washing or pressing, because mounting will make later access difficult.
Wash and press only when the materials allow it
Check that the fabric and every floss color are washable and colorfast. If the piece is clean and the materials are uncertain, careful surface cleaning may be safer than immersion. When washing is appropriate, use cool water and a mild product intended for the materials, avoid twisting and rinse thoroughly. Roll the work in a clean white towel to remove excess water, reshape it square and dry flat. Press from the back on a padded surface with the temperature suited to the fabric and thread. A pressing cloth protects the work. Direct pressure on the front can flatten crosses and make the motif look dull. Let the fabric cool and dry fully before it touches paper or adhesive. Recheck the square weave and measurements after pressing. This is also the moment to add a missed stitch. Do not use starch, fragrance spray or household spot treatment on a keepsake without testing, because residues and discoloration may appear later.
Cut a clean window template
Make a paper template before cutting the final card stock. Center the opening over the pressed motif and test different shapes: a square suits a pumpkin, a softly rounded rectangle can frame a turkey, and a narrow vertical window works for a leaf. The opening should be smaller than the fabric cut and larger than the stitched motif. Mark the final panel from the back with a ruler and sharp pencil. Cut on a protected surface with a craft knife and metal ruler, turning the card rather than forcing the blade around corners. For rounded corners, use a matching punch or make several light knife passes. Do not cut with the stitched fabric underneath. Place the finished window over the work and check equal space on all sides from the front. If the motif is slightly off-center, shift the opening position on the panel before trimming paper. A double mat can add color but also increases thickness, so dry-fit every layer inside the envelope.
Mount the fabric without stretching the motif
Place the pressed fabric face down on a clean surface, then position the window panel face down over it. Turn both together to inspect the front. Adjust until the weave is square with the paper and the visual border is even. Mark only the fabric margin or use small removable clips to preserve alignment. If using photo-safe double-sided tape, apply narrow strips to the back of the paper panel outside the window and press the fabric margin evenly without pulling. If lacing around thin acid-free board, align the motif on the board, fold opposite margins and draw them together with spaced stitches, then mount the board behind the window. Never glue directly across the stitched field. After securing the fabric, attach a clean cover panel inside the card front to hide the back. Open and close the card several times to confirm the layers do not buckle or rub the stitches.
Add a message and a restrained paper finish
The embroidery is the focal point, so keep extra decoration simple. A short printed or handwritten greeting can sit below the window: “Grateful for you,” “Happy Thanksgiving,” or a personal message. Write or stamp before final assembly whenever pressure or ink could reach the fabric. Test ink on a paper offcut and let it dry fully. A thin border matching one floss color can visually connect the chart and card. Avoid placing adhesive gems or metal pieces where they might press against the thread in the envelope. Inside, add a smooth paper liner over any construction seams and leave enough blank space for a message. Sign and date the card if it is meant as a keepsake. If the stitched motif can be removed later, include a small note explaining that the recipient may frame it. Do not claim the chart is a vintage or licensed motif; identify it simply as an original Cross Stitch Creator pattern.
Prepare the card for mailing or hand delivery
Measure the assembled thickness and weigh the finished card with its envelope. Postal rules vary by country and may treat rigid, square or unusually thick pieces differently, so check the current service requirements before adding postage. Place a smooth protective sheet over the stitched front inside the envelope to reduce abrasion. A piece of clean glassine or archival tissue can help when appropriate for the materials. Do not put loose glitter, dried leaves or plant material in the envelope. If the card must travel through automated sorting, a slightly larger outer mailing envelope with a firm insert offers better protection. Marking an envelope “hand cancel” does not guarantee special handling. For a valuable or time-intensive piece, use tracked or rigid-mailer options available in your area. Hand delivery remains the simplest choice for a dimensional hoop-style card. Photograph the finished card before mailing and save the pattern and color notes for your records.
Make a coordinated set efficiently
Choose two or three charts with similar dimensions from the Thanksgiving pattern collection, then standardize the fabric count, margin, card size and paper palette. Cut all fabric pieces from a squared strip, mark centers and label each with removable thread. Print the charts and place each palette on separate floss drops. Stitching the same shared color across several cards can be efficient, but keep each project’s count and thread tails independent. Make one complete prototype before cutting every paper window. The first card reveals whether the opening, adhesive, inner cover and envelope fit together. Use that approved card to create a repeatable paper template. Small variations in the stitched motifs keep the set personal. A turkey, pumpkin, acorn and grateful sampler can share rust, gold, brown and green while retaining their own silhouettes. Keep a checklist so no card is assembled before its final stitch and back inspection.
Avoid common stitched-card failures
Cards usually fail because the opening is sized from a screen preview, the fabric margin is trimmed too early, the mount uses unsuitable adhesive or the finished stack will not fit the envelope. Solve those problems in order: calculate the stitched size, build a paper prototype, retain generous fabric and dry-fit every layer. If the window is slightly too large, add a second inner mat instead of stretching the cloth. If it is too small, recut the paper panel rather than hiding important stitches. A crooked weave can often be corrected by releasing the fabric and remounting it with opposite edges aligned. Adhesive that touches the stitched area should be removed only according to the material maker’s advice; aggressive solvents may damage thread. Keep food, drinks and hand cream away from the assembly surface. Finally, make sure the greeting opens in the correct direction before attaching the window panel. A careful five-minute dry run prevents losing a finished motif to a folded-card mistake.
Download free charts and plan a personal photo card separately
Every public pattern in the bibliothèque de modèles gratuite includes a real preview and free printable PDF without an account or checkout. The Thanksgiving hub groups turkey, pumpkin, leaf, pie, wreath, sunflower, mug and bookmark designs with their exact stitch counts. If you want to convert a family photo, pet or original illustration, the créateur de motifs photo provides a free preview so you can inspect crop, grid size and palette before paying. A saved custom PDF costs $2.99 USD as a one-time purchase. Keep that custom workflow separate from the free public charts: selecting a library pattern never requires payment. Only upload an image you have the right to use, and simplify it enough for a card-sized grid. Faces and fine text rarely survive very small stitch dimensions. For a reliable first card, stitch one of the purpose-built original motifs and treat any photo conversion as a later, larger project.
Calculateur de taille de tissu au point de croix · Download the original thanksgiving pumpkin pattern
Les exemples, diagrammes et estimations de planification sont le contenu original de Cross Stitch Creator.