
A small turkey cross stitch is quick enough for a card or ornament, but it still rewards careful fabric planning, consistent crosses and a readable color order. This guide walks through the complete Mini Thanksgiving Turkey chart from setup to finishing.
Choose the small turkey chart before buying supplies
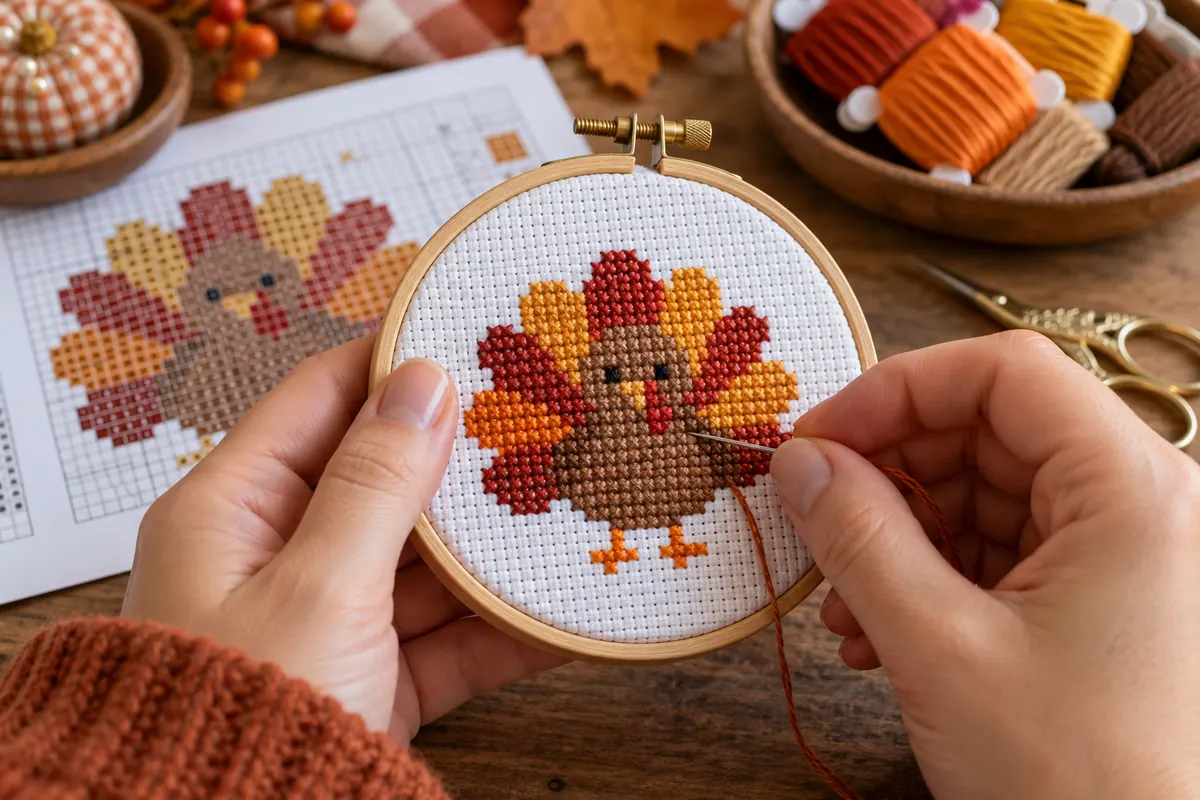
Start with the original Mini Thanksgiving Turkey pattern, a 24 × 24 stitch chart made only with full crosses. Its compact square shape works well for a card, ornament, coaster insert or three-inch hoop. Open the pattern page before cutting fabric so you can inspect the actual grid, color count and stitched dimensions. Download the free PDF in color or black-and-white symbols and save it with the project notes. The decorative photograph shows a finished-project idea; the PDF chart is the counted instruction. If you want a larger design with more feather detail, compare the 35 × 35 Thanksgiving Turkey. Choosing between them at the start prevents a common problem: buying a frame or card opening that is too small for the selected chart. Both are original Cross Stitch Creator patterns, use generic color numbers and can be stitched with any physical floss palette that preserves the light and dark relationships.
Calculate the stitched size on 14, 16 and 18 count Aida
Divide each stitch dimension by the fabric count. A 24 × 24 chart measures about 1.71 × 1.71 inches on 14-count Aida, 1.50 × 1.50 inches on 16-count and 1.33 × 1.33 inches on 18-count. Those numbers describe the stitched motif, not the cloth you need to cut. Add room for the intended finish on every side. A card insert might need one inch per side, while a hoop finish is safer with two or three inches. Enter 24 stitches for width and height in the calculateur de taille de tissu, select the fabric count and set the margin explicitly. Keep the result in both inches and centimeters with your project. Higher fabric count makes the motif smaller and the holes finer; it does not add detail because the chart still contains 24 squares in each direction. If 18-count feels difficult to see, use 14-count rather than forcing a tiny finish that makes the stitching uncomfortable.
Build a clear turkey palette from real floss
The chart uses generic numbered colors so you can match thread you already own. Place the intended skeins together in daylight and arrange them from lightest to darkest. The turkey needs a dark brown body and outline, a lighter face, warm red, orange and gold feathers, plus small accents. Photograph the group in grayscale on your phone. Adjacent colors that become the same gray may merge in the finished motif, especially in the small feather fan. Replace one with a lighter or darker option until every important section remains distinct. Screen swatches and home printers are not color-calibrated, so do not choose a manufacturer number from the displayed hex color alone. Stitch a small sample on the actual fabric because cream Aida softens pale gold more than bright white Aida does. Record each substitution beside the generic G-number in the PDF legend. That simple record prevents confusion if the project rests for a week or if you need another length from the same color.
Prepare the fabric and find a reliable center
Cut the calculated fabric with straight edges, then protect the raw perimeter with a loose zigzag, overcast stitch, removable tape made for needlework or a temporary folded edge. Avoid permanent adhesive near the final mounting area. Find the fabric center by folding lightly in half horizontally and vertically, or measure and mark it with a water-soluble or removable fabric pen that you have tested on an offcut. Match this point to the chart center. The mini turkey is almost symmetrical, so a center start keeps the feather fan balanced inside a small hoop or card opening. If you prefer a corner start, count the finishing margin from two fabric edges and verify the first stitch twice. Do not treat the printed page edge as the stitched edge because the chart includes blank squares around the motif. Mount the cloth in a hoop with the weave square and comfortably taut. It should feel like a steady surface, not a drum tightened enough to distort the Aida holes.
Start with the body to anchor the design
Thread the needle with the working strand count listed in the pattern notes; two strands on 14-count Aida is a useful starting point. A loop start can create a tidy back when the thread is folded to provide the required two working strands. Otherwise, leave a tail and secure it under nearby stitches. Begin with the central brown body because it establishes the vertical axis and provides several places to secure later colors. Count a short row, compare it with the chart coordinates and complete the return legs before traveling farther. Every top diagonal should face the same direction. Let the thread lie on the surface rather than pulling until the fabric holes close. Work in lengths short enough to resist fraying and twisting. Drop the needle occasionally so the thread can untwist. After the main body is established, check its width and height against the grid. Correcting one misplaced stitch now is much easier than moving an entire feather after the surrounding colors are filled.
Stitch the feather fan one color block at a time
The broad red, orange and gold sections are visually simple, but their repeated curves can make it easy to shift a row. Pick one color and finish a compact block before moving to the next. Mark completed squares on a printed working copy with a transparent highlighter that leaves the symbols visible. Count from two already-verified points whenever a feather reaches the body. Avoid long carries across blank fabric because dark thread can show through the Aida or catch during finishing. End the strand and restart when the next group is several empty squares away. If you use the Danish method, work a row of lower diagonals and return with the upper diagonals only while the path remains easy to follow. Complete individual crosses in irregular edge areas where reversing rows would encourage a counting error. Step back after each feather. The fan should feel balanced even before the face and feet are added; an uneven gap is a useful signal to audit the last few rows.
Add the face, wattle and feet without losing tiny details
Small motifs depend on a few high-contrast stitches. The eyes, beak, wattle and feet may contain only a handful of squares, so place them from verified body stitches rather than counting from an empty chart edge. Use the chart symbols instead of guessing from the colored preview. Dark eyes can disappear if the face thread is too similar to the body, while a pale beak can fade into cream fabric. Test these accents before committing. Secure short threads under existing stitches without making a knot behind the face; a bump becomes obvious in a card or tightly mounted hoop. The legs and feet sit near the lower boundary, so check the available finishing margin before stitching them. If one foot appears one square lower than expected, compare coordinates before changing it: the original drawing can include intentional asymmetry. Once the accents are complete, look at the turkey from normal viewing distance and in a phone photograph. Missed outline stitches often become clearer in the reduced image.
Estimate thread without buying a full kit
The pattern PDF counts stitches by generic color and gives an estimated six-strand floss length based on full crosses, the selected fabric count, two working strands and an allowance. Treat it as planning guidance because starting tails, carrying, tension and mistakes change real consumption. A mini 24 × 24 design usually uses only part of a skein in every color, which makes it ideal for organized leftovers. Run each stitch count through the estimateur de fil à broder if you change fabric count or strand count. Add extra for the main body and feather colors, especially when using short remnants. Put each color on a labeled bobbin or floss drop that matches the G-number in the legend. Keep the remaining thread with the work until finishing is complete. A small motif can still show a dye-lot change in one solid feather. If you need to join a new length, do it near an edge or natural color transition instead of across the center of a flat area.
Read the printable PDF at actual size
Choose A4 or US Letter from the pattern page and decide whether color plus symbols or black-and-white symbols will be clearer on your printer. Open the downloaded PDF and select Actual size or 100 percent in the print dialog. Fit-to-page can make symbols smaller and coordinates harder to follow. The first pages summarize dimensions, fabric planning and the generic palette; the chart page contains the authoritative grid. Keep the legend visible beside the chart and orient both the same way as the fabric. A magnetic board, tablet annotation tool or clipboard can help hold your place. Mark completed rows without covering symbols you may need to recount. If the print is difficult to see, enlarge the view on a device rather than changing the chart scale and assuming the motif dimensions changed. One grid square always represents one full cross. The guide to printing and reading a cross stitch chart explains coordinates and symbol-first stitching in more detail.
Check the work before removing it from the hoop
Compare the finished piece with the chart by sections: left feathers, right feathers, body, face and feet. Count the outer width and height at their widest points. Check every color boundary for isolated empty holes, then inspect the back for unsecured tails. A single missed cross is easier to add while the fabric remains mounted. If a misplaced interior stitch does not weaken the outline or create an obvious gap, deciding to leave it can be reasonable; handmade work need not be mechanically identical. Remove the hoop when the project will rest for a long time so the ring does not become permanent. Follow the fabric and floss manufacturer’s care advice before washing. Test colorfastness first, use cool water if washing is allowed and avoid aggressive rubbing. Roll the piece in a clean towel, reshape it and press from the back on a padded surface. Never iron directly across raised crosses, because flattened thread changes the light and texture that make the motif readable.
Finish the turkey as a hoop ornament or gift tag
For a hoop ornament, re-center the dry, pressed piece in a small display hoop and tighten it gradually while pulling opposite sides evenly. Confirm equal breathing room above the feather fan and below the feet. Leave enough cloth at the back to lace or gather; do not cut flush with the hoop rim. Cover the back with felt or acid-free board and attach a secure hanging loop. For a gift tag, mount the cloth behind a window cut in heavyweight card, keeping adhesive on the fabric margin and away from the stitched area. Add a second card layer to hide the back. Punch the ribbon hole through paper layers that can carry the load rather than through the Aida. Write the message before final assembly so pen pressure cannot crush the stitches. If the tag will travel on a package, place it inside a protective envelope until gifting. The same mini turkey also fits the card method described in our Thanksgiving cross stitch cards guide.
Fix common small-turkey mistakes
The most frequent errors are cutting fabric before calculating the finish, shifting one feather row, mixing two similar warm colors and pulling small facial stitches too tightly. Prevent the first with a written cut size and the others with a symbol-marked working chart. If a row is shifted, remove only the stitches needed to return to the last verified coordinate. Slide the needle under each leg and lift gently instead of tugging the whole strand through the fabric. Use a lint roller on the table, not on the stitched surface, to collect removed fibers. When a color was used in the wrong feather but the values remain distinct, compare the result from normal viewing distance before unpicking a large area. For tension problems, practice several crosses on the offcut and adjust how you hold the working thread. If the design is off-center but still has enough finishing margin, choose a slightly smaller card window or reposition the hoop. Accurate finishing can rescue a layout that is not perfectly centered.
Plan the next Thanksgiving project
After one mini turkey, use the same fabric and color notes to build a coordinated set. The Thanksgiving pattern collection includes a larger turkey, pumpkin, acorn, leaf, pie, cornucopia, sampler, wreath, sunflower, mug and bookmark. Keep the top direction of every cross consistent across the set and repeat two or three palette colors to make separate motifs feel related. Cards can use the mini turkey and pumpkin, while the larger wreath or cornucopia suits a hoop. Before cutting a shared strip of fabric, calculate every chart independently and leave separation for finishing. Do not crowd two motifs to save a small amount of cloth. Save each PDF with its slug and note the actual floss substitutions used. This turns leftover colors into a repeatable project palette rather than an unlabelled bundle. Public library charts remain free to preview and download; the separate photo pattern maker offers a free custom preview and a $2.99 custom PDF only when you decide to buy that saved conversion.
Calculateur de taille de tissu au point de croix · Download the original mini thanksgiving turkey pattern
Les exemples, diagrammes et estimations de planification sont le contenu original de Cross Stitch Creator.